Configure Enforcement: Office 365 using MS Graph for On-Prem Sensor
The Microsoft Graph API is used by Fortra Cloud Email Protection to move and delete messages in your employee mailboxes.
TIP: Before you begin, Have your Microsoft Global Administrator available to perform a one time authorization for Fortra Cloud Email Protection.
-
Use the Default Junk Folder as the destination for messages being enforced.
-
Enforce batches of up to 10,000 items.
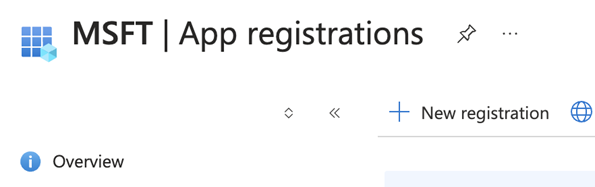
Manually Configure Azure AD App Registration
Follow these steps to Manually Configure Azure AD App Registration:
The Azure AD App Registration steps only need to be performed once. If you have already created your Azure AD App Registration and added the necessary API permissions, you may skip this step.
- Go to https://portal.azure.com and login.
-
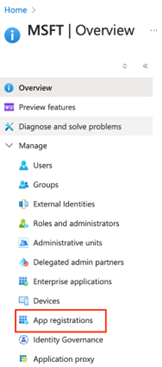
In the Azure Portal, select the Microsoft Entra ID service.

- Go to the Manage section in the left panel and click App registrations.
- If an app registration does not already exist, do the following:
- Click New Registration to create one.
- Enter the new app registration Name.
- Select Accounts in this organizational directory only (MSFT only - Single tenant) option under Supported Account Types.
- Click Register.

- Click the All Applications tab, then click on the existing Azure application used for CEP enforcement.
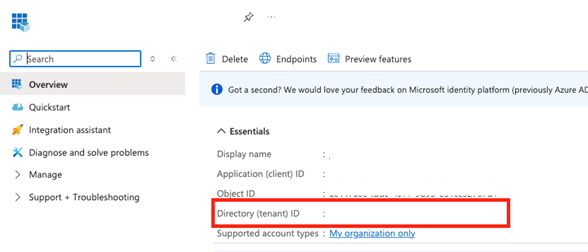
- Click the Overview section in the left panel and copy the Directory (tenant) ID listed under the Essentials panel. You require the ID for performing Step 4.
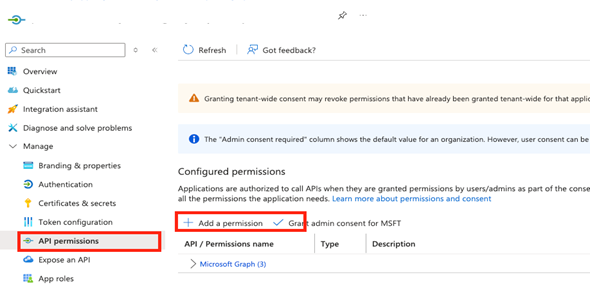
- In the left panel, click Manage then API permissions.
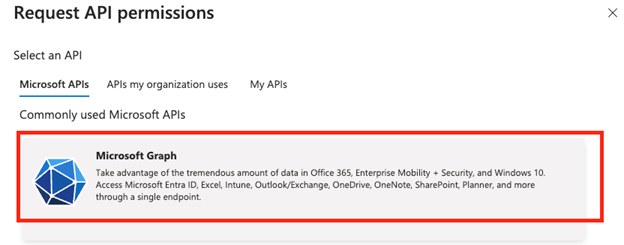
- In the main panel, click Add a permission.
- In the right panel titled Request API permissions select the Microsoft Graph box at the top.
- Click the Application Permissions box.
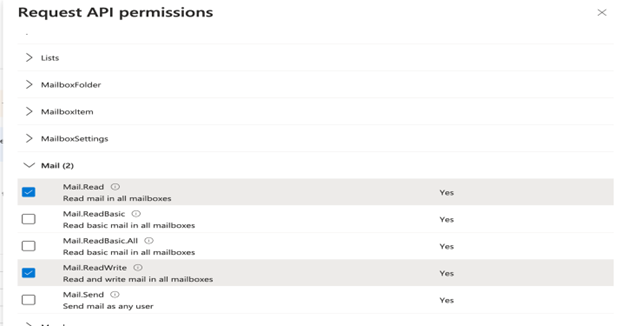
- Scroll down to the Mail section and expand it.
- Select the following permissions: Mail.Read, Mail.ReadWrite.
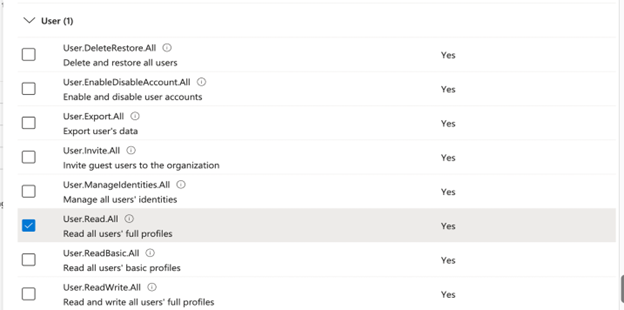
- Scroll down to the User section and expand it.
- Select the following permission: User.Read.All.
- Click Add permissions button to save the changes.
- In the main panel, click Grant admin consent for <ORGANIZATION_NAME>.
- Click Yes on the Confirmation popup window.

Update the Certificate in Azure AD and Obtain the Azure AD
Name the public/private key files provided to you as follows:
- agari_sensor.crt
- agari_sensor.pem
- Go to https://portal.azure.com and login.
- In the Azure Portal, select the Microsoft Entra ID service.
- Go to the Manage section in the left panel and click App registrations.
- Click on the name of the App registration you created.
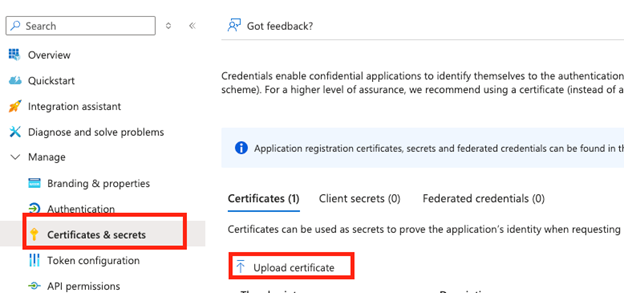
- In the left panel, click Certificates & secrets.
- In the main panel click Upload certificate and then the folder icon to browse for the public certificate file, agari_sensor.crt.
- Click Add.
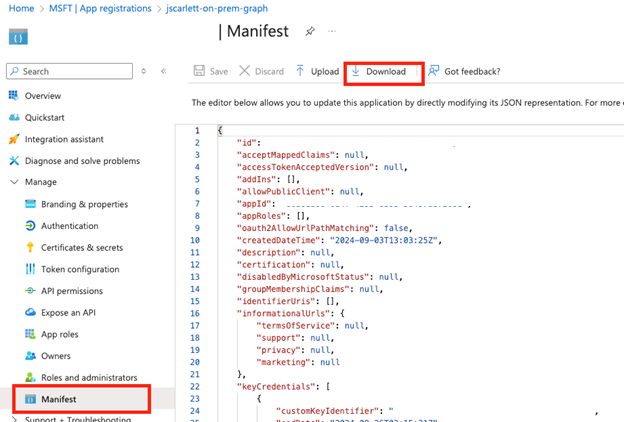
- In the left panel, click Manifest.
- In the main panel click Download.
- Rename the manifest files as : azure_manifest_creds.json
Update Sensor Credentials
Use scp to copy three files onto the Agari sensor:
- agari_sensor.crt
- agari_sensor.pem
- azure_manifest_creds.json
On the sensor, run (replacing <TENANT_ID> with the actual Azure tentant ID):
sudo /opt/agari/bin/configure-graph-enforcement -t <TENANT_ID> -m azure_manifest_creds.json -c agari_sensor.crt -k agari_sensor.pem
This will copy the Azure tentant ID, the client ID from the manifest file, and the contents of the public/private key files into a secure, root read-only config file that can be used by the Sensor to authenticate to the Microsoft Graph API. The Sensor will then automatically enable enforcement.
Delete the copied files after running the below command:
sudo rm -f agari_sensor.crt agari_sensor.pem azure_manifest_creds.json
Advanced Usage
To provide the tenant ID, file locations, or test email address as script arguments refer to the help text:
Get $ sudo /opt/agari/bin/configure-graph-enforcement --help
usage: configure-graph-enforcement [-h] [-t TENANT_ID] [-m MANIFEST_FILE] [-c CERTIFICATE] [-k KEY]
optional arguments:
-h, --help show this help message and exit
-t TENANT_ID, --tenant_id TENANT_ID
Azure Tenant ID
-m MANIFEST_FILE, --manifest_file MANIFEST_FILE
The path to the manifest file on disk
-c CERTIFICATE, --certificate CERTIFICATE
The path to the public certificate
-k KEY, --key KEY The path to the private key
For example:
PS C:\Windows\system32> Get-mailbox plorence | Select-Object -ExpandProperty AuditOwner
Creating a new session for implicit remoting of "Get-Mailbox" command...
WARNING: Commands available in the newly opened remote session are different than when the im
created. Consider recreating the module using Export-PSSession cmdlet.
Update
Move (<--)
MoveToDeletedItems
SoftDelete
HardDelete
MailboxLogin
Update
Repeat the Update Sensor Credentials step for all Agari sensors you want to configure with Enforcement.
Enable Enforcement
Follow these steps to enable enforcement in CEP:
- Go to Manage > Organizations.
- Go to Enforcement Settings.
-
Switch the Enforcement toggle to Enabled.
NOTE:
This option may be grayed-out (disabled) for a few minutes after you update Sensor credentials. If so, just wait a few minutes and reload the page.
Verification & Validation
On Sensor via CLI
Run the following command to verify that the Microsoft graph credentials have been configured correctly:
sudo /opt/agari/bin/agari-ep test-api-creds <TARGET-EMAIL-ADDRESS>
Using the CEP portal
Follow these steps to verify and validate enforcement in CEP:
- Stop the sensor processes on any sensor not yet configured for graph enforcement:
- Send one or more messages to a mailbox in the PAT environment from an external email account (e.g. a gmail.com account).
- Login to the Cloud Email Protection portal.
- Go to Analyze > Search.
- Select messages you want to enforce and click Enforce Now.
- Login in to the O365 mailbox and verify the messages have been enforced.
sudo /opt/agari/bin/agari-ep stop