Investigations
An Investigation in Phishing Response is a collection of one or more phish reports by your employees matched with messages in a campaign. Once you have identified the investigation as an actual threat incident, you then prioritize it and examine it more thoroughly. Investigations are listed in the Analyst tab.
Investigation Status and Tags
You can use menus at the top left of the Analyst tab to filter investigations by their status and by which tags have been assigned to them.
Select one of the options in the drop-down investigation status menu at the top-left to view:
- open investigations
- closed investigations
- all investigations
Select from the Tag menu to filter investigations by tag.

Click the Download CSV button at the top right of the Analyst tab to download a file in comma-separated value format (CSV) containing a list of all of the investigations that you have filtered, including tag information.

The CSV file contains information limited to the first 5,000 investigations, and contains any of these values that are available:
- Investigation ID
- Reported By
- Date Reported
- From
- Subject
- Classification
- Priority
- Assignee
- State
- Tags
- Total URIs
- Malicious URIs
- Total Attachments
- Malicious Attachments
- Total Domains
- Malicious Domains
- Total IPs
- Malicious IPs
Click an investigation to select it and view more details.


Add or edit tags
Once you've clicked an investigation to select it, the + Add Tag link appears. Click this link to open a menu of existing tags to add.
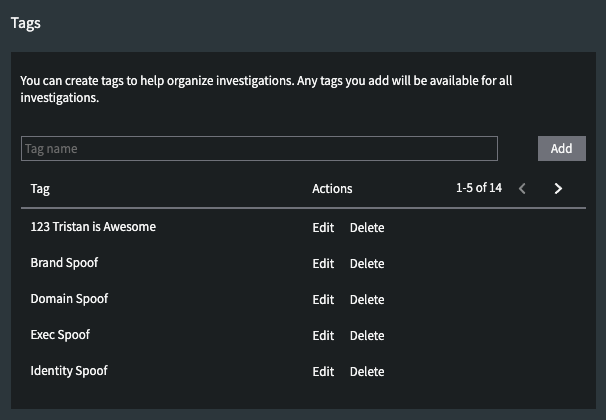
To manage and edit tags, select Settings at the top of the window, and then Configuration, then scroll down to find Tags.

Enter a tag name and click Add to create and add a tag. Click Edit next to an existing tag to change the name, or click Delete to delete an existing tag. Deleting a tag will remove that tag from all associated investigations
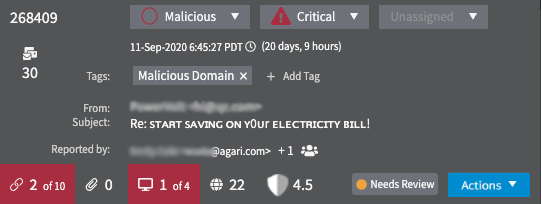
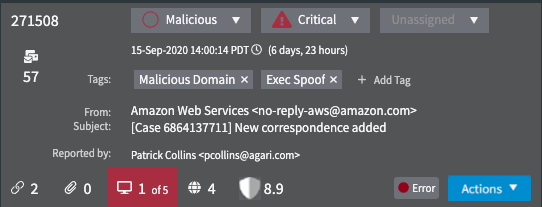
Along the top of a selected investigation are the initial classification and prioritization values initially determined automatically by Phishing Response. (See Investigation Classifications for details.) Along the bottom are the numbers of links, attachments, domains, and IP addresses found in the investigation and the Agari Risk Score. If any of these are determined to contain threats, the icon will display both the number of threats and the total, and its background will be red.
The bottom right shows investigation status, which can include:
Analyzing - This means that Phishing Response is continuing to analyze the messages in the investigation, including any URLs and attachments.
Error - This means that an error occurred during analysis of one ore more messages in the investigation. You can review the details of an investigation and re-scan URLs and attachments (see Scan a URL Manually and Scan an Attachment Manually) if analysis of any of these did not complete or may have been the cause of the error status.
Needs Review - This means that the initial analysis of the investigation is complete and any issues found are ready for review.
TIP: The time stamp records the date and time Phishing Response received its first phish report in the investigation. However, Phishing Response's analysis may discover messages older than the date of this first phish report that are also determined to be part of the campaign.
The investigation classification, in this case Malicious, is a result of Phishing Response's initial automated analysis. There are 9 URLs with 7 determined to be malicious, 8 attachments and all were determined to be malicious, 29 domains with 4 determined to be malicious, and 56 IP addresses with 3 determined to be malicious. The Risk Score is 0.3 (on a scale of 0 to 10, with lower scores being more malicious).
When an investigation has more than one reporter, it appears with a shadow behind it in the Investigations list.

When an investigation has been closed, a "Closed" indicator will appear in the upper-right of the investigation card.

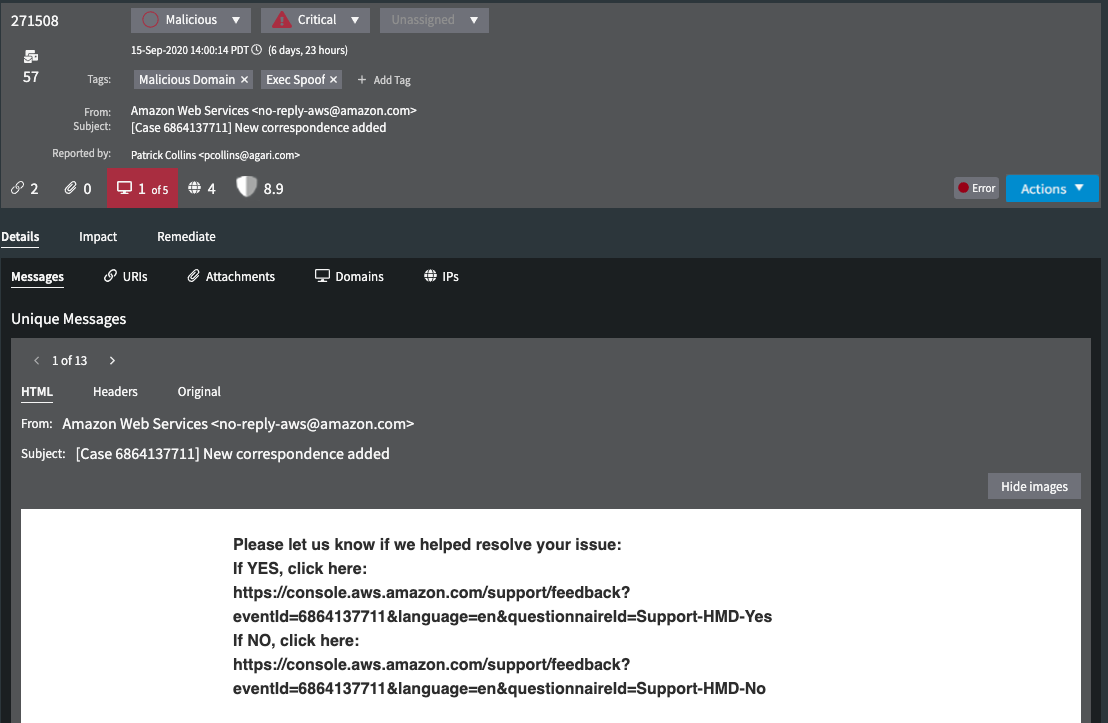
When you click anywhere in the investigation, you'll see an expanded selected view.

This selected view gives you additional information and actions. Under the From and Subject lines, a Reported by field shows who reported the message. Initially, you'll see the first person who reported this particular message. When an investigation has multiple reporters, you'll also see the number of reporters next to the name of the first reporter.
Click on the number to view all of the reporters. If there are more than will fit in the list area, then the list will become scrollable, with the original reporter always visible.
Reporters can include individuals in your organization who report phishing from their email clients, Phishing Defense policies, and Phishing Defense users who send a message to Phishing Response manually from a message details page in Phishing Defense. (For the latter, the reporter will read APD Direct Share.) Note that the number of reporters will rarely match the number of messages in an investigation.
The classification, priority, and assignment drop-down lists at the top are selectable, and an Actions menu appears. Click anywhere else in the investigation to see a details view; click on an icon along the bottom to go to the details view with the list of that threat type selected.
Once you have done the necessary research into the message, you can classify it, prioritize it, and assign it to an Phishing Response user for further research and remediation.
Click on the selected investigation to get a detailed view of the investigation.

The three tabs contain detailed information that helps you decide the correct remediation.
- Details: Allows you to view details of every message in the incident, potential threat information of every URL and attachment in the messages, and reputation of domains and IP addresses in the messages.
- Impact: Shows how widespread the incident is in your organization.
- Remediate: Where you take the enforcement action to decide is appropriate for the incident.
Large Investigations
Large investigations, defined as investigations with more than 5000 messages, are treated differently in Phishing Response, and that treatment is based on statistical analysis. The basic theory is that analysis of a reasonable subset of a large total is enough to make a determination. And one of the reasons that Phishing Response works this way is to make determinations quicker, so you can act quicker to stop threats in your organization.
With smaller investigations, investigations with 1 or a few messages, threat analysis can be made on everything in an investigation relatively quickly, typically within seconds.
However, as investigations get larger, analysis time can get larger too, larger to the point where a complete analysis would end well after enough analysis to make a threat determination would occur. So for large investigations, Phishing Response does 2 things:
- Analyzes a number of messages and message components that is statistically sufficient to make a threat diagnosis.
- Offers the capability to manually analyze additional messages.
When you view an open investigation that Phishing Response has determined to be large and where only some subset of messages have been analyzed, when you view the investigation details, you will see a "Large investigation" indicator in the upper right. This will also show how many messages in the investigation have been analyzed.