Runtime Components & Configuration
Overview
Automate . The Automate Desktop Runtime Edition contains only the Task Service which quietly runs in the background on the remote machine and performs tasks as directed by Automate Desktop developers. This allows tasks to be constructed, deployed and managed from one convenient location instead of being spread throughout the organization. Newly assembled tasks can be easily deployed to remote machines where Runtime components reside by way of Remote Administration.
Licensing Runtime Editions is more manageable and cost efficient than installing separate full installations of Automate Desktop on every machine. There is no limit to the amount of remote connections available.
Remote Administration is supported in Automate Premium edition
only. It is not supported in Automate Professional edition. With
Premium edition, the following remote connections are allowable:
-
Local Premium edition to Remote Premium edition.
-
Local Premium edition to Remote Runtime edition.
Configuring remote runtime installations
Automate Desktop Remote Administration feature requires the following:
-
A TCP/IP connection established from the local machine to each remote machine using a dedicated port.
-
Task Administrator running on the local machine.
-
Task Service running on each remote machine.
-
Remote access enabled on each defined remote Automate Desktop client and a password.
Remote Administration password and port configuration (if needed) is usually done from the Task Administrator. Since Runtime installations don't include a Task Administrator, password and port configuration must be performed differently.
Runtime password configuration
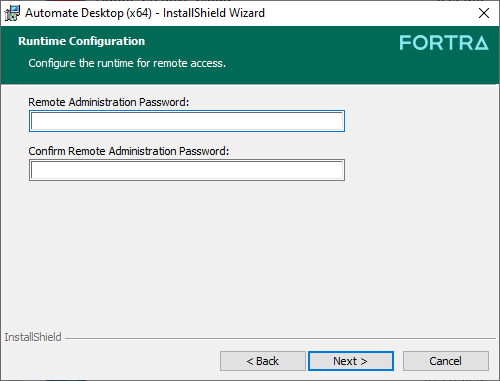
Password authentication is required in order to connect to a remote Automate Desktop client , therefore a password must initially be configured for each client that is remotely administered. Since a Runtime does not have an interface, password entry is accomplished during the installation process. A page is displayed during some stage during installation prompting for a password to be entered for remote access (as shown below). Enter the password in the appropriate field and click Next to complete the process. For complete installation instructions, see the Automate Desktop Installation Guide on the Fortra Support Portal at https://support.fortra.com.
Configuring the runtime port
Since various components of Automate Desktop use TCP/IP to communicate with each other, it must connect and bind itself to a particular TCP port. By default, Automate Desktop 2025 will accept connections on port 10010 or 10011. This can be modified if conflicts arise, such as when another application already binds to the specified port or in cases when a firewall, anti-virus or other system security related software interferes with Automate Desktop’s ability to send and receive data on the default port. Normally, port changes can be made from the Task Administrator interface. Because Automate Desktop Runtime installations contain no Task Administrator, port modifications must be performed from the system registry.
To modify runtime port using the registry:
-
Stop the Automate Desktop Service by navigating to Windows Services, right-clicking the Automate Desktop 2025 service and clicking Stop.
-
In Windows, enter regedit in the Search field and press Enter on your keyboard.
-
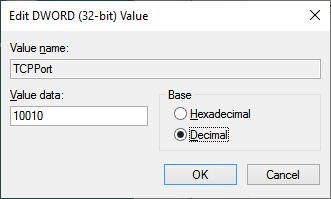
Find and open the following registry entry at HKEY_LOCAL_MACHINE\SOFTWARE\Automate Desktop\TaskService\TCPPort.
-
Toggle the Decimal option, enter the desired port in the Value data field.
-
Click OK.
-
Restart the Automate Desktop Service by navigating to Windows Services, right-clicking the Automate Desktop2025 service and clicking Start.
After the proper connection to a Runtime or compatible remote client is established, you can change the port, password, and other system related from the local Task Administrator by accessing the system options of the remote client. See Modifying Remote Preferences for more details.