Managing Security Profiles
A security profile defines the security settings for an account, such as password strength and session timeout. Users with administrative privileges can view information about security profiles and create new security profiles through the Security Profiles area.
Creating a Security Profile
To create a security profile:
-
Log in to beSECURE with administrative privileges.
-
Make sure the DevOps role is selected.
-
Click Admin > Accounts > Security Profiles.
-
Click the plus sign
 button at the bottom right and complete the form that appears. The form has the following fields:
Field Description Profile Name (required) A name for the security profile. Password Expiration (required) The number of days before passwords for accounts associated with this security profile expire. Password Length (required) The required password length. First Login Password Change (required) Default is 30. Password Failure Lockout Duration (required) The number of failed login attempts before an account is locked out. Default is 3. Comment A field for optional comments. -
Click Create.
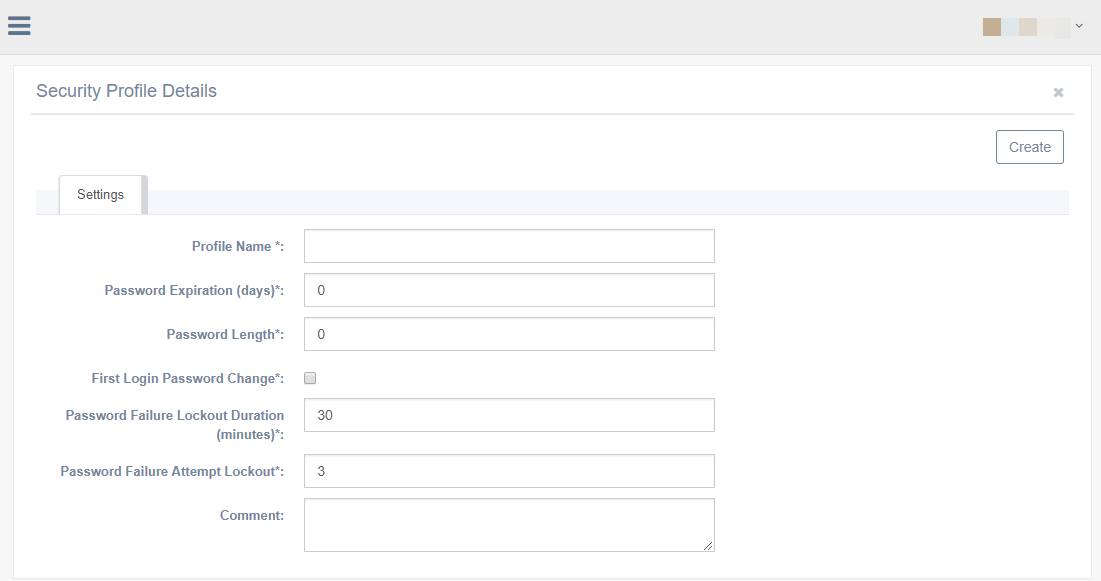
The Security Profile Details page.
Modifying a Security Profile
To modify a security profile:
-
Log in to beSECURE with administrative privileges.
-
Make sure the DevOps role is selected.
-
Click Admin > Accounts > Security Profiles.
-
Enter text in the search box at the top right to search by Profile Name. You may also use the navigation buttons at the bottom to page through the list of security profiles.
- Select a security profile from the list.
-
Optionally, modify the basic settings on the Settings tab.
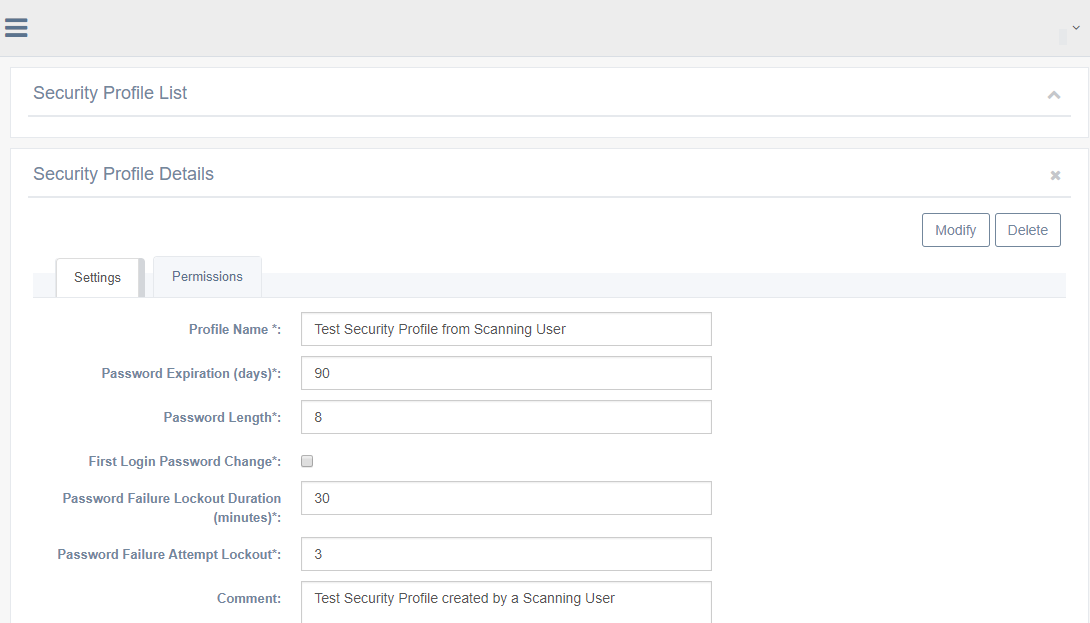
Modifying the Settings on the Security Profile Details tab.
-
Click the Permissions tab to modify permissions for the Security Profile. If there are any current managers for the Security Profile, they will appear in the Assigned area. To add a new manager, click on the username in the Available area of the Owned By section. This will move that entity over to the Assigned area. To remove a current manager, click the X at the end of the green box in the Assigned area. This will move that entity back to the Available section.
NOTE: A security profile without assigned owners is automatically owned by any Administrator account in the system.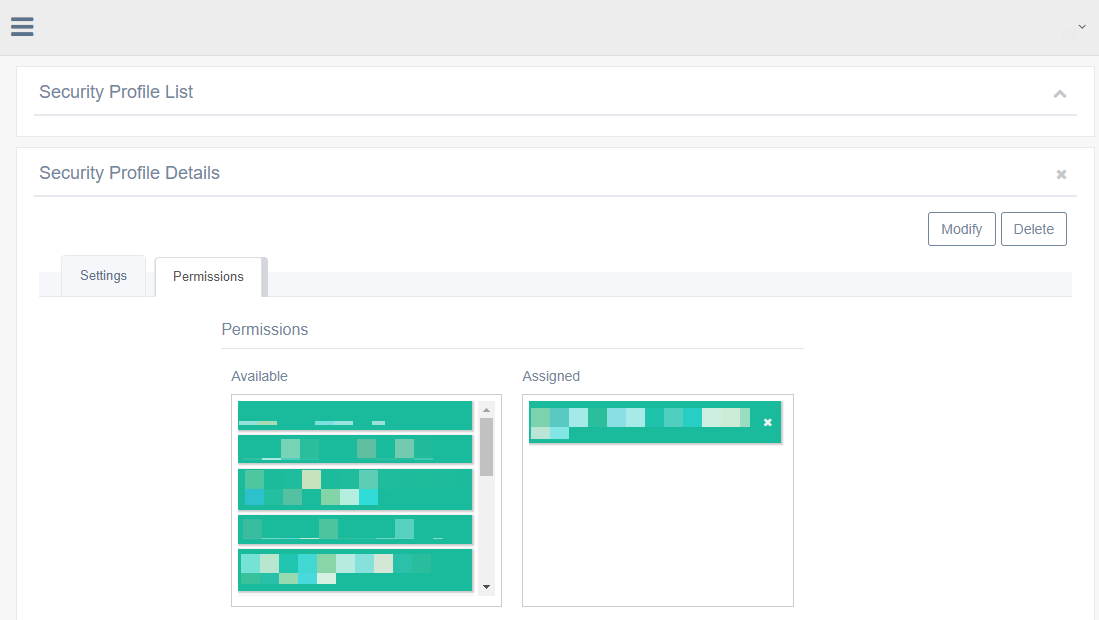
-
Click Modify.
Deleting a Security Profile
To delete a security profile:
- Log in to beSECURE with administrative privileges.
- Make sure the DevOps role is selected.
- Click Admin > Accounts > Security Profiles.
- Enter text in the search box at the top right to search by Profile Name. You may also use the navigation buttons at the bottom to page through the list of security profiles.
- Select a security profile from the list.
- Click Delete.
Restoring a Security Profile
To restore a security profile that was deleted by mistake:
- Log in to beSECURE with administrative privileges.
- Make sure the DevOps role is selected.
- Click Admin > Accounts > Security Profiles.
- Click the arrow in the search box to open the advanced search.
- Select Show Deleted.
- Click Search.
- Select the appropriate deleted item from the list of results.
- Click Undelete.