beSTORM New Project Wizard
This is a general overview of the beSTORM New Project Wizard. Depending on your needs, some parameters may not apply to your fuzz testing scenario.
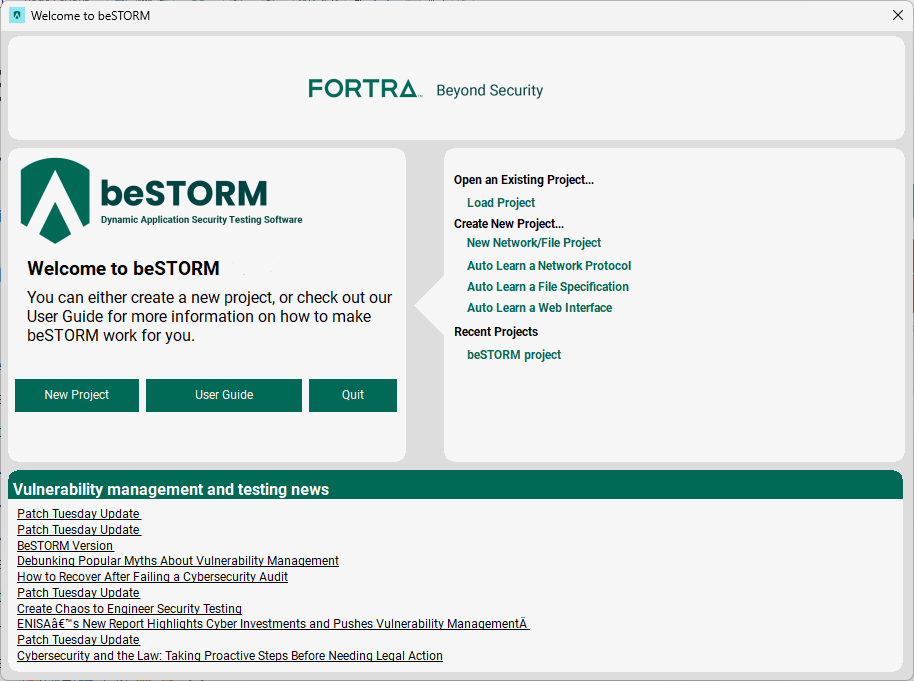
After opening beSTORM Client, select New Project on the Welcome window to open the wizard.
New Project Wizard pages
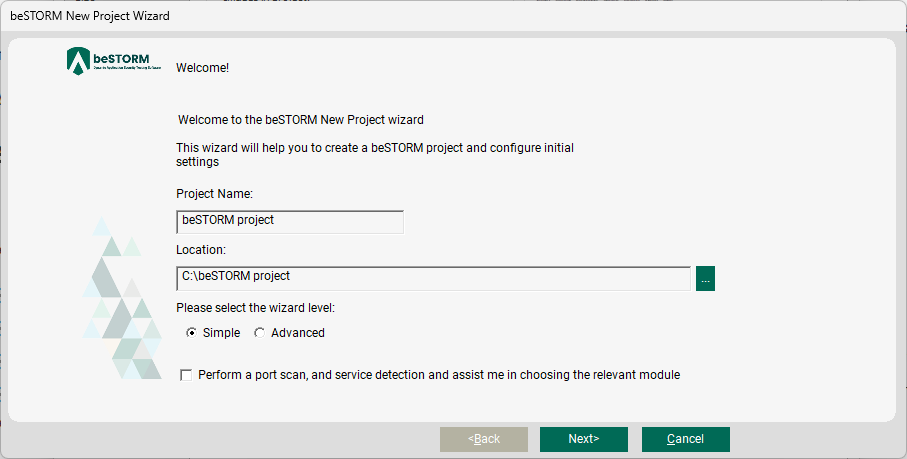
Welcome page
The Welcome page contains the following parameters:
-
Project Name - Enter a unique name for the project or use the default name provided.
-
Location - Select a location to store the project and its files or use the default location provided.
-
Wizard level - Select Simple to use preconfigured settings or Advanced to manually configure those settings yourself on the Advanced Configuration page.
-
Perform a port scan, and service detection and assist me in choosing the relevant module - Select this parameter to scan ports/services for the desired IP address or hostname to help with determine which module/protocol to use for your test.
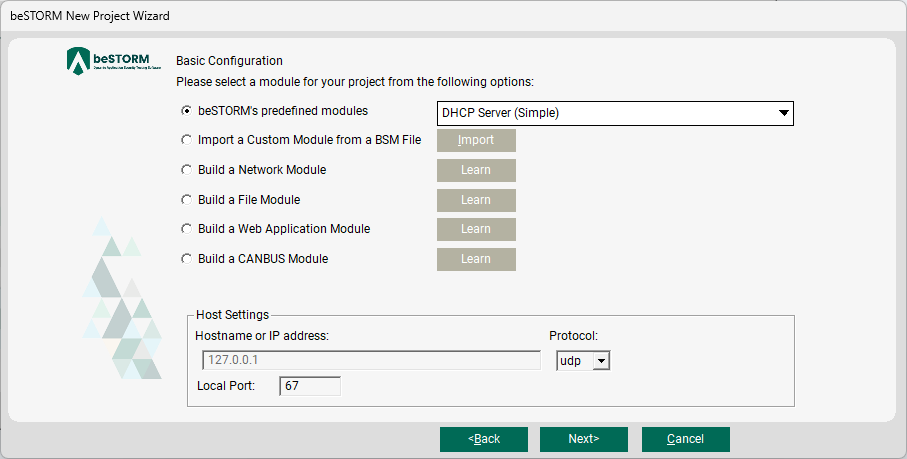
Basic Configuration page
The Basic Configuration page contains the following parameters:
-
beSTORM's predefined modules - Predefined modules such as BMP, GIF, FTP, HTTP, POP3, etc. Selecting a predefined module requires additional Target Host Settings,
-
Import a Custom Module from a BSM File - A custom module you can import.
-
Build a Network Module - Create a new Network-based module utilizing beSTORM's network auto learning capabilities.
-
Build a File Module - Create a new File-based module utilizing beSTORM's file auto learning capabilities.
-
Build a Web Application Module - Create a new Web Application module utilizing beSTORM's web testing capabilities.
-
Build a CANBUS Module - Create a new Controller Area Network (CAN bus) module utilizing beSTORM’s ability to read and process CAN DBC files.
Depending on your module selection, the Hostname or IP address (default is 127.0.0.1), Protocol (default is udp), and Local Port (default is 67) parameters are preset. If you select a predefined module (which does not require network configuration) or a new File, Web Application, or CANBUS module, the Target Host Settings section of the wizard will not appear.
Advanced Configuration page
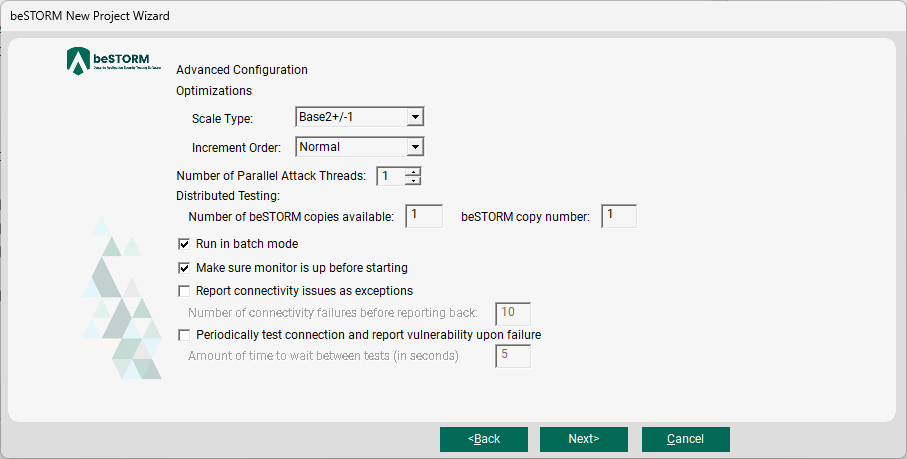
If you selected Advanced on the Welcome page, you can manually optimize and select parameters for your test on the Advanced Configuration page. The available parameters are:
-
Optimizations - Different modules support different settings. For example, HTTP testing does not run multiple Parallel Attack Threads, while modules such as SMTP do. This depends on the type of server being tested, the robustness of the protocol to parallel testing, and other considerations.
-
Scale Type - Optimizes testing by specifying the number of combinations sent per Module Buffer Type. Each Scale Type alters the Estimated combination count per Buffer number. The available options are:
-
Base2+/-2 - Sends buffer combinations by +/-2: 2, 4, 6, 8, 10, 12, 14, 16, etc.
-
Base2+/-1 - Sends buffer combinations by +/-1: 0, 1, 2, 3, 4, 5, 7, 8, 9, 15, 16, 17, etc.
-
Base2 - Sends buffer combinations by 2, 4, 8, 16, 32, etc.
-
Base10+/-2 - Sends buffer combinations by +/-2: 10, 100, 1000, 10000, etc.
-
Base10+/-1 - Sends buffer combinations by +/-1: 10, 100, 1000, 10000, etc.
-
Base10 - Sends buffer combinations by 10, 100, 1000, 10000, etc.
-
Serial - Sends buffer combinations by 1, 2, 3, 4, etc.
NOTE: The Serial type is extremely time consuming. Only use this type if your test has no time constraints. -
Timed - Select this type if you have time constraints for your test to run (that is, you can only run beSTORM for 1 hour, 10 hours, 1 day, etc.), but want to test all fields regardless. The Timed type spends one second on each field in the first loop (changing the buffer types as usual but stopping after one second) covering the entire protocol quickly. Then, on the second loop, it spends two seconds on each field, then four seconds, eight seconds, etc., until the allotted time expires. beSTORM will incrementally test more and more of each field until you stop the test manually.
-
Serial/Base2 - Combines the Serial and Base2 types, providing an intermediate option that generates more combinations than Base2, but less than Serial. Sends buffer combinations by 1, 2...4095, 4096, 8192, etc.
-
- Increment Order - Determines the order the module will use to test buffer sizes. The order does not affect the combination count or speed of the test.
- Normal - Starts with small buffer sizes (for example, 2, 4, 8, 16, etc.) and increases in size as the test runs. This order can possibly find vulnerabilities more precisely as the smallest attack will trigger an issue.
- Reverse - Starts with larger buffer sizes (for example, 2,000,000) and decreases in size as the test runs. This order can possibly find vulnerabilities earlier in the test.
-
Number of Parallel Attack Threads - Specifies the number of threads to use during a test. Running a test with multiple threads increases its speed, especially when beSTORM modules wait for a response.
-
Distributed Testing - Combines the Number of beSTORM copies available and beSTORM copy number settings to allow multiple copies of beSTORM to be in use and testing against the device under test (DUT). While working together, each copy can do 1/n of the tests.
For example, if you run two copies of beSTORM in parallel, one copy will do half of the test, and the other copy will do the other half. The two values in this case would show Number of beSTORM copies available as 2 and beSTORM copy number as 1 in one copy of beSTORM, and beSTORM copies available as 2 and beSTORM copy number as 2 in the other copy of beSTORM.
-
Run in batch mode - If selected, beSTORM continues running after the first fault is found.
NOTE: In this case, the product being tested should recover from the previous fault, either by being restarted or by some other way. -
Make sure monitor is up before starting - If selected, beSTORM waits for an agreed signal from the tested environment before beginning the test. This allows beSTORM to be certain that the tested environment is running properly.
-
Report connectivity issues as exceptions - If selected, beSTORM treats a case of receiving no network traffic from the tested environment as potential problems or vulnerabilities. This feature is useful while testing an environment that is not easily monitored (such as a proprietary hardware device) as it marks all network problems as a potential vulnerability. By doing so, it allows to easily reproduce the issue later and discover the cause.
-
Periodically test connection and report vulnerability upon failure - If selected, this option tests the behavior of the product being tested and expects it to answer traffic that is not malformed in a normal manner. If the product does not respond, beSTORM reports an exception.
Certain modules require additional information to perform proper testing. One such example is in the case of the FTP module. It requires a username and password to log in to test all the available commands.
NOTE: beSTORM cannot log in without a proper username and password.
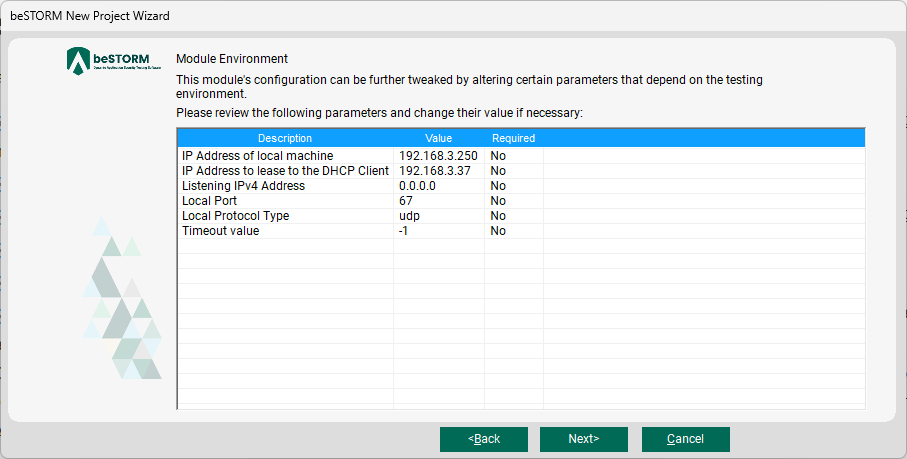
Module Environment page
On the Module Environment page, some of the fields appearing here are automatically populated by values that were previously defined (for example, Remote Hostname, Remote Port, and Remote Protocol Type). Other items to note:
- To change a username or password value, double-click its Value box.
-
The Required column indicates which parameters must contain an actual value. If the protocol contains such parameters, beSTORM prompts you to supply values, otherwise values are assigned by default.
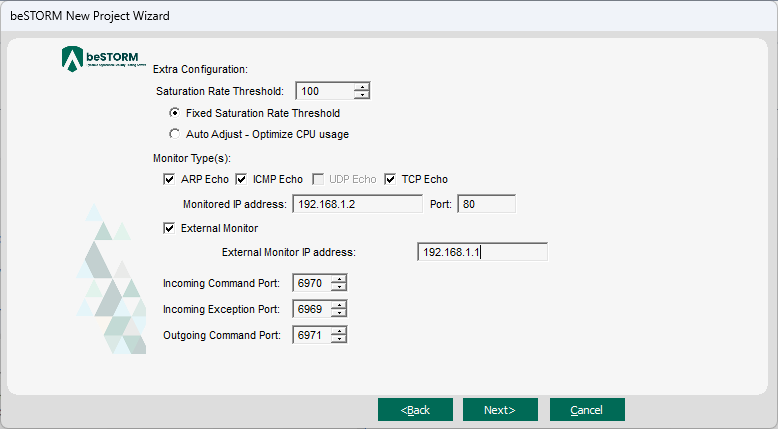
Extra Configuration page
On the Extra Configuration page, configure these test settings:
-
Saturation Rate Threshold
-
To adjust the speed of your test to be a fixed number of sessions per seconds, select a value for Saturation Rate Threshold and leave Fixed Saturation Rate Threshold selected.
-
To allow your test's speed to be automatically adjusted according to reports from the beSTORM monitor, select Auto Adjust - Optimize CPU usage.
-
- Monitored IP address and Port - Enter the IP address of the machine you want to perform ARP, ICMP, UDP, or TCP monitoring on by providing a value in the Monitored IP address box. If you are utilizing UDP or TCP, enter the port number you want to monitor in the Port box.
- ARP Echo - Attempts to resolve the Monitored IP address (the machine being tested) into a MAC address.NOTE: ARP Echo properly works on LAN in a WAN environment where the target is not on the same network/subnet class. An ARP response will be received from the Router that connects the two networks, thus causing a false status.
- ICMP Echo - Attempts to perform an ICMP Echo/ICMP Response test on the Monitored IP address.
UDP Echo - Attempts to verify whether the remote UDP port for the Monitored IP address is open.
NOTE: For UDP to be properly detected as non-responsive/closed, the Windows Firewall must allow ICMP Destination Unreachable packets to arrive. By default, Windows Firewall blocks such packets from arriving.TCP Echo - Attempts to verify whether the remote TCP port in the Monitored IP address is open.
- External Monitor - The beSTORM Monitor (provided) or your own custom monitoring device or program. To use an external monitor, define the following parameters:
- External Monitor IP address - Enter the IP address of the machine where the external monitor is running.
- Incoming Command Port - Enter a port number for receiving commands from the external monitor (such as reports on the tested machine's load and status).
- Incoming Exception Port - Enter a port number for exception data being sent from the monitor to beSTORM.
- Outgoing Command Port - Enter a port number for beSTORM to use to send internal data to the external monitor (using the External Monitor IP address).
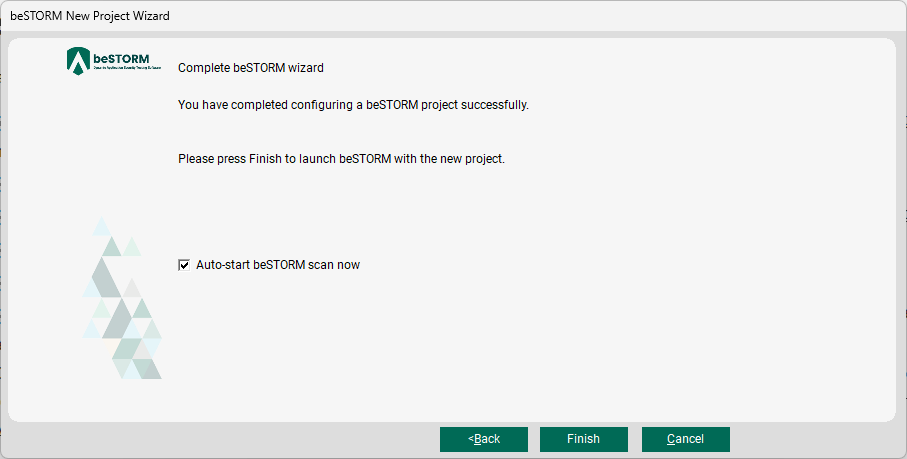
Complete beSTORM wizard page
On the Complete beSTORM wizard page, you can skip automatically scanning after completing the wizard by clearing the Auto-start beSTORM scan now checkbox (selected by default).
Selecting Finish will close the wizard and open the beSTORM Client.