Users and Groups Management
Users and Groups are used within Event Manager for assigning and reviewing events. To work with Users and Groups, select Users and Group Management from the Event Manager Configuration Options screen. Note that this option is also available from any option where Users or Groups can be assigned to an event.
Adding A Group
When you are creating a group you are defining a group with a specific responsibility, such as Security or Operations which is then linked to an existing group login defined in the Active Directory. For example a new group defined as Security Team may be linked to the existing Operations team, and so on.
Group Info
The following fields are available on the Group Info page:
- Name: Enter the name by which the group will be identified throughout Event Manager.
- Domain: Use the drop-down menu to select the domain on which the group is registered.
- Group: Type beginning letters into the search field to locate a user from the Active Directory to which this group is assigned. For example, typing Op, may return Operations Team to which the group can then be assigned. If the login for which you are searching is not in the list, it may have already been associated with another group.
Security
The Security page is used to assign Security Roles and Assets to a group. This means that when users are assigned to roles within this group they only have access to specific functionality and assets as specified by the group control.
Security Roles
The following security roles can be assigned.
- Administrator: The Administrator can configure and view all the product pages and edit the users and permissions.
- Creator: The Creator can configure and view all the product assets. He cannot modify global settings, users and permissions.
- Viewer: The View can view all the product pages. He cannot access the configuration.
- Event Manager Administrator: The Event Manager Administrator can configure and view all the audited assets and security controls. He cannot modify global settings, users or permissions.
- Security Manager: The Security Manager can view all the audited assets and review, comment etc. He cannot access the configuration.
- Security Analyst: The Security Analyst can view all the audited assets and review, comment etc. He cannot access the configuration.
- Security Auditor: The Security Auditor can view all the audited events. He cannot review, comment or access the configuration.
The group will only be able to visualize the information from the assets displayed.
Use the 'Family:Asset name' search term (for example Family:Windows) to display just those assets belonging to that operating system family. The group will only then be able to view and configure security events from assets within the selected family.
Click OK to save the group configuration.
Adding A User
Users must be added before they can be made available for selection elsewhere in Event Manager. From the Users and Groups Management page, click Add New User.

When adding User details, there are three pages of information to be completed.
- User Info
- Security
- Notifications Preferences
User Info
The following fields are available on the User Info page:
- Name: Enter the name by which the user will be identified throughout Event Manager.
- Domain: Use the drop-down menu to select the domain on which the user is registered.
- User: Type beginning letters into the search field to locate a user from the Active Directory to which this user is assigned. For example, typing Adm, may return Administrator which can then be assigned to the new user. If the login for which you are searching is not in the list, it may have already been associated with another user.
Security Settings
These settings specify the current groups and roles inherited from the groups to which this user belongs.
User Role
- Groups: This shows the groups to which the user already belongs and the security role inherited from those groups.
- Security Roles: Additional role access can be granted at user level aside from that already granted at group level.
The group will only be able to visualize the information from the assets displayed.
Use the 'Family:Asset name' search term (for example Family:Windows) to display just those assets belonging to that operating system family. The group will only then be able to view and configure security events from assets within the selected family.
Click OK to create the new user.
Notifications Preferences
The following fields are available on the Notifications Preferences page:
Primary Notifications
These fields are used to determine the primary email address and times at which to send notifications to this address.
- Email: Enter the email address to be used as the primary point of contact for this user. This will usually be a business email to which the user has access during normal business hours. More than one email can be entered if required.
- Calendar: Use the first drop-down menu to determine whether this email address is to be used inside or outside the selected calendar. Use the second drop-down menu to select the required calendar for when notifications are sent to this email address.
Alternate Notifications
These fields are used to determine any alternate email address and the times at which to send notifications to this address.
- Email: Enter the email address to be used as the alternate point of contact for this user. This may be a private or secondary business email to which the user has access outside normal business hours. More than one email can be entered if required.
- Calendar: Use the first drop-down menu to determine whether this email address is to be used inside or outside the selected calendar. Use the second drop-down menu to select the required calendar for when notifications are sent to this email address.
Notifications Configuration
These fields determine what notifications are issued and how they are delivered.
What should be notified?
Select the type of event that will cause a notification to be raised. A single selection or any combination of the three event types can be selected.
- New Incident: A notification is sent whenever an incident is assigned to this user.
- New Threat: A notification is sent whenever a threat is assigned to this user.
- New Highlighted Event: A notification is sent whenever a highlighted event is assigned to this user.
Click next to an event to select  and again to remove the selection
  .
.
How should it be notified?
Select the time interval between notifications delivery and the type of notification that is sent.
- Notification interval: Enter a number to reflect the time period and use the drop-down choice menu to determine whether this indicates minutes or hours.
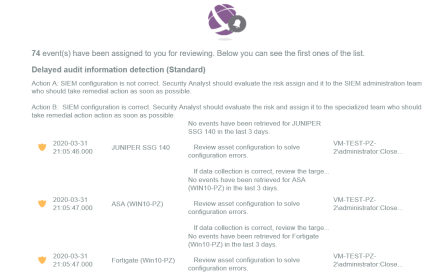
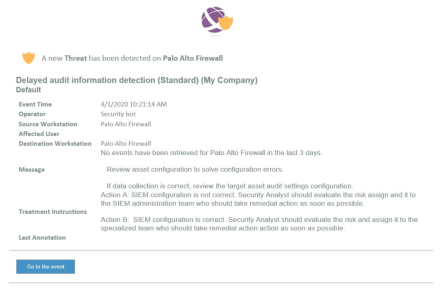
- Notification type: Use the toggle switch to select whether the notification email is a digest containing a summary of all the events or whether all events are sent as individual emails. Examples are shown below with the Digest first and the individual email beneath.


You pause the alert processing after a specified number of occurrences in the defined interval to avoid over alerting. For example, specifying 10 in this field, with a notification interval of 20 minutes would mean that no further notifications would be received after the first 10 occurrences and until the 20 minutes time interval had expired. Notification processing would restart with the next 20 minute interval period.
Filters
Use Filters to limit notifications to those types of security controls selected from the available list.
Enter the name of the required security control in the Search panel in the following format:
Therefore, to enter a filter for the User Inactivity (Standard) security control, the following entry would be made:
The security control is then displayed in the current filter panel.

Multiple security controls can be added to a single filter by use of the OR statement. So for example, Name:"User Inactivity (Standard)" OR Name:"User Lock (Standard)" would result in notifications being sent to this user for either of these security events occurring.
Click Edit Filters to be able to set specific inclusion or exclusion filter details.
For example, you may not want to include any periods of inactivity that relate to an automated machine user as this is an irrelevant event. To complete this example, you'd do the following:
- Click Edit Filters to open the Event Filters window.
- Click Add Exclusion Filter.
- Enter a Filter Name, in this instance Machine Users.
- Use the drop-down menu at the bottom of the panel to select the field to which the filter applies. Use the vertical scroll bar if the required field is not initially visible in the displayed list. For this example, select Operator Name.
- Click Add Field to Evaluate. The field is now displayed in the panel, ready for the text entry. In this example, the entry would be *$ to identify a machine user.
- Click OK to apply this exclusion filter.
The Exclusion filter is now applied and displayed on the main Notifications Preferences page for this user.

User Auditing
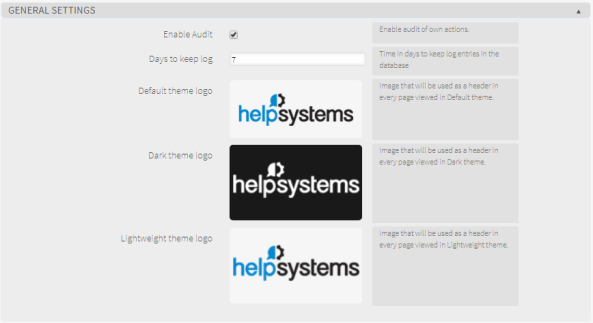
Event Manager is supplied with its own internal auditing system which records every action performed by each user on the system. This auditing mechanism is enabled by default. To change this setting do the following:
- Click the
 User icon from the Event Manager header bar.
 - From the drop-down menu, click Settings. The Settings page is displayed.
- Select the General Settings menu options.

- Click Enable Audit to remove the self-auditing feature from this user.
- If required, amend the value in the Days to keep log setting to increase or reduce the amount of time for which the user audit data is retained.
