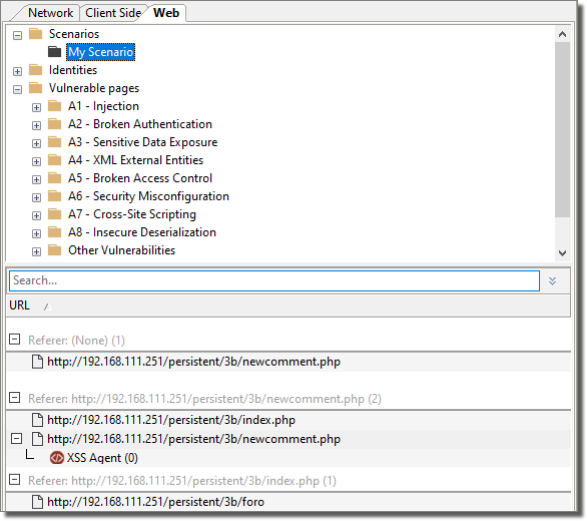
Web View
Core Impact 's Web View shows the results of all web application testing.

figure 32 - Entity View - Web View
By default, when you first open your workspace, the Web View will be empty. To populate the view you can run WebApps Information Gathering, or you can follow these steps:
- Right-click inside of the Web View.
- Select New -> New Scenario.
A Scenario serves as a context in which you can test a web application and it will provide organized structure to the results of the WebApps modules. You can use multiple scenarios to test the same web application with varying settings, or segment a web application and test each part independently in a different scenario.
- In the resulting Module Parameters box, enter the details for your Scenario:
NAME Provide a name that will help you identify this WebApps scenario HTTPPROXY If there is a proxy server, select from the drop-down menu the appropriate value: - Use Core Impact settings will follow the settings that are in the Tools -> -> form.
- Use Custom HTTP Proxy will follow the proxy value in the next field (CUSTOM HTTPPROXY)
- Use Internet Explorer settings will follow the settings as defined in your Internet Explorer preferences
CUSTOM HTTPPROXY If HTTPPROXY is set to Use Custom HTTP Proxy, enter the name or address of the proxy server to be used. USERAGENT Select from the drop-down menu the browser type and version that the WebApps test will simulate. CUSTOM USERAGENT If the USERAGENT is set to Custom, enter the name of the browser to be simulated. - Click the OK button.
The new Scenario will appear in the Web View with the following subordinate folders:
- Pages: Any pages that are identified by WebApps Information Gathering will be visible under this folder.
- Vulnerabilities: Any potential or confirmed vulnerabilities will appear under this folder.
- Broken Links: As the web crawler searches for pages, it may find a link that generates a 404 Not Found error. In this case, the link will be added to the Broken Links folder.