REST API
The Core Impact REST API is a Restful API that you can use to control Impact and initiate scans and other automatic exploitation activities. Use REST API to leverage Impact programmatically as part of a dev/opps CICD process where you want to run a quick RPT against infrastructure that you are in the process of standing up (in the staging environment) and other tasks for pure automation. Follow these steps to set REST API options:
- Select the Tools > Options command from the main menu.
-
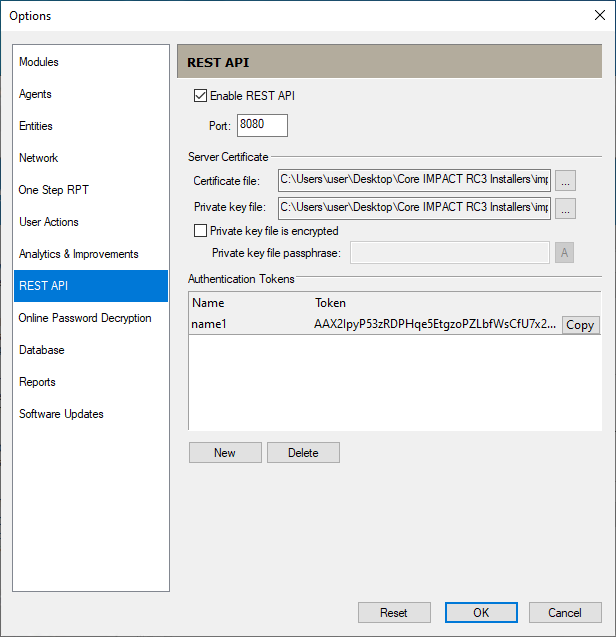
Click the REST API category to review or edit the available options.
-
Press OK after making any changes.
Enable REST API - Check to enable this feature.
Port - Change the port if desired. 8080 is the default.
Server Certificate
The communication is encrypted, as the API is designed to be used by external tools. In order to encrypt it, a certificate and a private key are needed (both must be in "PEM" format). Connection is done using HTTPS.
Certificate File - Specify a certificate file. This is required. It can be self-signed or issued through some other mechanism.
Private Key File - Specify a private key file.
Private Key File is Encrypted - Check if the private key file is encrypted.
Private Key File Passphrase - Enter the passphrase for the encrypted private key file.
Authentication Tokens
Every endpoint is authenticated. So, in order to allow the execution, the HTTP request must have an "Authorization" header with a valid token. The tokens are defined in this section, and can have a display name for tracking.
New Button - Press to generate a new token.
Copy Button - Press to copy the token to the clipboard.
Delete Button - Press to delete the highlighted token.
Reset Button - Press to clear out all settings.
- From the Dashboard or Console menu select Tools\Options\REST API.
- Check the Enable REST API box to enable this feature.
- Change the Port from the default (8080) if desired. (not recommended)
- Specify a Server Certificate and Private Key File. These are required.
-
If the private key is encrypted, check the box and enter the passphrase for the private key file.
- To create an Authentication Token press the New button.
- Press the Copy button to copy the token to the clipboard. You will need this in the next section, step 3.
- Press OK to continue.
The REST API is configured. Use the following steps to see the API in action using a Swagger Documentation Interface:
-
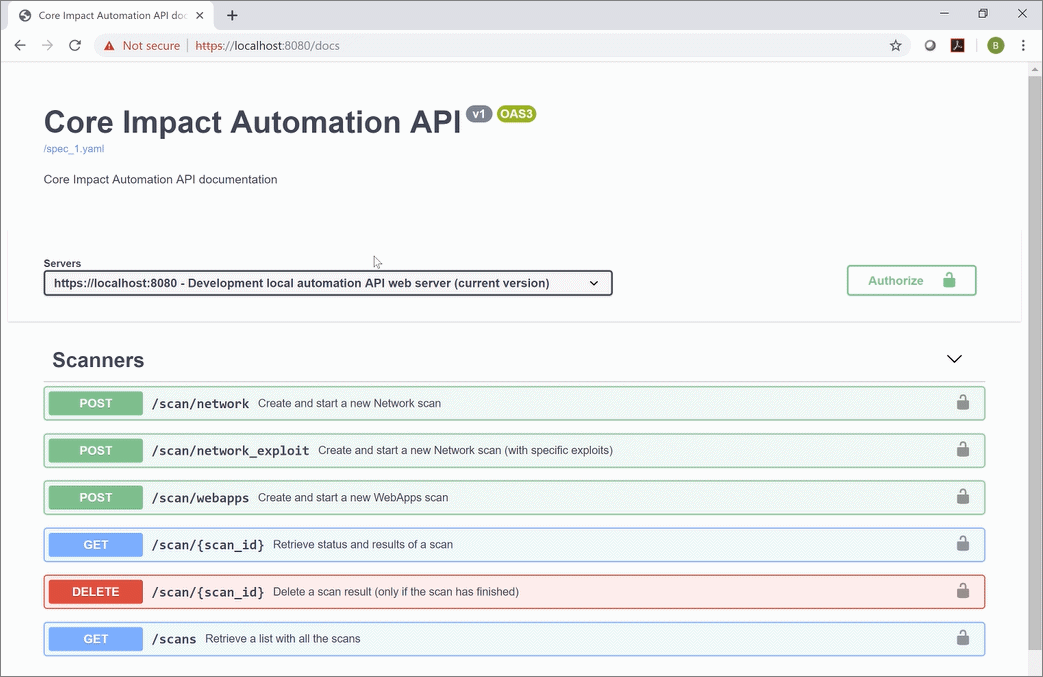
In a browser load the page - https://localhost:8080/docs
A standard swagger documentation interface displays. This allows you to initiate actions within the API.
- On this screen press the Authorize button.
-
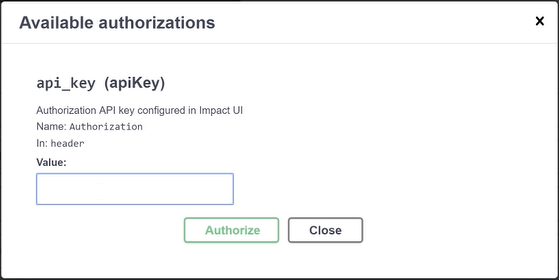
In the Available Authorizations screen paste the bearer token copied in setup step 7 .
- Press Authorize and Close.


