Customizing Toolbars and Keyboard Shortcuts
Keyboard shortcuts and Console toolbars can be customized using the Customize dialog box. To open this dialog box, select the Tools -> Customize command from the main menu.
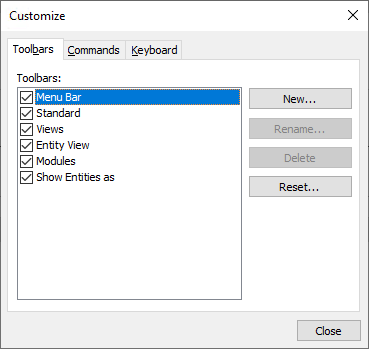
figure 4 - Customize Dialog Box
Customizing Toolbars
You can activate or deactivate toolbars, create new toolbars or remove existing toolbars using the Toolbars Panel of the Customize dialog box. Active toolbars will automatically appear at the top of the Console.
To add or remove commands from a toolbar, click on the Commands tab of the Customize dialog box. Use drag-and-drop to add or remove specific commands from an existing toolbar.
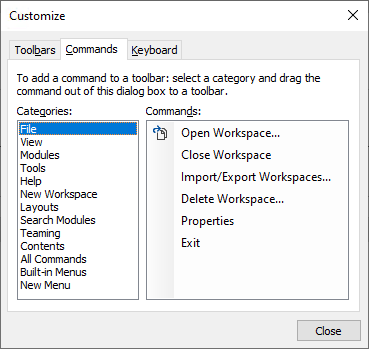
figure 5 - Adding commands to a toolbar
Customizing Keyboard Shortcuts
You can navigate through Core Impact using your keyboard and you can assign custom keystrokes to many of Core Impact's basic navigational features using the Keyboard tab of the Customize dialog box.
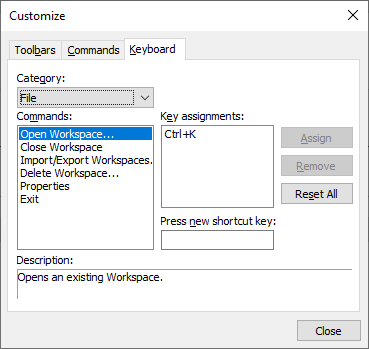
figure 6 - Customizing keyboard shortcuts
There are several default keystrokes already set up when you install Core Impact:
| Action | Shortcut |
|---|---|
| Create new workspace | Ctrl + W |
| Open workspace | Ctrl + K |
| View entity properties | Ctrl + Shift + P |
| View executed modules | Ctrl + Shift + X |
| View modules | Ctrl + Shift + M |
| View quick information | Ctrl + Shift + Q |
| View module log | Ctrl + Shift + L |
| View module parameters | Ctrl + Shift + A |
| View module output | Ctrl + Shift + O |
| Open options | Ctrl + E |
| Search modules | F5 |
To use the Keyboard tab and customize your keystrokes, use the following sections of the properties box:
- Category
-
Commands are grouped into categories (such as Edit or View) which correspond with the Main Menu and the Toolbar.
- Commands
-
The actions you can perform using the keyboard command.
- Key assignments
-
Used to assign new keyboard shortcuts or remove existing ones. Commands can have multiple keyboard shortcuts.
- Press new shortcut key
-
Changes the keyboard shortcut for any command.