Exporting Data from Core Impact
There are several ways that you can export data in order leverage Core Impact's test results.
Impact Workspace data
If you have an external system into which you want to import Core Impact workspace data (hosts, entities, agents, vulnerabilities, etc), you can customize and use the Export Impact Workspace to XML File module. To customize the module:
- Make sure the Network Entity tab is active, then locate the Export Impact Workspace to XML File module in the Modules tab (use the search feature or navigate to the Import-Export folder).
- Right-click on the module, then select Edit.
- Modify the module .py file as desired, then use Save As to save the file with a new name.
- Click the Modules menu, then select Reload. This will refresh the modules list and should reveal your new, custom export module.
SCAP
You can export vulnerability data from Core Impact that is compatible with a Security Content Automation Protocol (SCAP) system. To do this:
- Make sure the Network Entity tab is active, then locate the Export results in SCAP xml format module in the Modules tab (use the search feature or navigate to the Import-Export folder).
- In the module parameters window, select the destination of the xml file, then click OK.
- Navigate in Windows to the location of the export file. You can then use the file with your SCAP system.
You can also view the publish and last updated dates for the exploits used within Core Impact. To extract this information, perform the below query from the Windows command line or using a SQL Client connected to Core Impact's SQL database.
- Command Line Query
-
osql -E -S .\IMPACT -d corevuln -Q "SELECT 'CVE-' + CAST(vuln_ncve_year AS VARCHAR) + '-' + CAST(vuln_ncve_number AS VARCHAR) AS CVE, vuln_published AS Published, vuln_lastchange AS LastChange FROM corevuln.dbo.vulnerability"
- SQL Client Query
-
SELECT 'CVE-' + CAST(vuln_ncve_year AS VARCHAR) + '-' + CAST(vuln_ncve_number AS VARCHAR) AS CVE, vuln_published AS Published, vuln_lastchange AS LastChange FROM corevuln.dbo.vulnerability
PCI Connect Format
You can export workspace data in XML format acceptable for importing to the QualysGuard PCI Connect format. To do this:
- Make sure the Network Entity tab is active, then locate the Export results in PCI Connect format module in the Modules tab (use the search feature or navigate to the Import-Export folder).
- Double-click the module.
- In the module parameters window, select the destination of the xml file, then click OK.
- Navigate in Windows to the location of the export file. You can then use the file with QualysGuard.
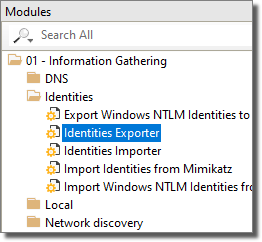
Identities Export
Use the Identities Exporter module to export identities in JSON format from one Workspace for import into another. Use the Identities Importer module to import identities.
To export identities:
- Navigate to the Modules tab, making that the Network tab of the Entity Database is active
-
Locate and execute the Identities Export module
- In the module properties window, select the Identities you wish to export and enter the path for the Output File.
- Click OK.
The identities you selected will be exported in JSON format and available at the location you specified in the module properties.