Active Directory Federation Services (AD FS)
You can configure Fortra VM for single sign-on (SSO) using Active Directory Federation Services (AD FS) by doing the following:
- Export your AD FS server token-signing certificate and send it to Fortra Support.
- Add a relying party trust for Fortra VM to your AD FS server.
- Add claim rules to the relying party trust to establish email address as the primary identifier.
Cache Export AD FS Server Token-Signing Certificate
To export your token-signing certificate from your AD FS server to give to Fortra Support, do the following:
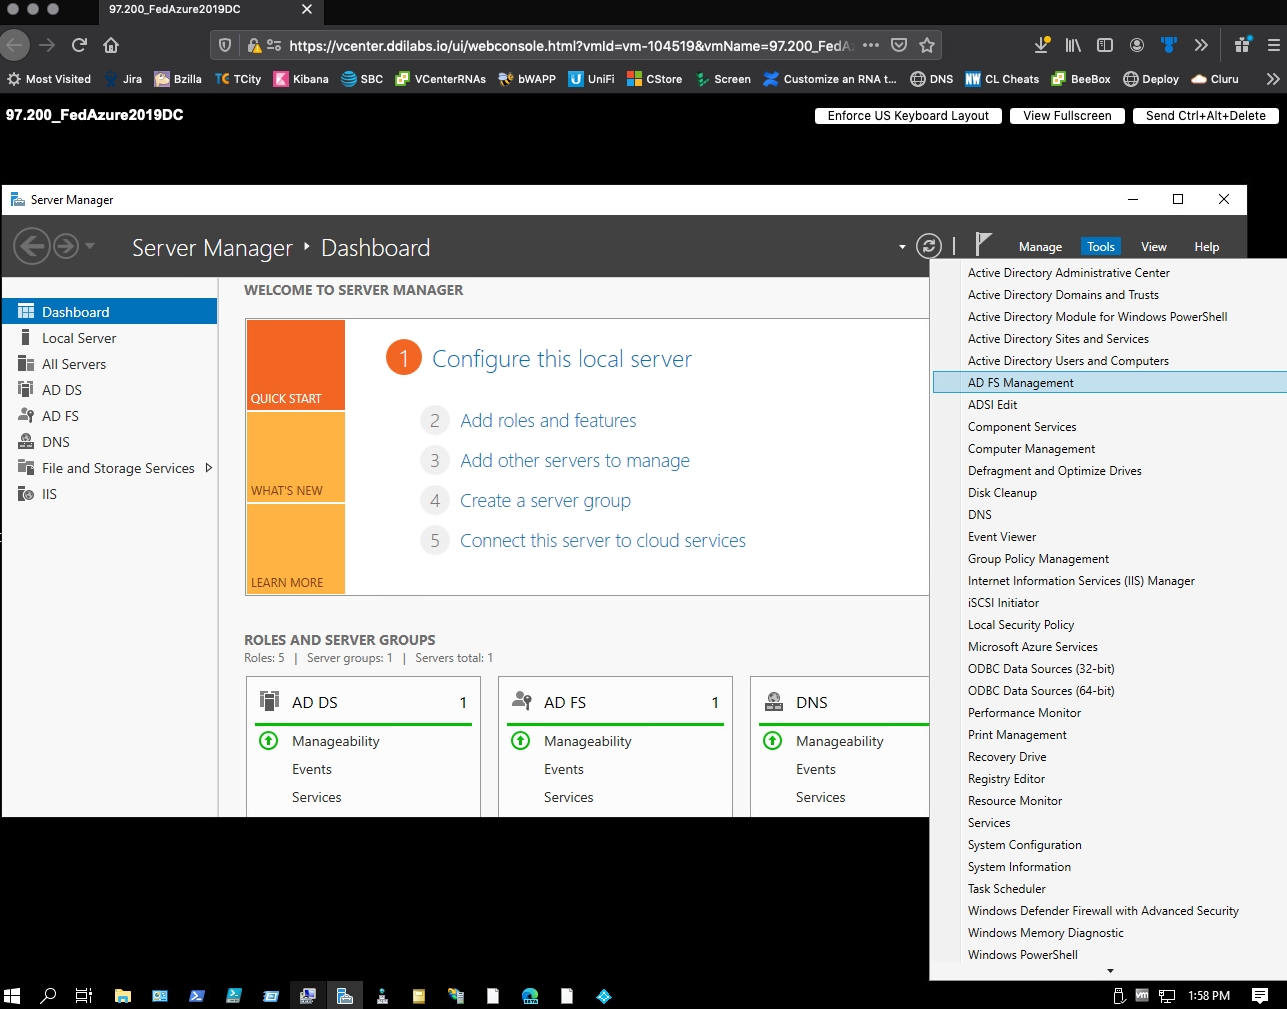
- Open the Server Manager on your Windows server.
- Open Control Panel.
- Select System and Security > Administrative Tools.
- Double-click Server Manager.
-
On the Server Manager dashboard, select Tools > AD FS Management.
-
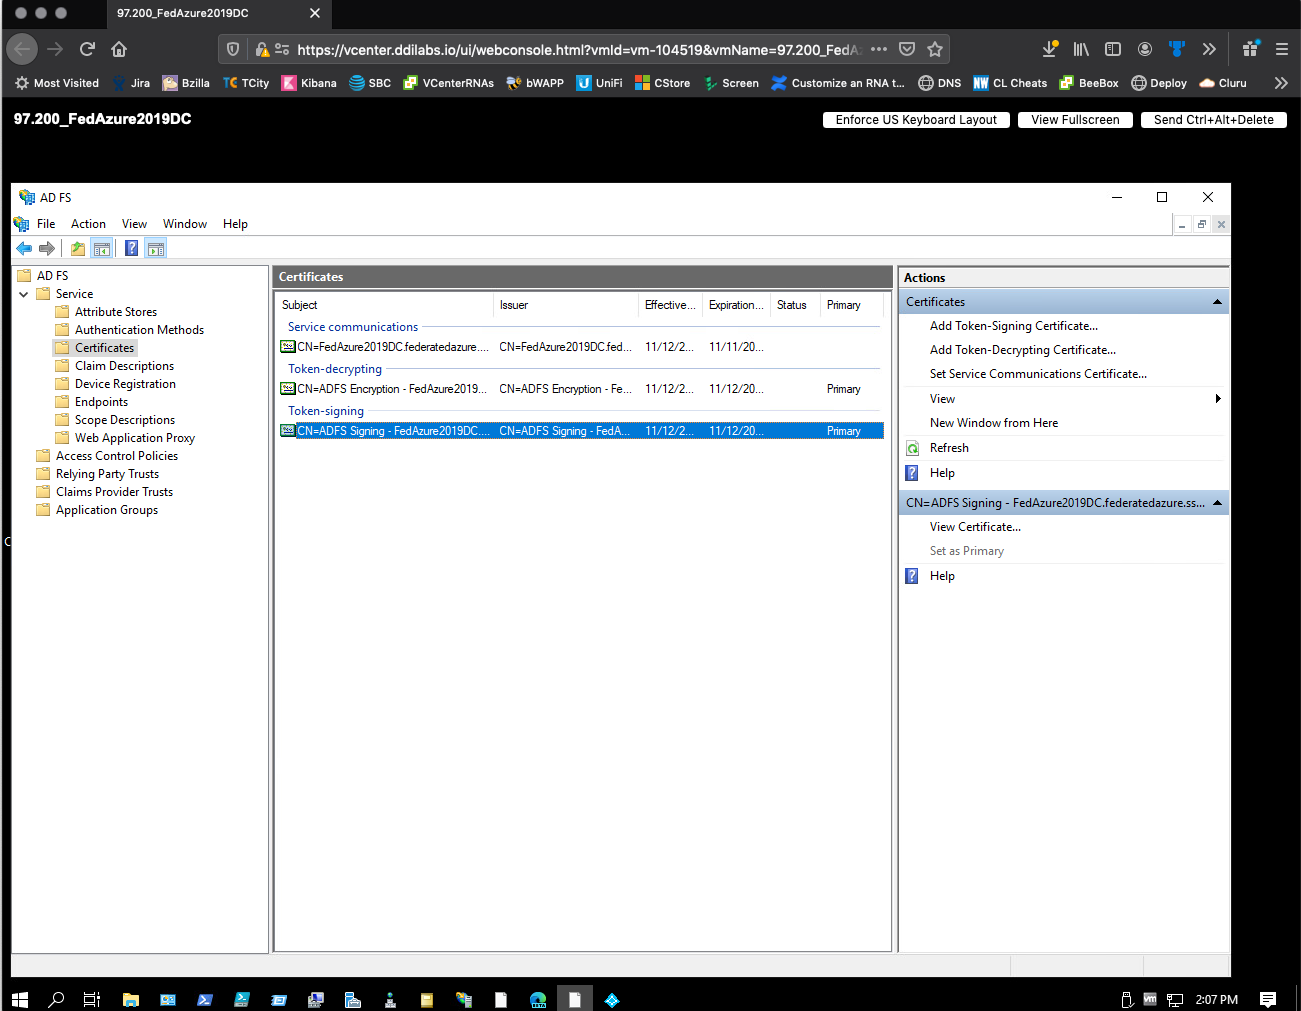
In the left pane, select AD FS > Service > Certificates.
-
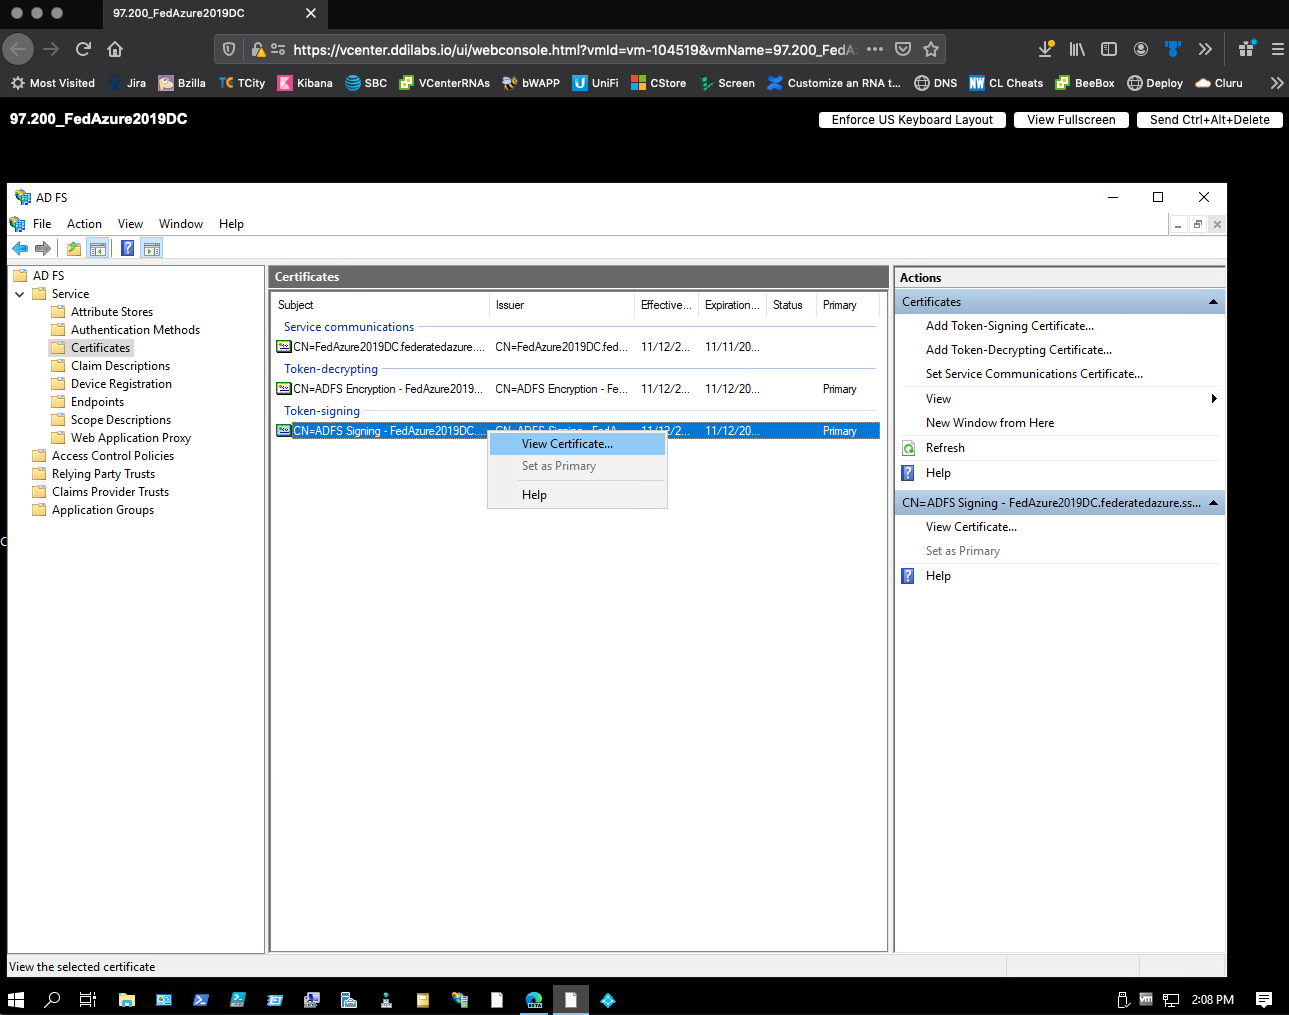
Right-click Token signing, and then select View Certificate.
-
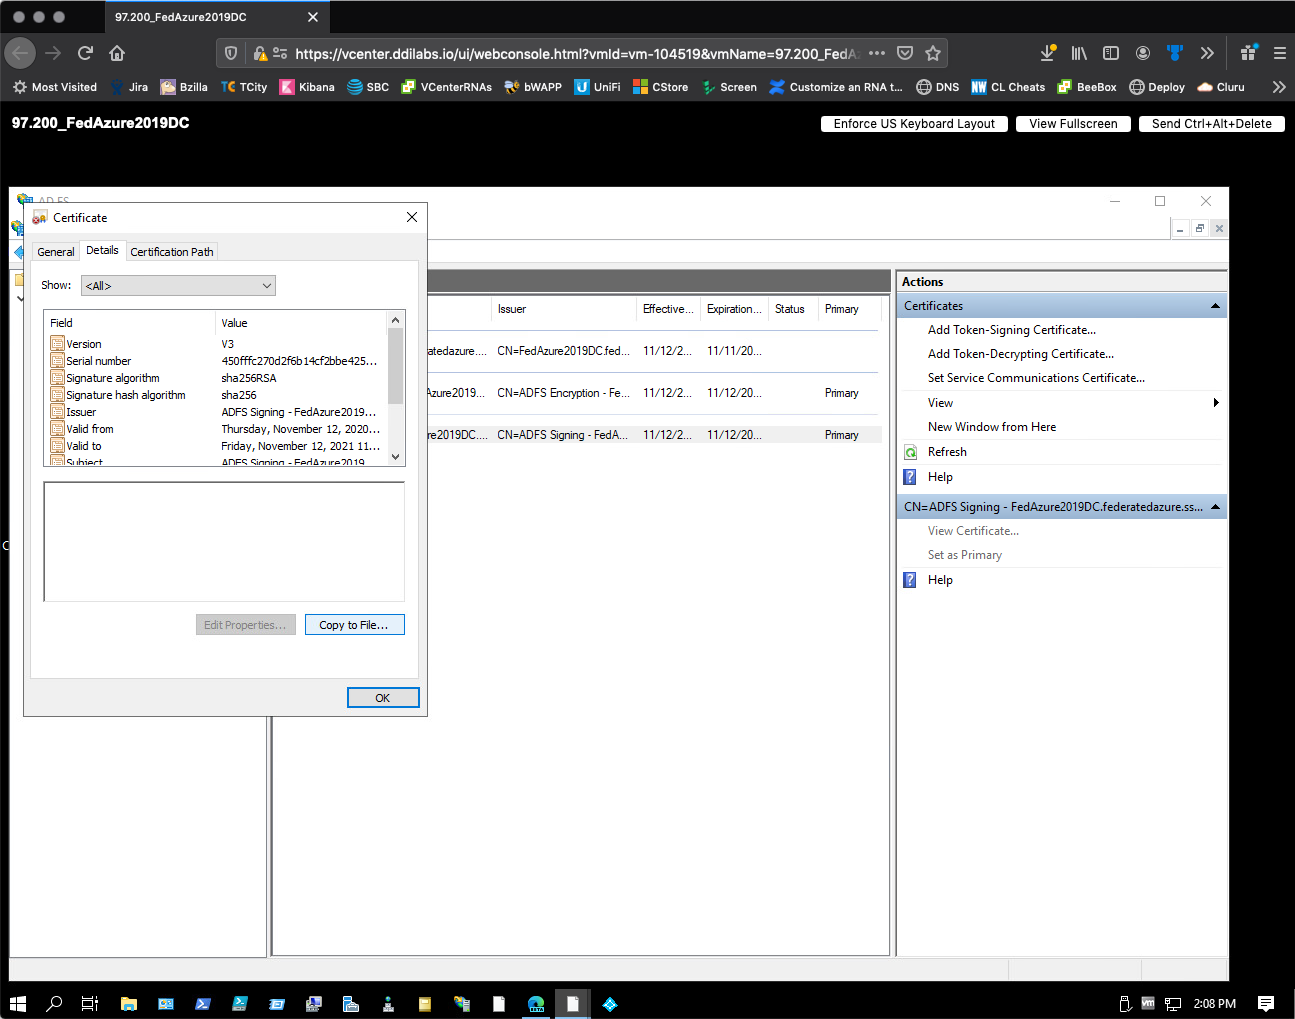
In the Certificate dialog, select the Details tab, and then select Copy to File.
-
In the Welcome to the Certificate Export Wizard window, select Next.
-
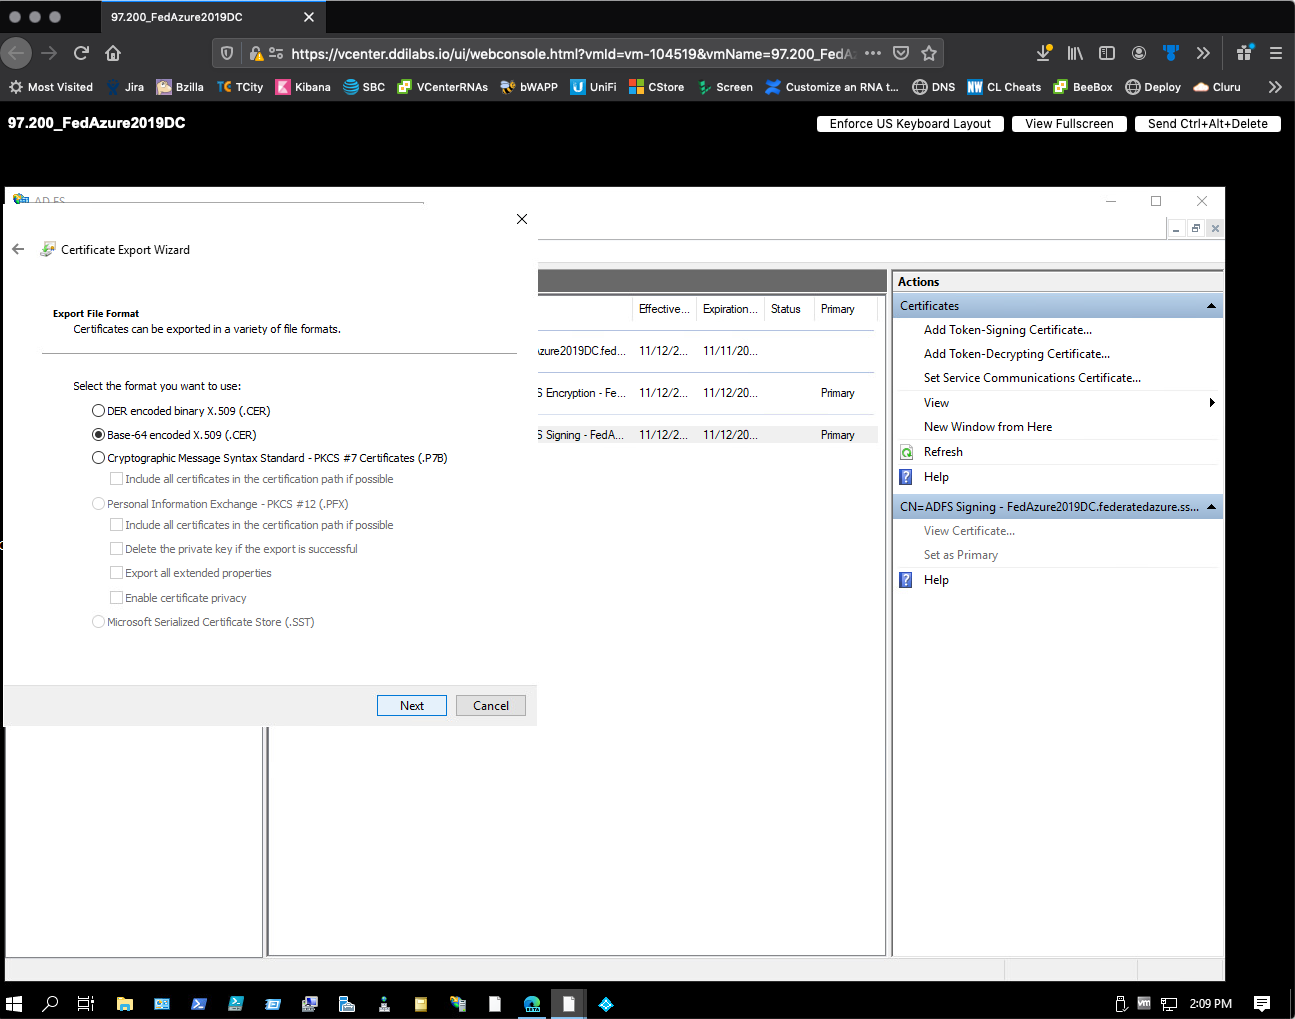
For Export File Format, select Base-64 encoded X509 (.CER).
-
Select Next.
-
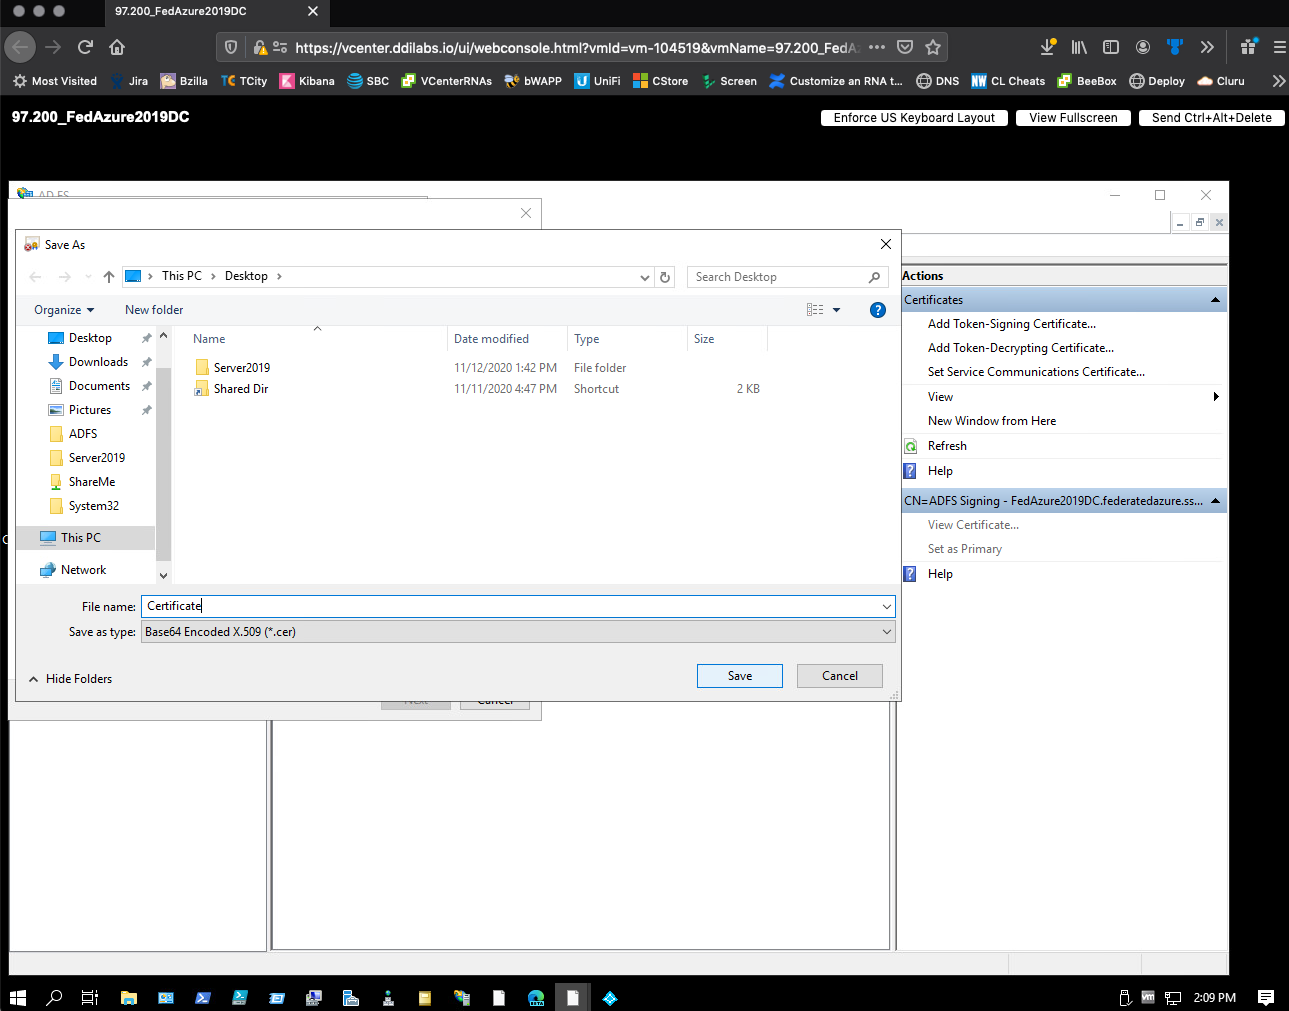
For File to Export, select Browse.
-
On the Save As dialog, name the file Certificate and then save it to your desktop.
-
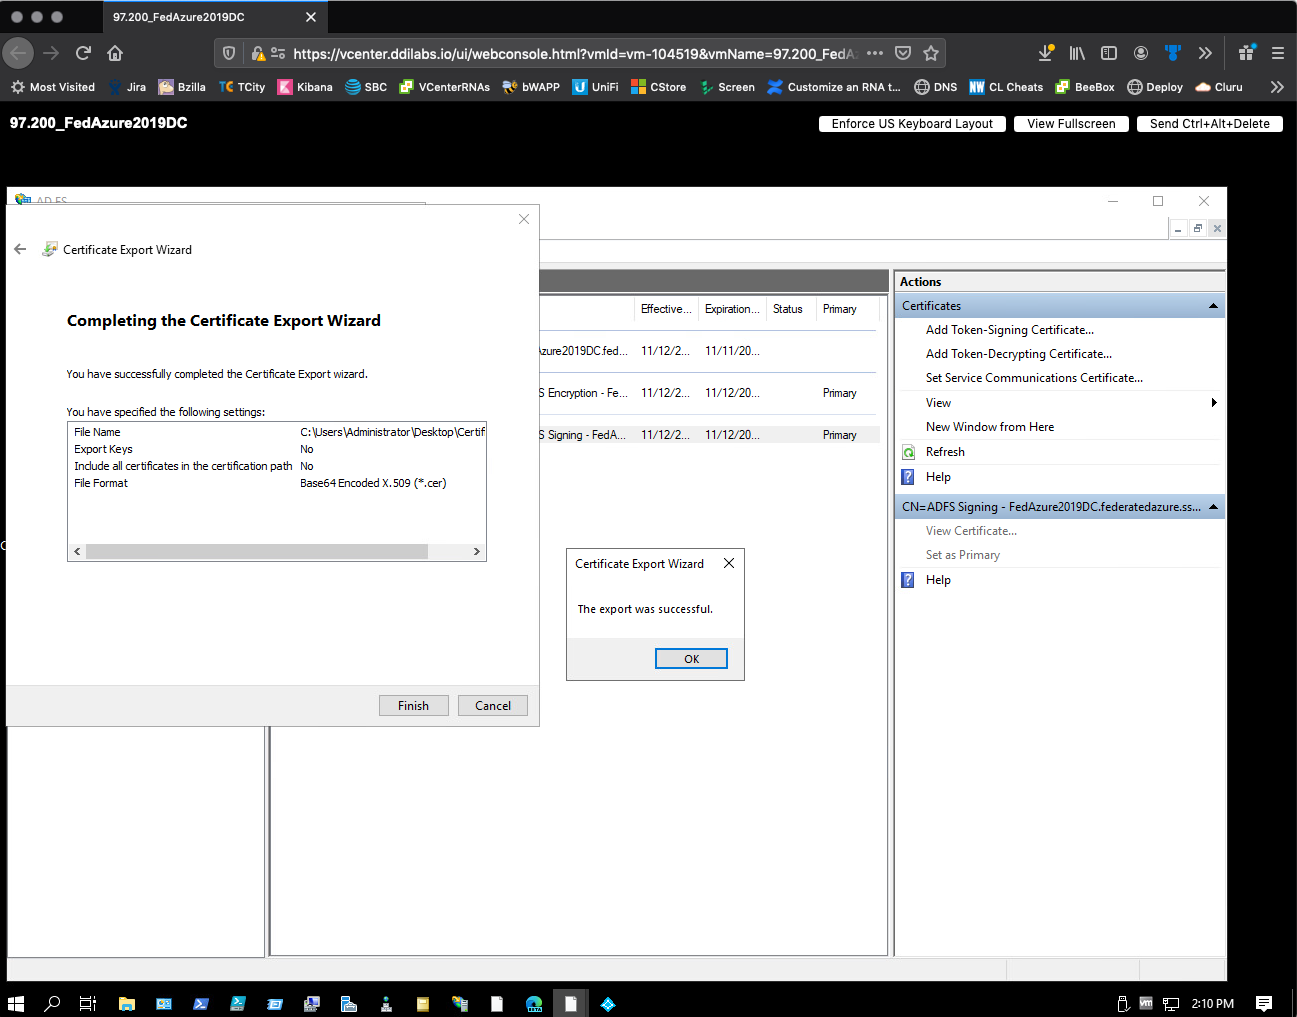
Back on the Save As dialog, verify the File name of the certificate, select Next, and then Finish. A dialog will appear, verifying the export was successful.
-
Send your exported certificate to Fortra Support.
Cache Add Relying Party Trust to AD FS Server
To add a relying party trust for Fortra VM to your AD FS server, do the following:
- Return to the Server Manager dashboard, and then select Tools > AD FS Management.
-
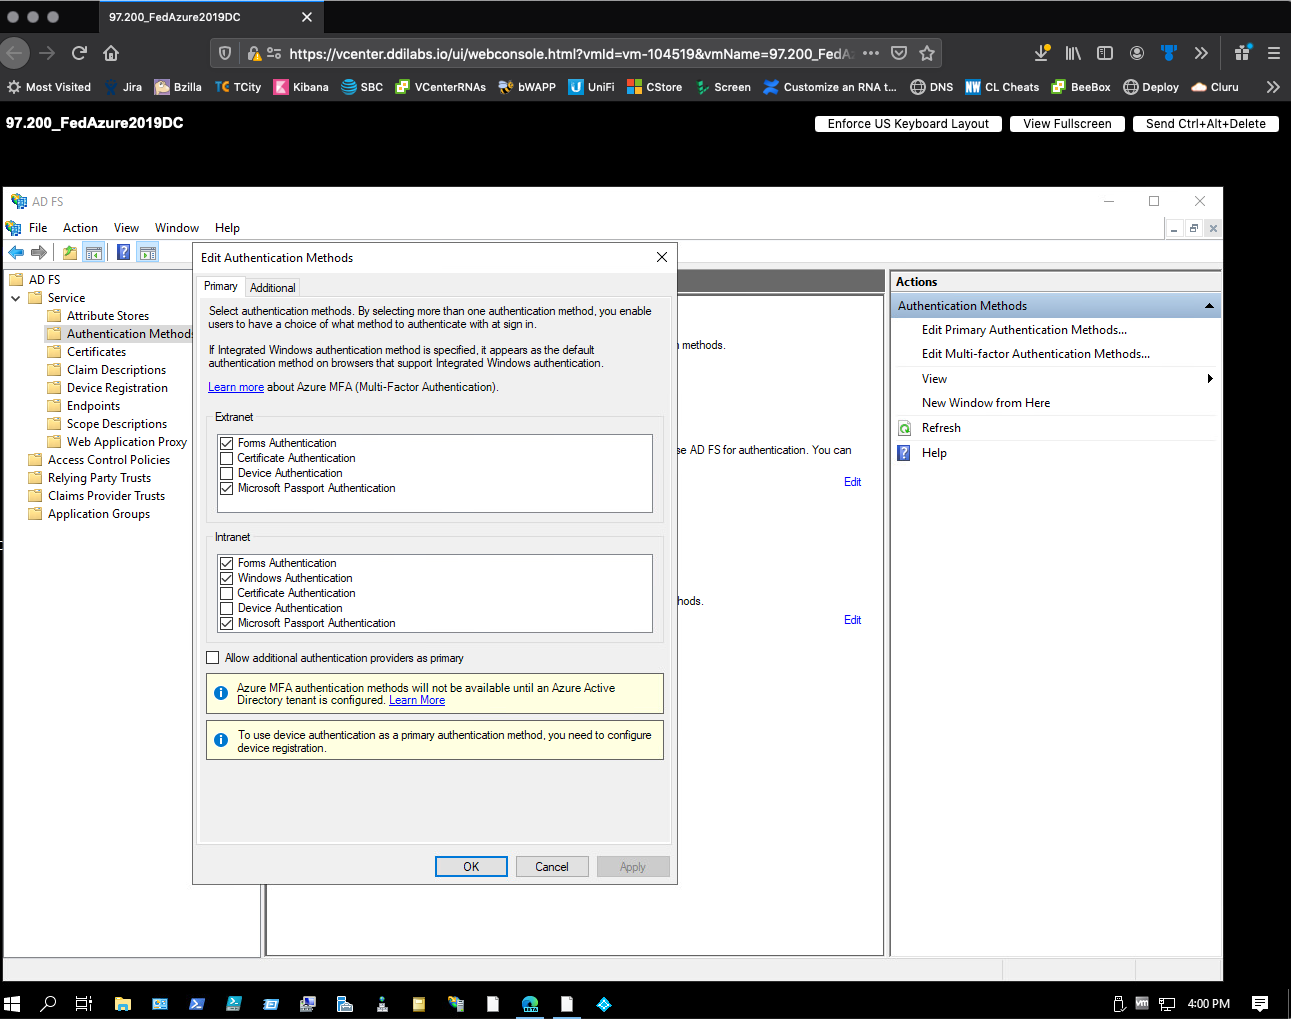
In the left pane, select AD FS > Authentication Policies.

-
Under Primary Authentication, select Edit for Authentication Methods.
-
Under the Edit Global Authentication Policy dialog's Primary tab, select theForms Authentication checkbox for Extranet and Intranet.
-
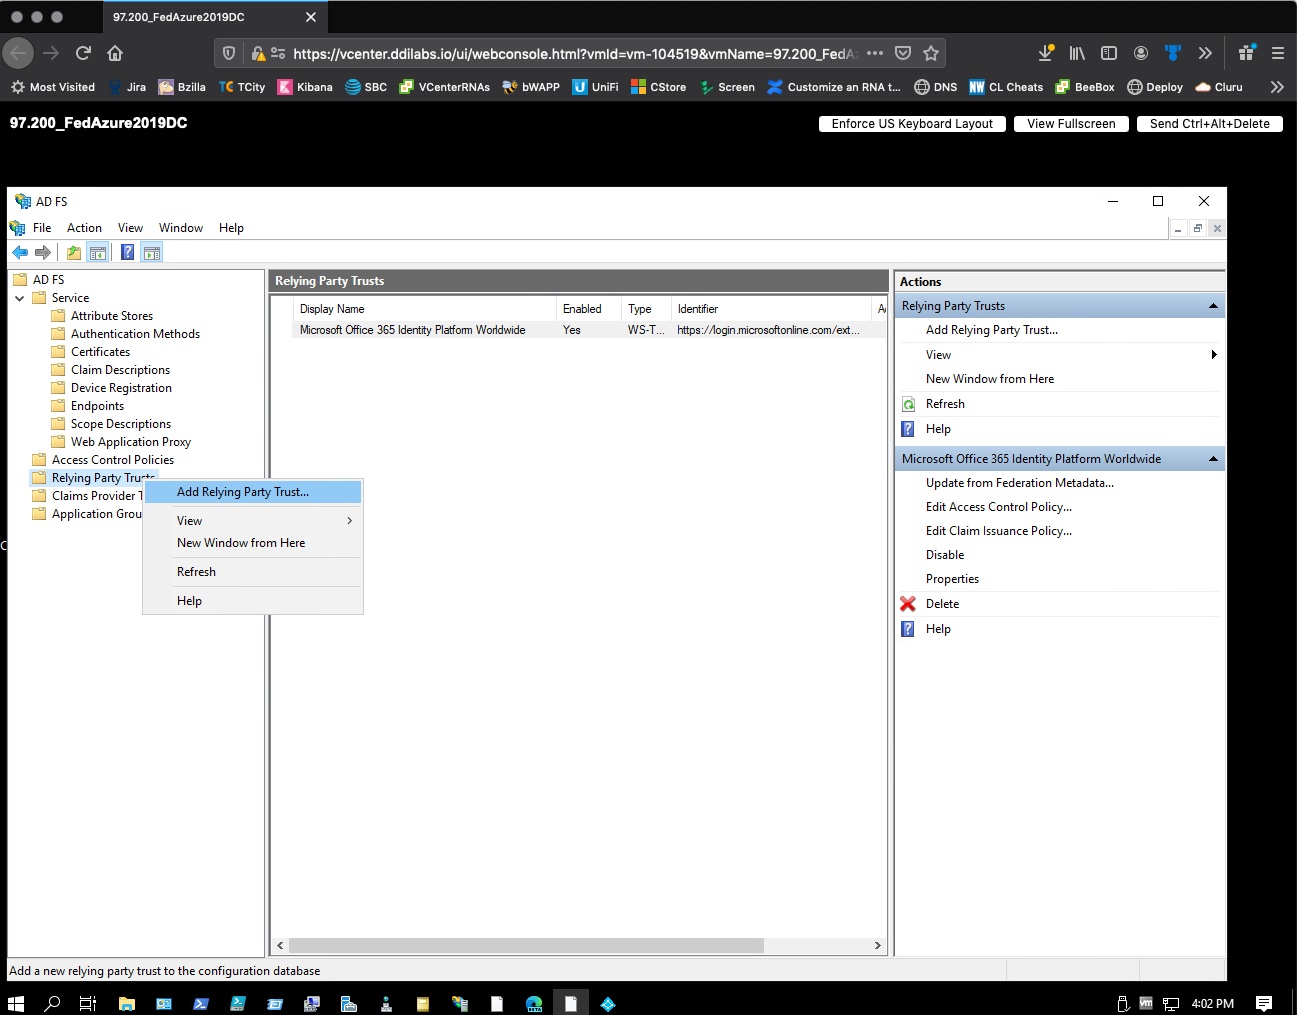
In the left pane, select AD FS > Trust Relationships.
-
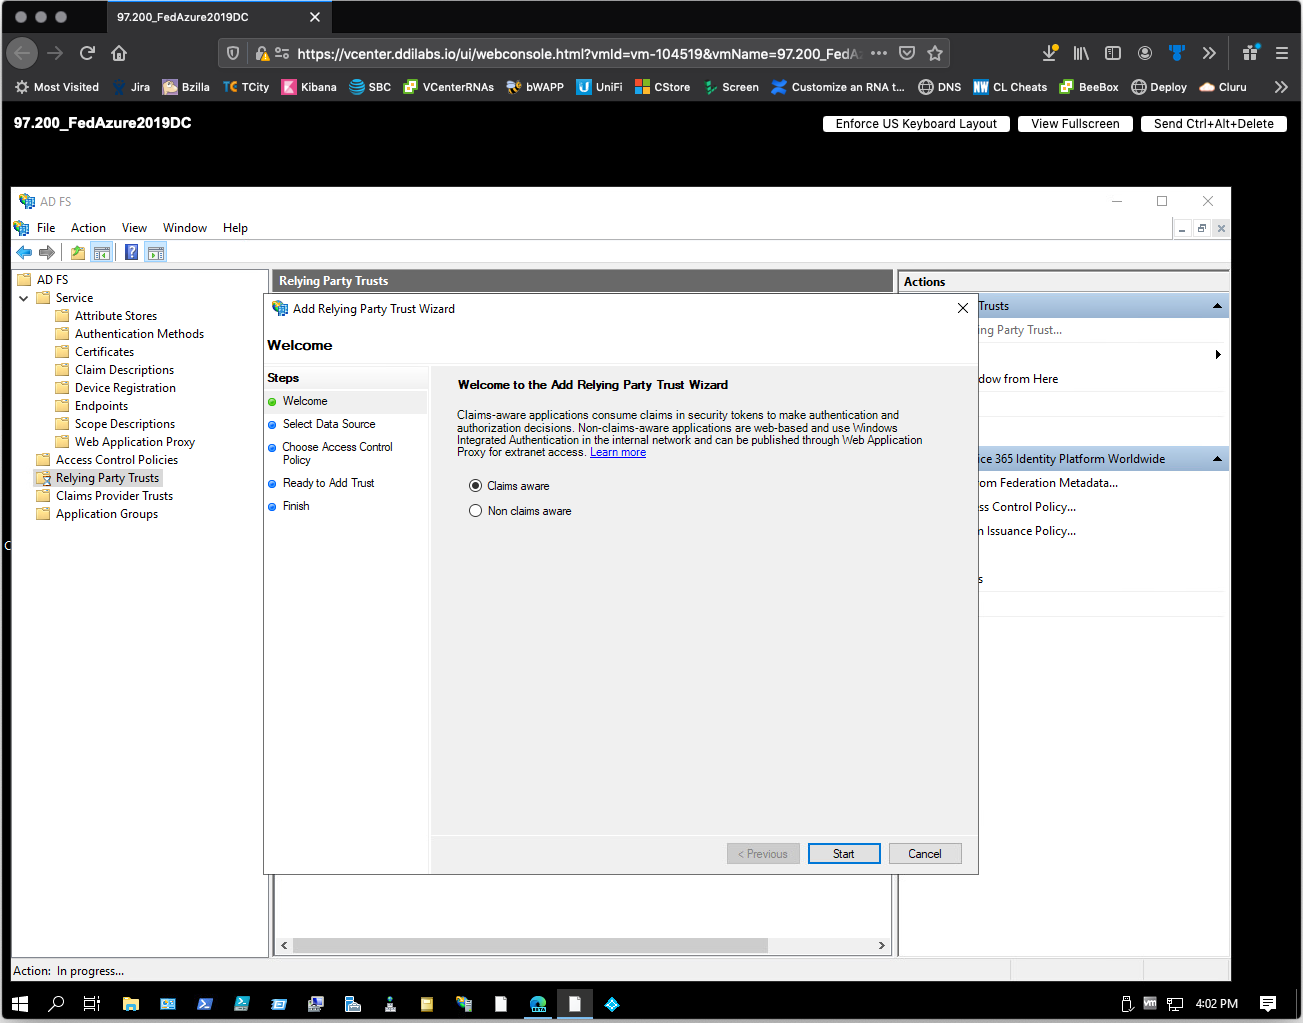
Right-click Relying Party Trusts, and then select Add Relying Party Trust.
-
In the Add Relying Party Trust Wizard, select Start.
-
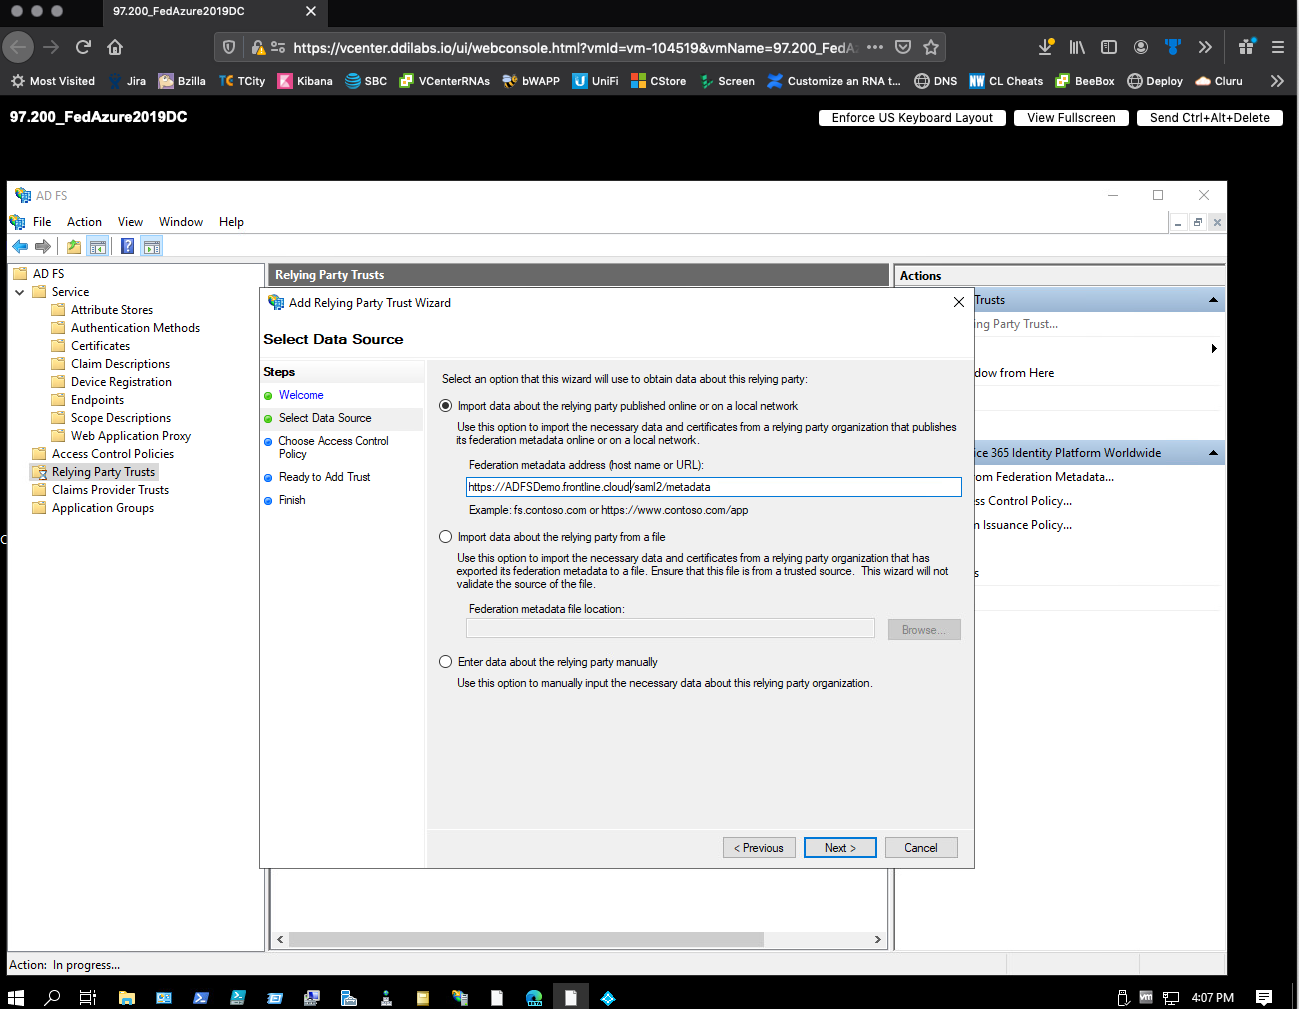
On the Select Data Source step, do the following:
- In the Add Relying Party Trust Wizard, select Start.
- On the Select Data Source step, perform the following:
- Select Import data about the relying party published online or on a local network.
- Enter the following in the Federation metadata address (host name or URL): box:
https://<your-company-name>.frontline.cloud/saml2/metadata - Select Next through the rest of the steps.
Select Close on the Finish step. A relying party trust for Fortra VM is added to your AD FS server.
Cache Add Claim Rules to Relying Party Trust for Email Address Identifier
The following instructions describe how to add claim rules to the relying party trust you created to establish email address as the primary identifier.
- Return to the Server Manager dashboard, and then select Tools > AD FS Management.
- In the left pane, select AD FS > Trust Relationships > Relying Party Trusts.
-
Right-click the trust you created (
https://<your-company-name>.frontline.cloud), and then select Edit Claim Rules.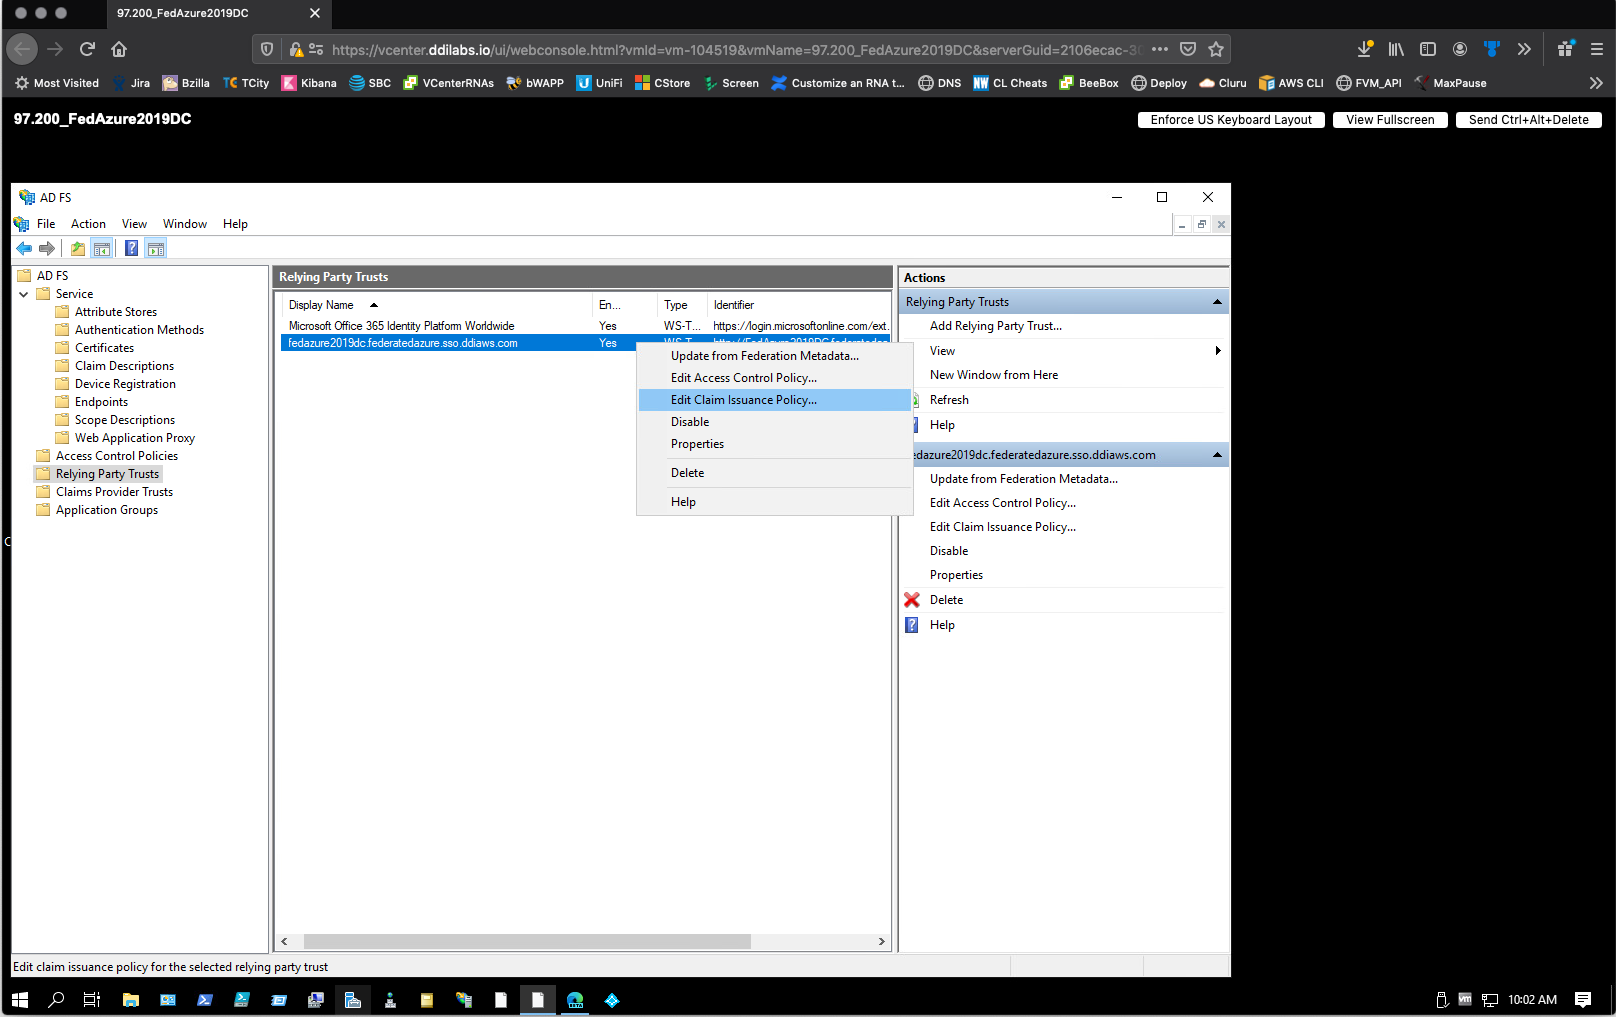
-
In the Edit Claim Rules dialog, select Add Rule to configure your first rule. The Add Transform Claim Rule Wizard opens.
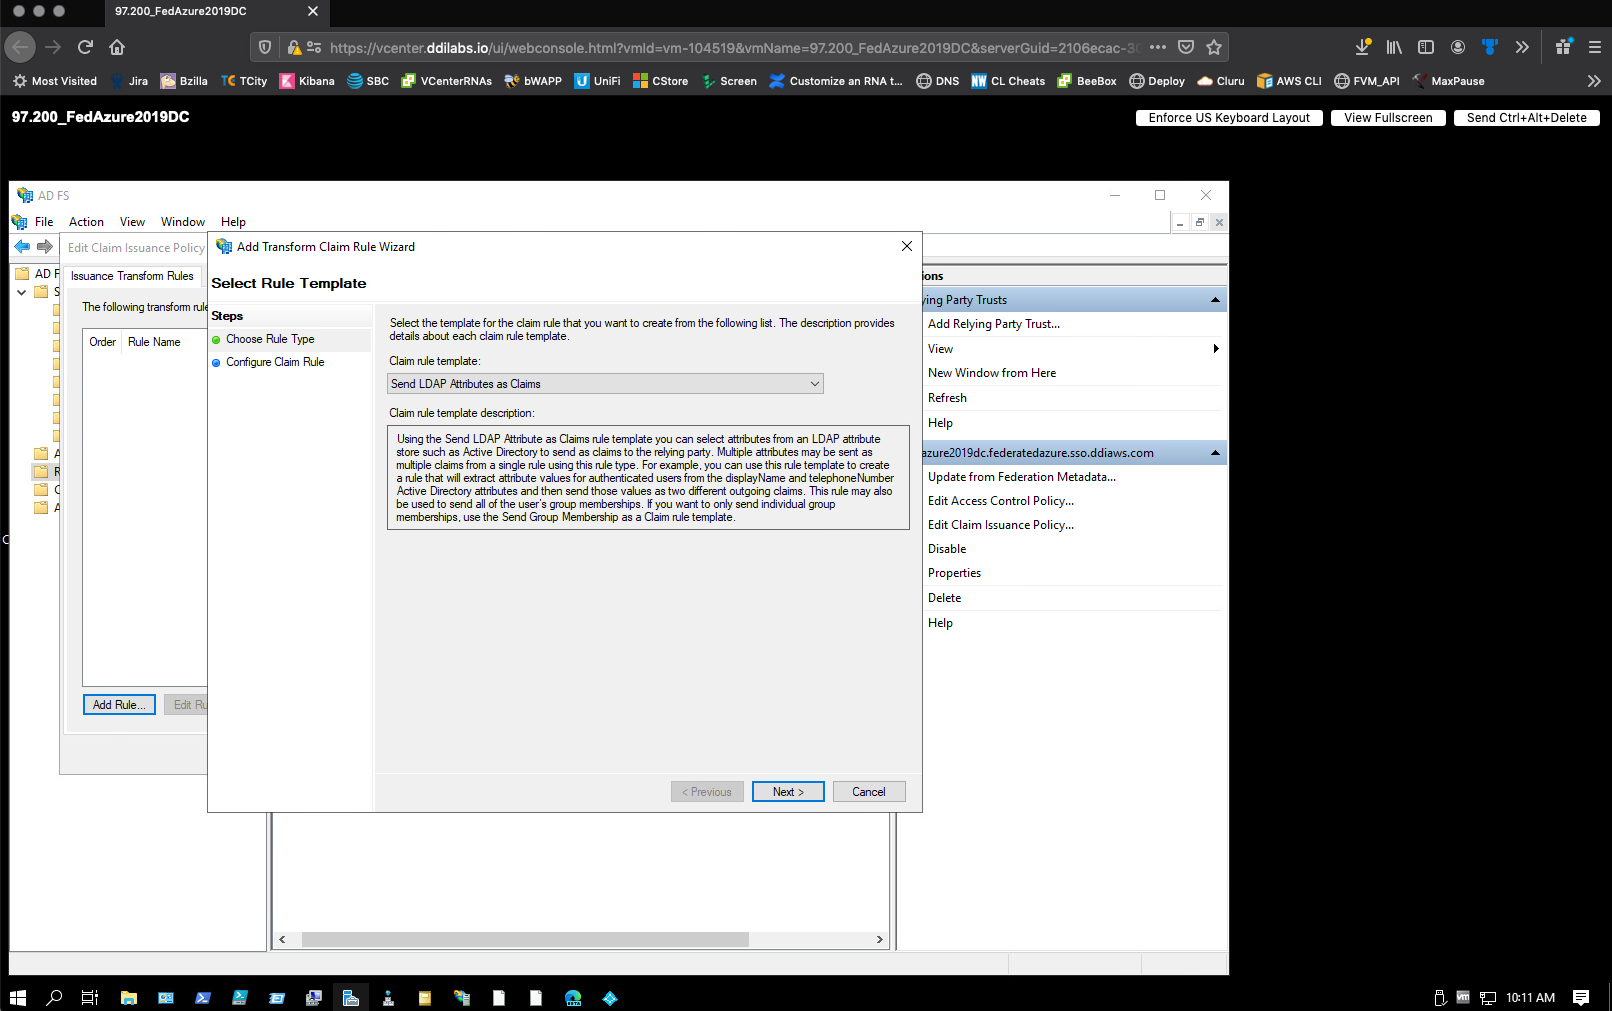
-
For the Choose Rule Type step, select Send LDAP Attributes as Claims as the template (should be the default choice).
-
Select Next.
-
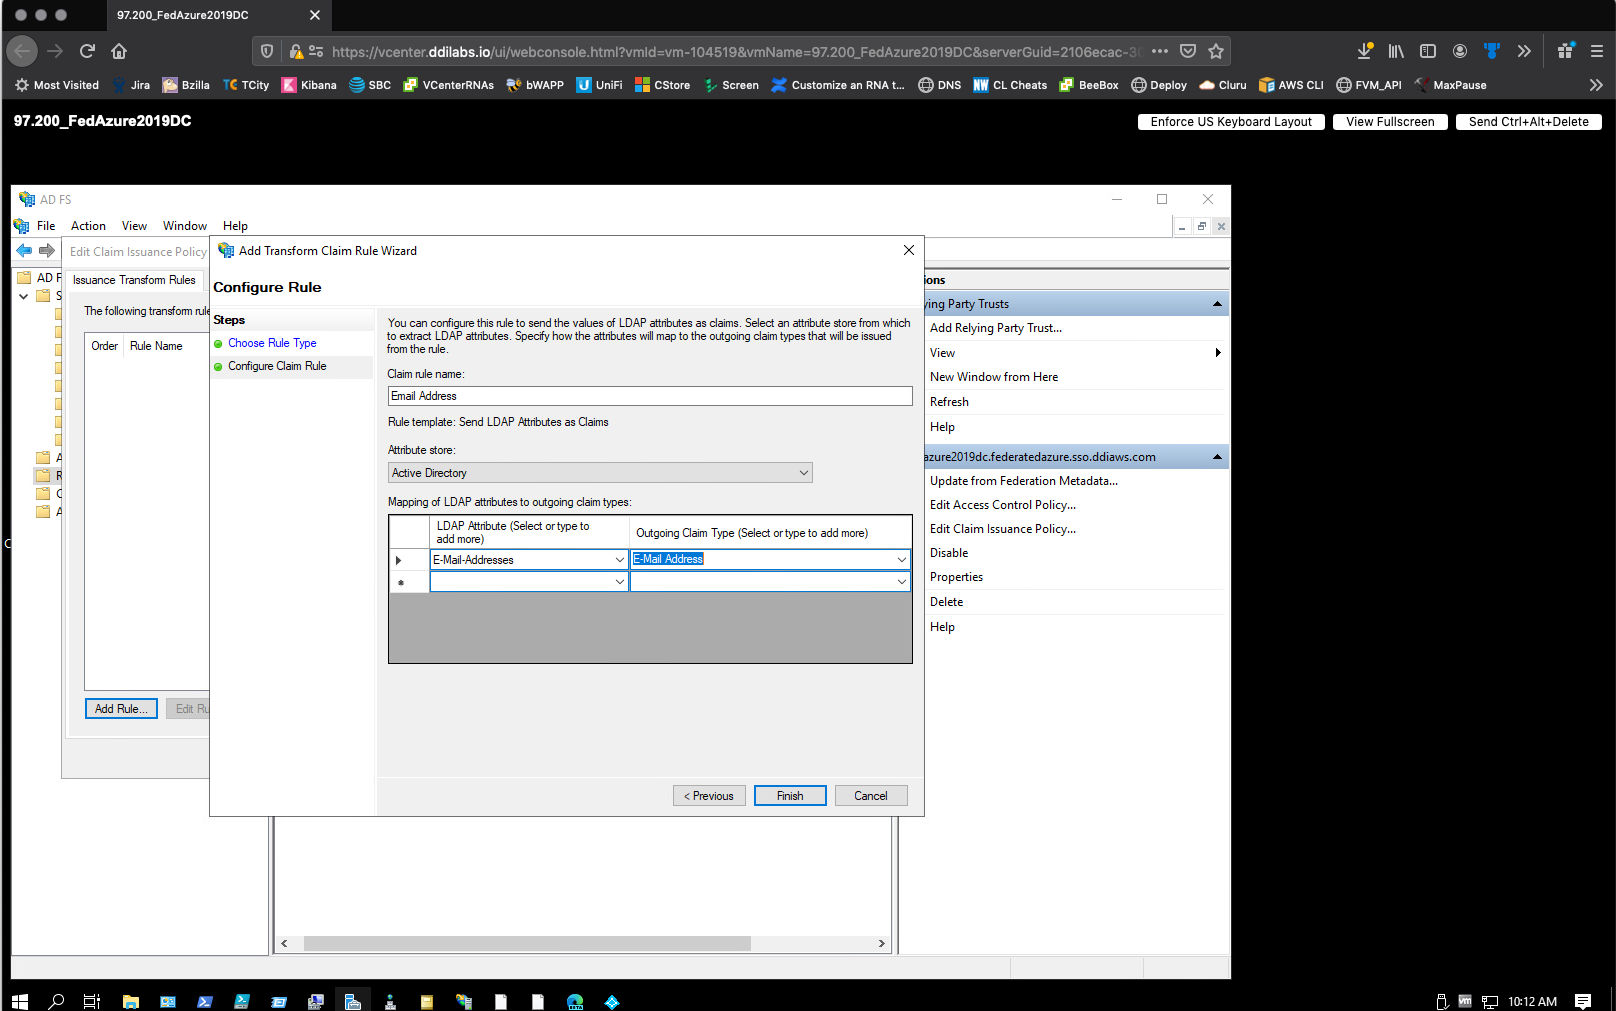
For the Configure Claim Rule step, do the following:
- In the Claim rule name box, enter Email Address.
- From the Attribute store list, select Active Directory.
-
From the LDAP Attribute list, select E-Mail-Addresses.
-
From the Outgoing Claim Type list, select E-Mail Address.
NOTE: For the LDAP Attribute and Outgoing Claim Type lists, select the down arrow icon three times to display the list of options. -
Click Finish. Your first claim rule is created.
-
Back on the Edit Claim Rules dialog, select Add Rule to configure your second rule. The Add Transform Claim Rule Wizard opens.
-
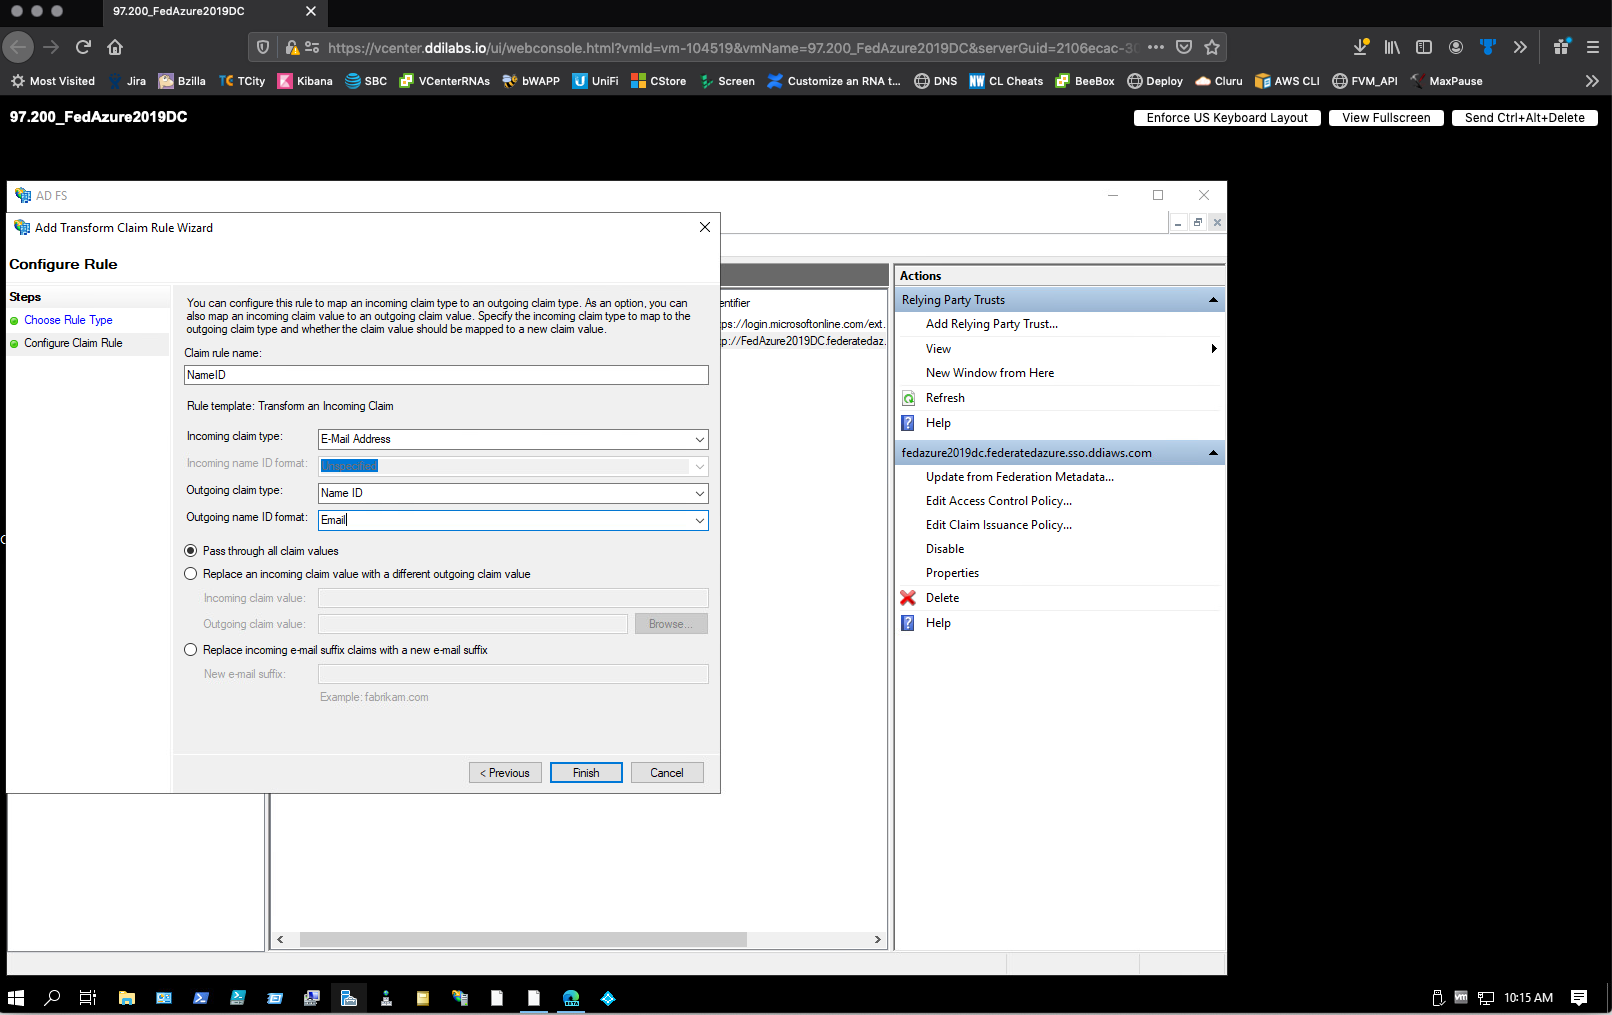
For the Choose Rule Type step, select Transform an Incoming Claim as the template.
-
Select Next.

-
For the Configure Claim Rule step, do the following:
- In the Claim rule name box, enter NameID box.
- From the Incoming claim type list, select E-Mail Address.
- From the Outgoing claim type list, select Name ID.
- From the Outgoing name ID format list, select Email.
- Select Pass through all claim values.
-
Select Finish to create your second claim rule.
Once you have completed these steps, AD FS should be configured to allow authentication to your company’s assigned Fortra VM sub-domain using Windows credentials.
To verify users can log in to Fortra VM with their AD email address and password, go to <your-company-name>.frontline.cloud and try your Windows credentials.