Authentication Integrations
Azure AD Single Sign-on
To integrate with Microsoft Azure AD for SSO using SAML2, do the following:
- Create an Azure AD Frontline Enterprise Application instance in your Azure AD tenant.
- Assign a user to the application (or disable User assignment required).
- Configure SSO in Fortra VM.
- Configure SSO for the Azure AD enterprise application.
Create an Azure AD Frontline Enterprise Application instance in your Azure AD tenant
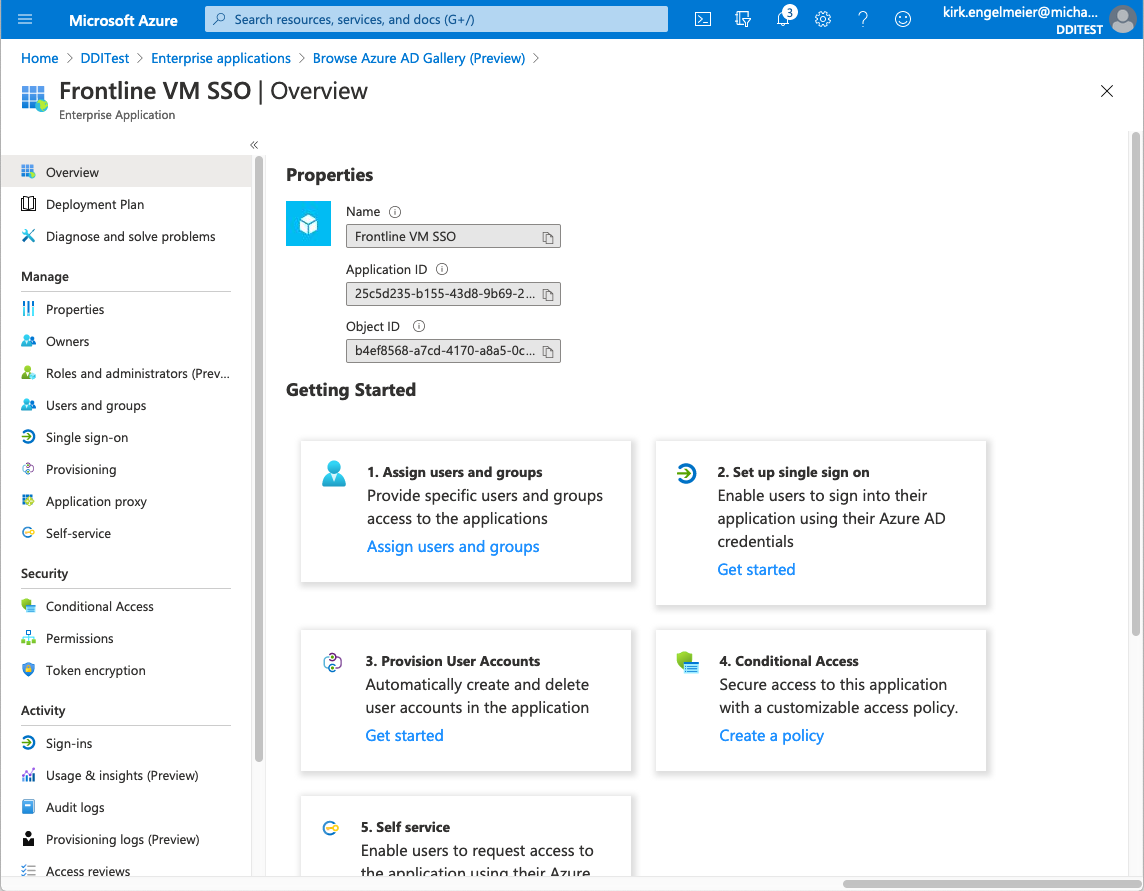
The following instructions describe how to create the Azure AD Enterprise application for use with Fortra VM SSO. You will need information from Azure AD to complete the Fortra VM configuration which will provide the required information needed to complete the Azure AD SSO configuration.
https://docs.microsoft.com/en-us/azure/active-directory/develop/quickstart-create-new-tenant
-
Select Enterprise applications from the left-hand, side menu. Use the Azure Search Bar if Enterprise Applications is not present on the menu.
-
Select New application.
-
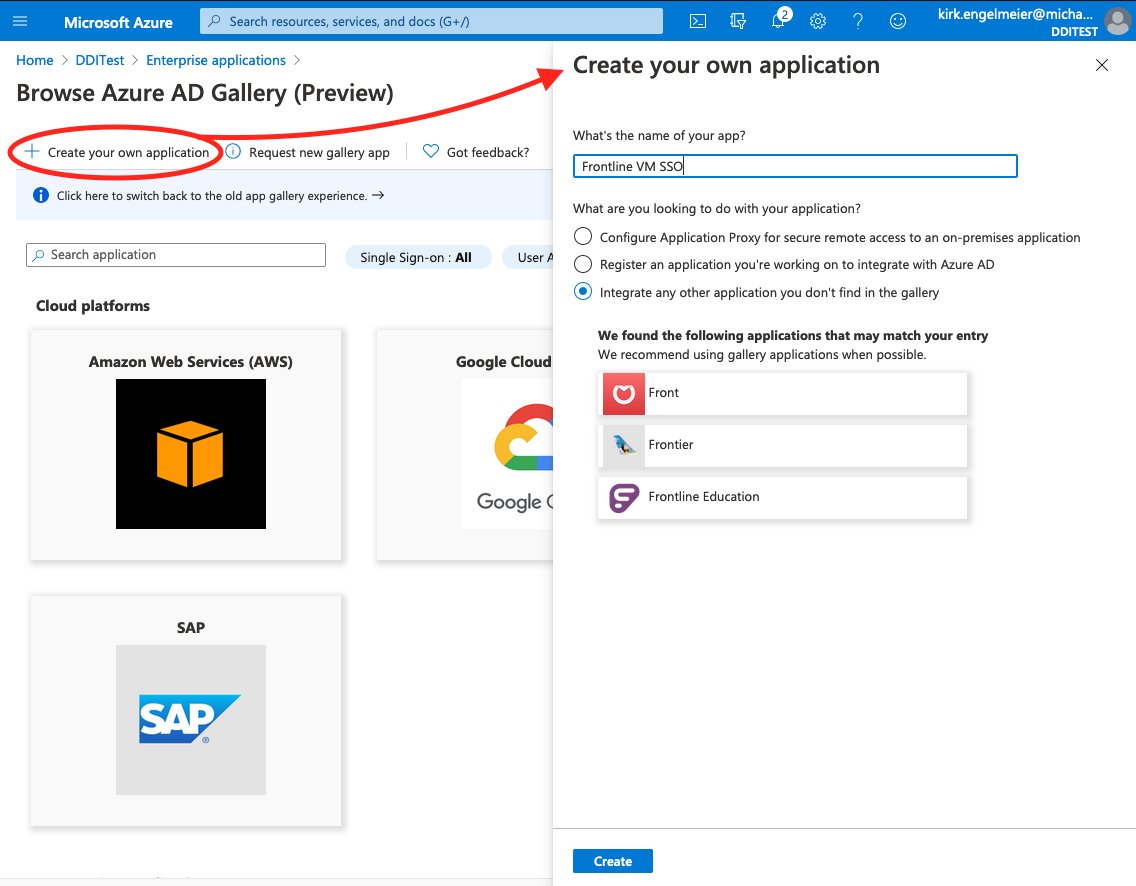
Select Create your own application.
-
On the Create your own application sheet, do the following:
- Enter a name of your choice, such as FVM SSO.
- Select Integrate any other application you don't find in the gallery.
- Select Create.
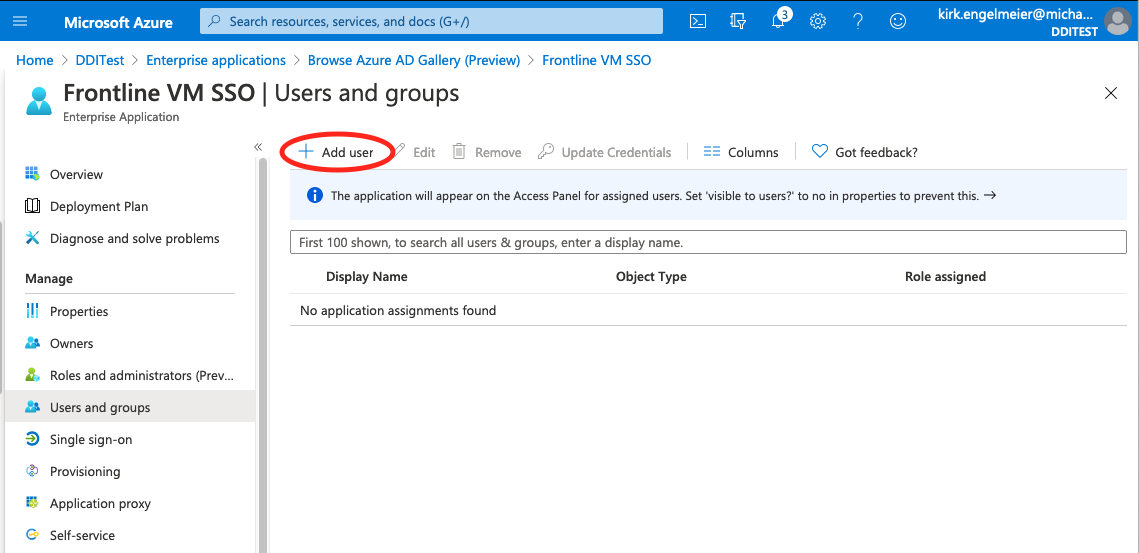
Assign users to the Enterprise application or disable ‘User assignment required’
-
Select Assign users and groups.
- Select Add user at the top of the page.
- On the Add Assignment page, select the Users list item.
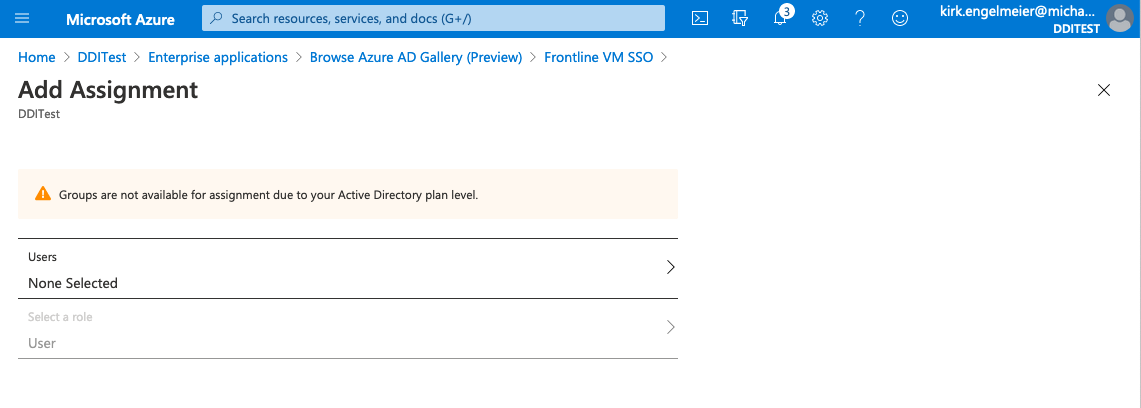
- On the Users sheet, select the users you want to add. Each user will need to have an activated Fortra VM user account with SSO enabled using the same email address used in Azure AD. Use the Select button to confirm your choice.
-
Select Assign.
In lieu of assigning users, you may also open the Properties page under Manage and set the toggle for User assignment required? to No. Using this option will allow users in your active directory to access the Fortra VM using SSO.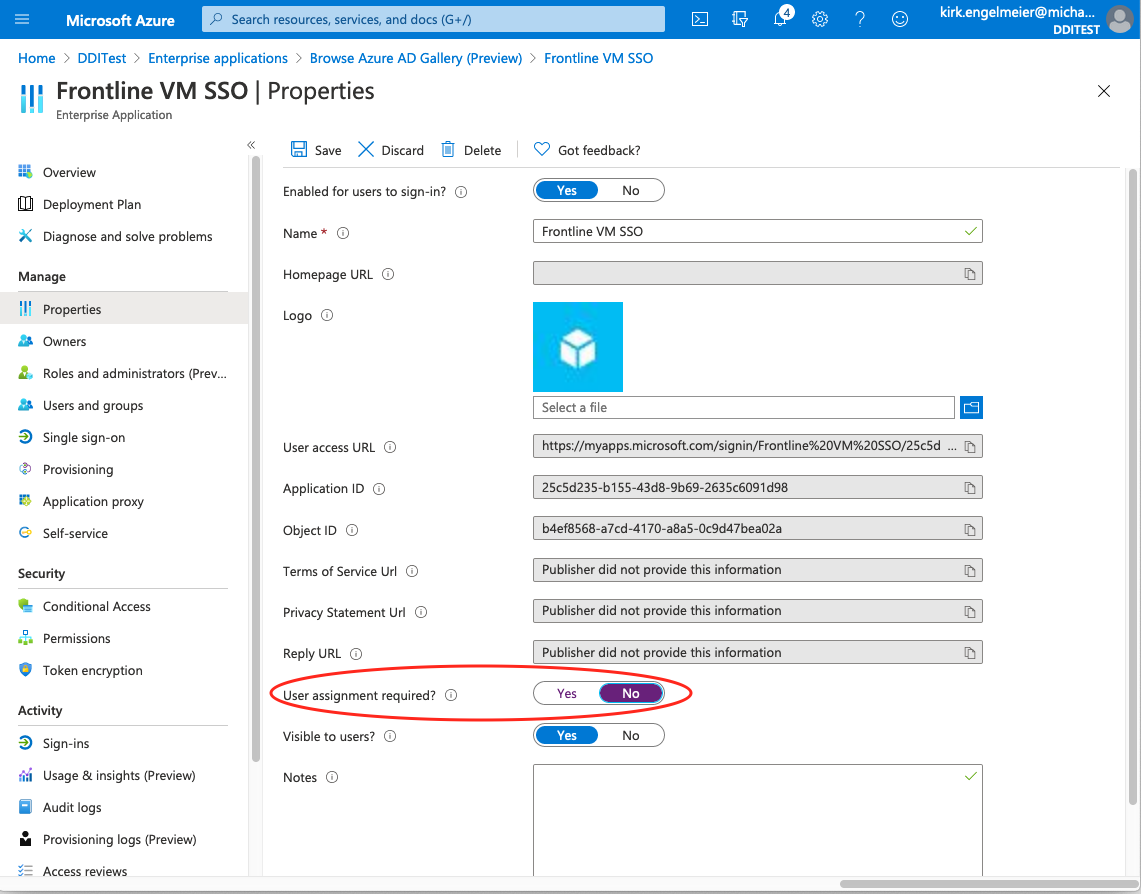
Configure SSO in Fortra VM
- Log in to Fortra VM.
- From the navigation menu, select Account > Settings.
-
Select the Single Sign-on tab.
NOTE: If you do not see the Single sign-on tab, then it has not been enabled. Contact Fortra Support for assistance. Fortra VM has a setting for each individual user account to enforce the use of SSO on the profile page. -
On the SSO Configuration page, do the following:
-
In the Name box, enter a name for the configuration (for example, companynameAzureADSSO.
-
In the Sub domain box, enter a sub-domain name, such as your company name with no spaces. This will generate the SSO URL and Metadata URL on the right side of the screen. You will need this information to create the Enterprise Application on your Azure AD tenant.
-
-
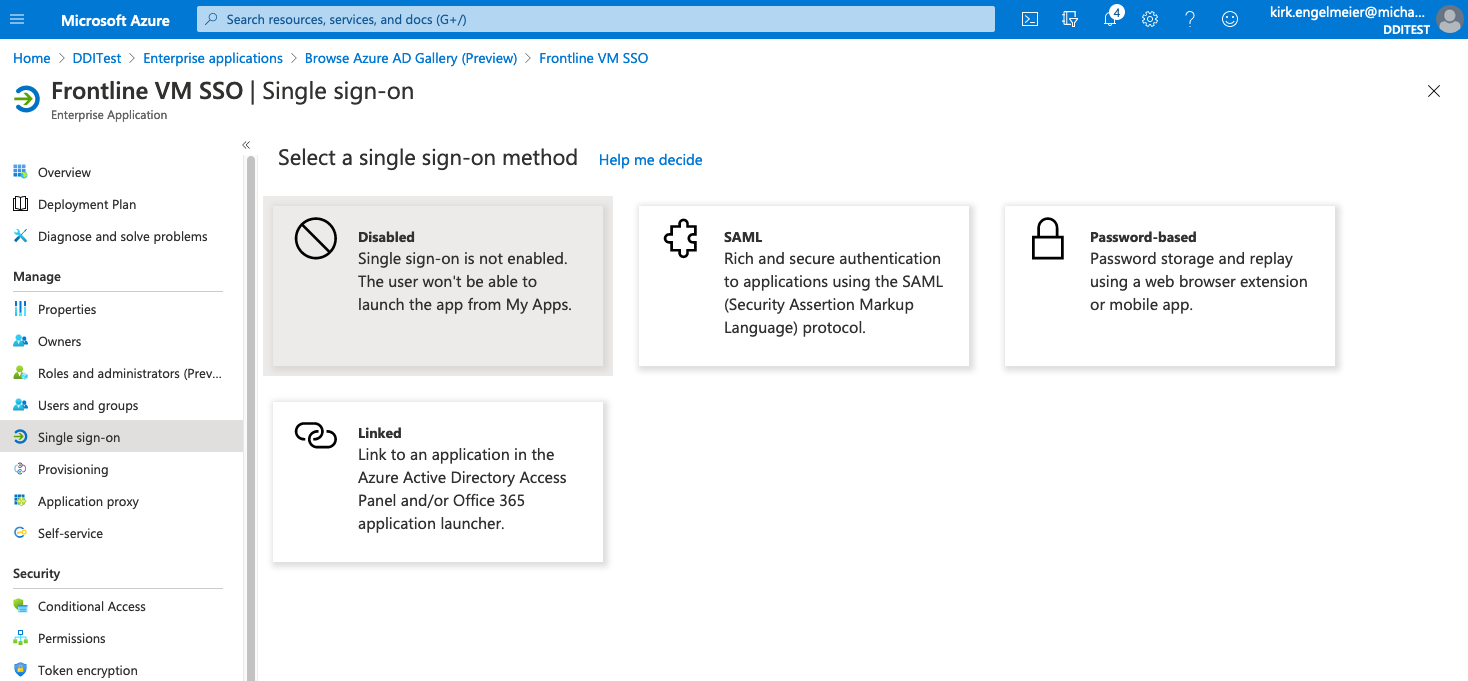
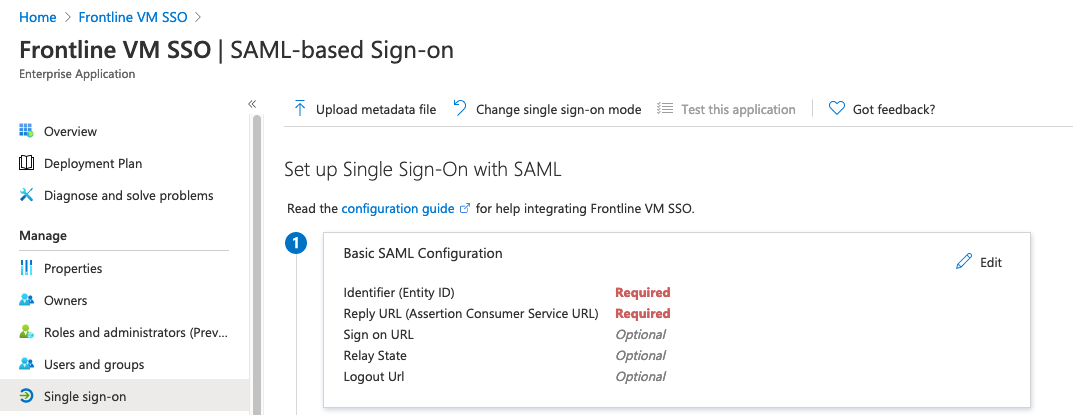
On the Azure AD window, select Single Sign-on under the Manage section of the left navigation menu.
-
Select SAML. The SAML-based Sign-on configuration page opens.
-
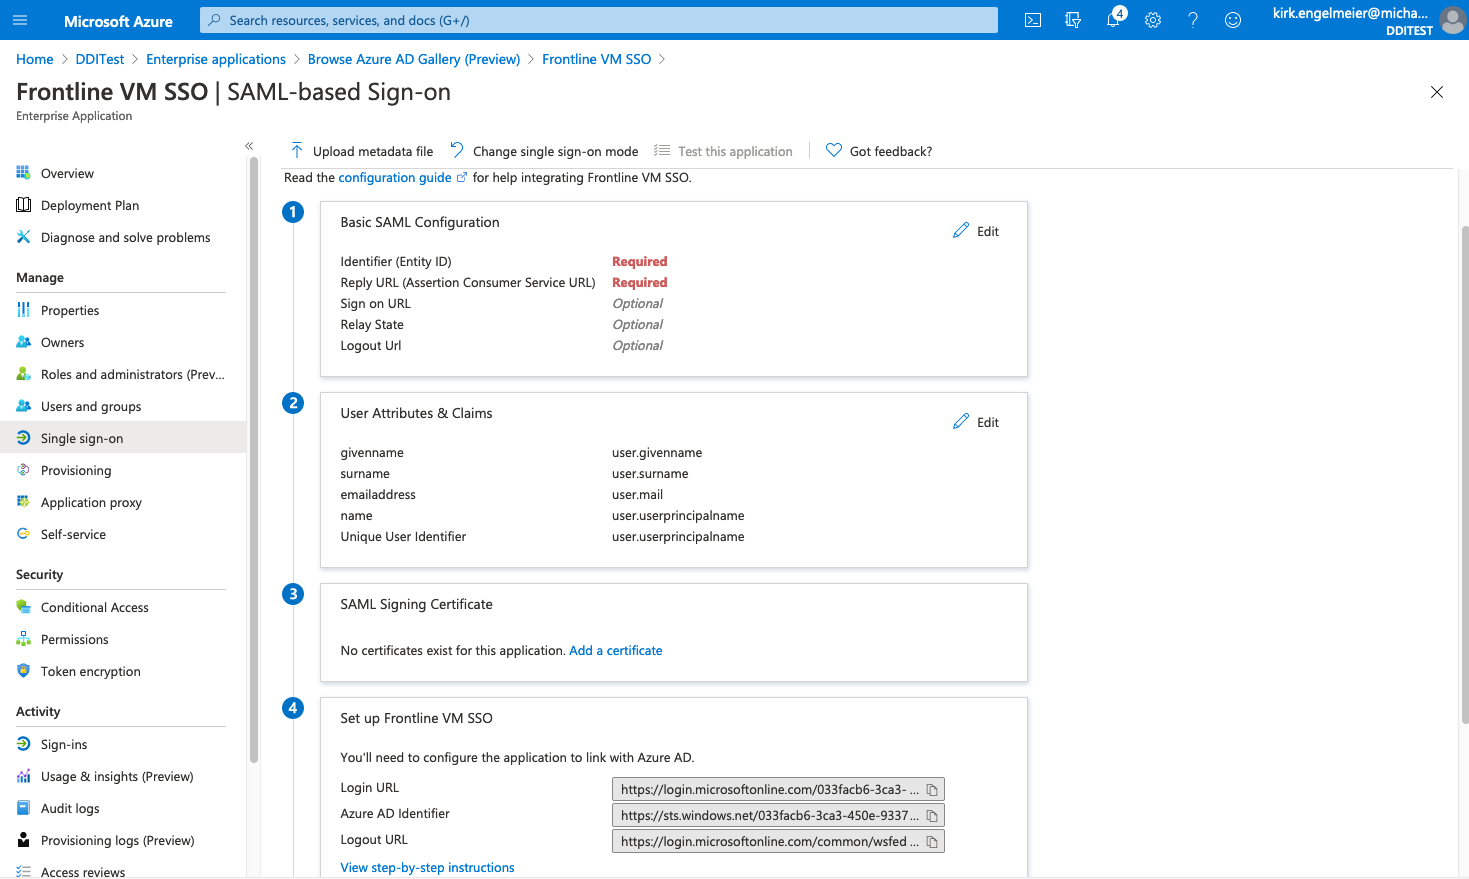
From Section 4 of the Azure AD window, copy the following values into the Fortra VM SSO configuration page:
-
Copy the Login URL from Azure and paste it into the Login URL field of Fortra VMFortra VM.
-
Copy the Azure AD Identifier and paste it into the Trust Identity URL field of Fortra VM.
-
Copy the Logout URL and paste it into the Logout URL field of Fortra VM.
-
-
In Section 3 of the Azure AD window, select Add a certificate.

-
On the SAML Signing Certificate sheet, select New Certificate.
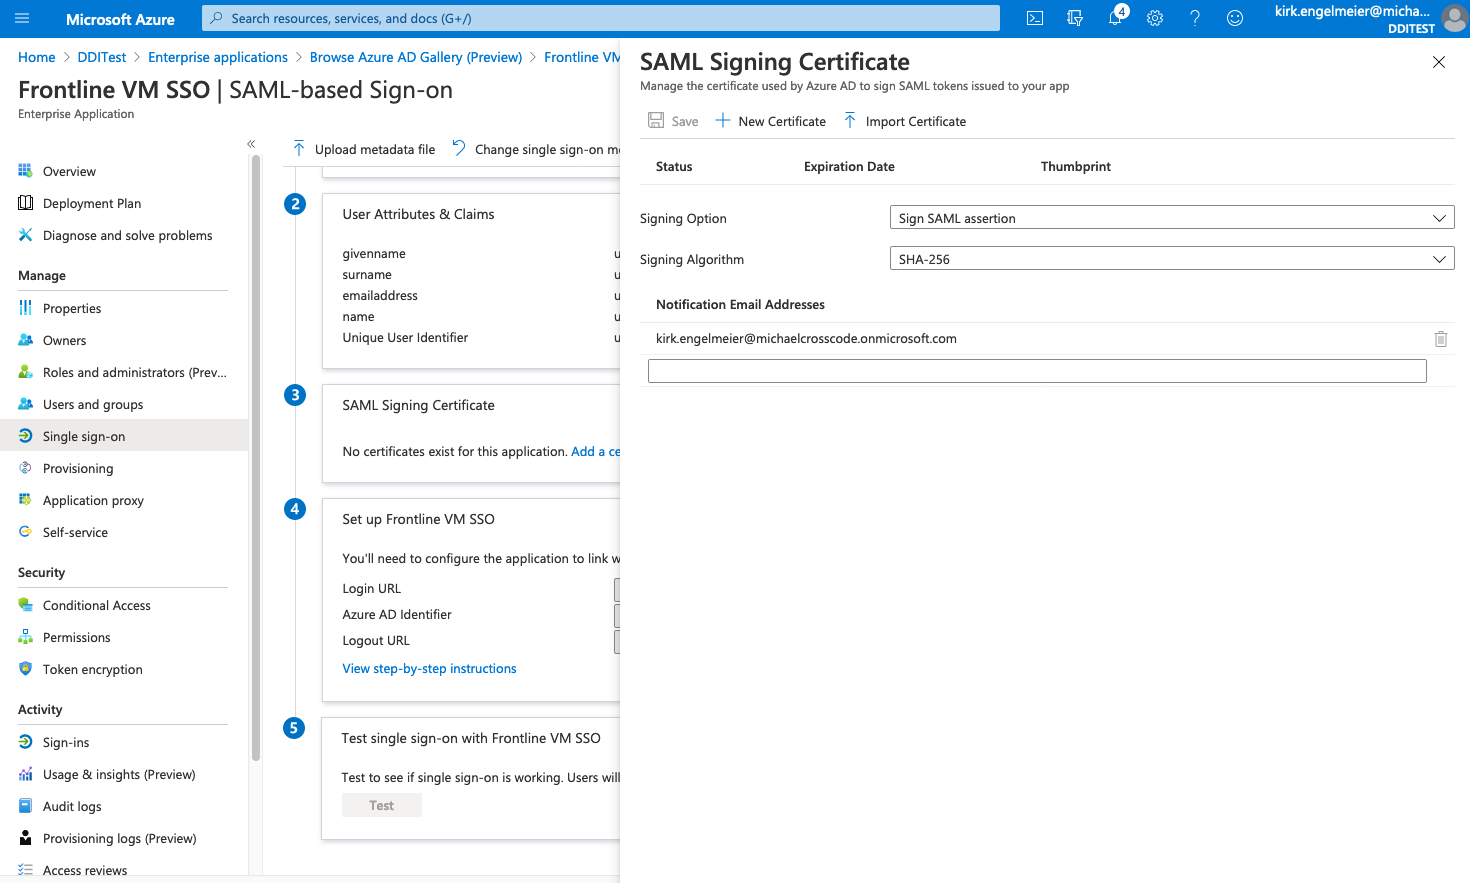
- For Signing Option, select Sign SAML assertion.
- For Signing Algorithm, select SHA-256.
- For Notification Email Addresses add the appropriate user emails for your organization.
- Select New Certificate at the top of the form. If the Save button is already enabled, this step may be unnecessary.
- Select Save at the top of the page.
-
Close the SAML Signing Certificate sheet.
NOTE: It may be necessary to refresh the page to view the new certificate information on the Set up Single Sign-on with SAML page.
-
From Section 3, copy the X.509 certificate value into Fortra VM (below is just one of several methods).
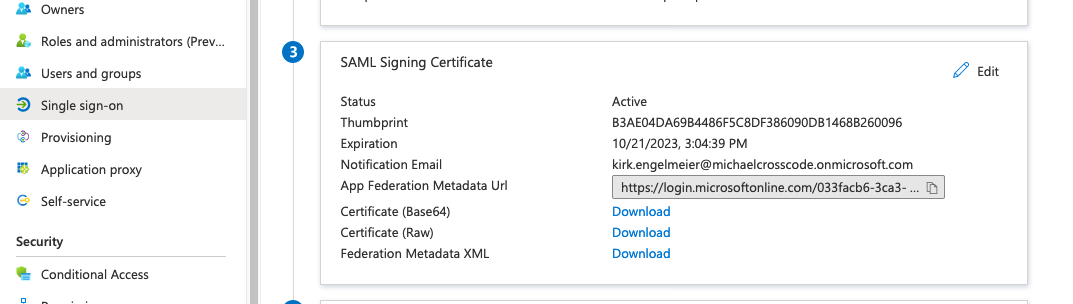
- Elect to download the Federated Metadata XML.
This can be downloaded and opened in an editor or viewed in the browser, copying the X.509-Certificate is the objective.
- Regardless how the certificate is copied to the clipboard, paste it into the Certificate field of Fortra VM.
Only include the value of the certificate, not the raw XML encasing it.
- Elect to download the Federated Metadata XML.
-
Select Save at the top of the Fortra VM page. If it is not enabled, verify all fields are complete and the certificate value is correct.
Configure SSO for the Azure AD Enterprise Application
-
From the Fortra VM SSO configuration page, copy the metadata URL and then open it in a browser.
-
Save the resulting page as an XML file on the local machine.
-
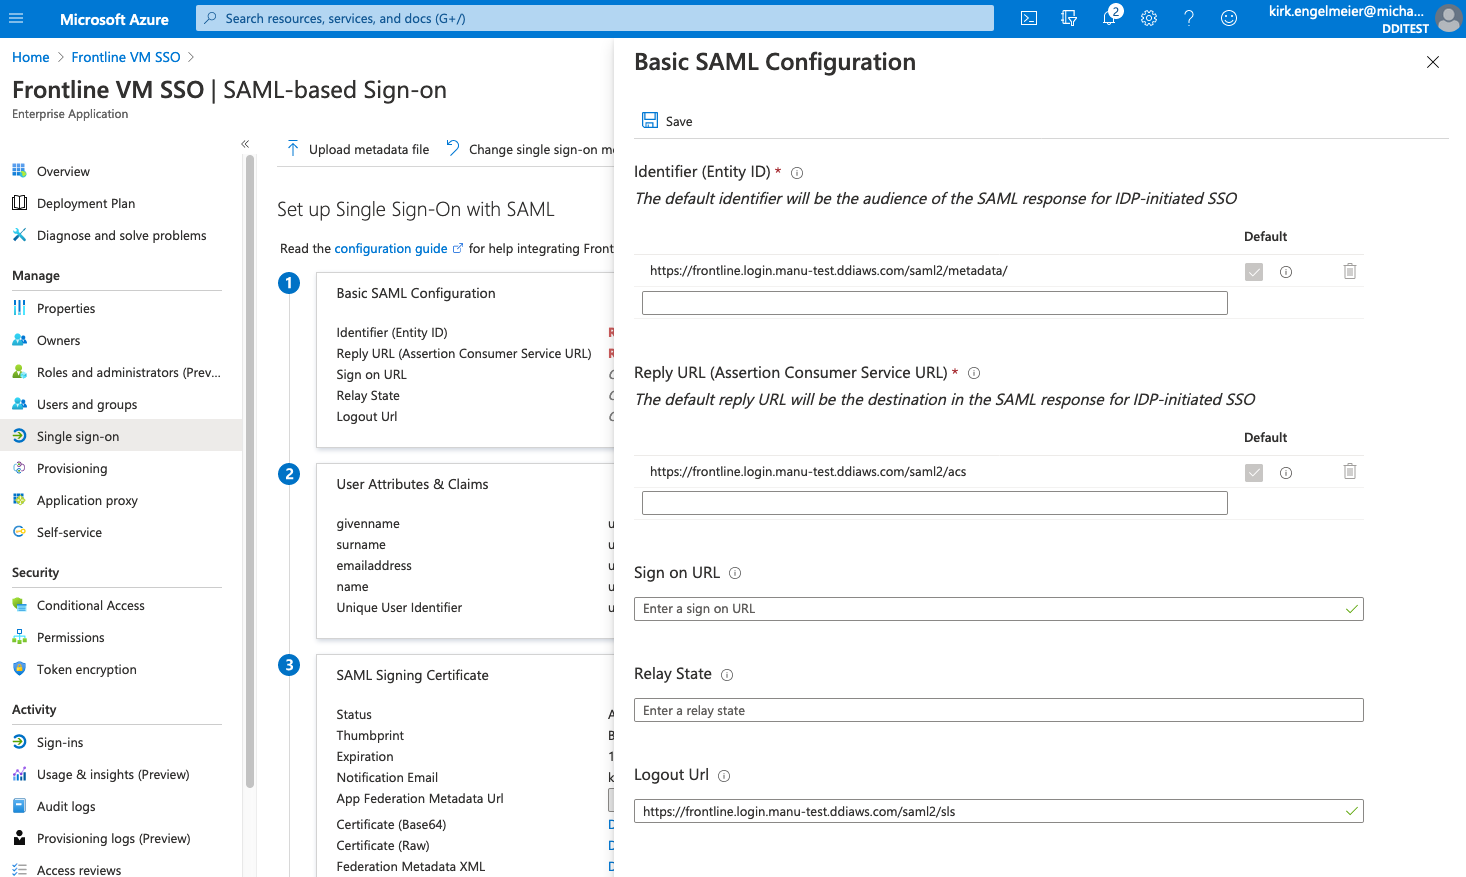
At the top of the Azure AD Set up Single Sign-on with SAML page, select Upload metadata file.
-
Select the XML file you saved in step 2.
-
Select Add.
-
The Basic SAML Configuration sheet will open.
-
From the Fortra VM Single Sign-on Configuration page, copy the value for SSO URL and paste it into the Sign on URL box of the Basic SAML Configuration sheet.
-
Select Save at the top of the Basic SAML Configuration sheet.
-
Close the Basic SAML Configuration sheet.
-
An option to Test Single Sign-on with Fortra VM SSO appears. Select No, I'll test later.
-
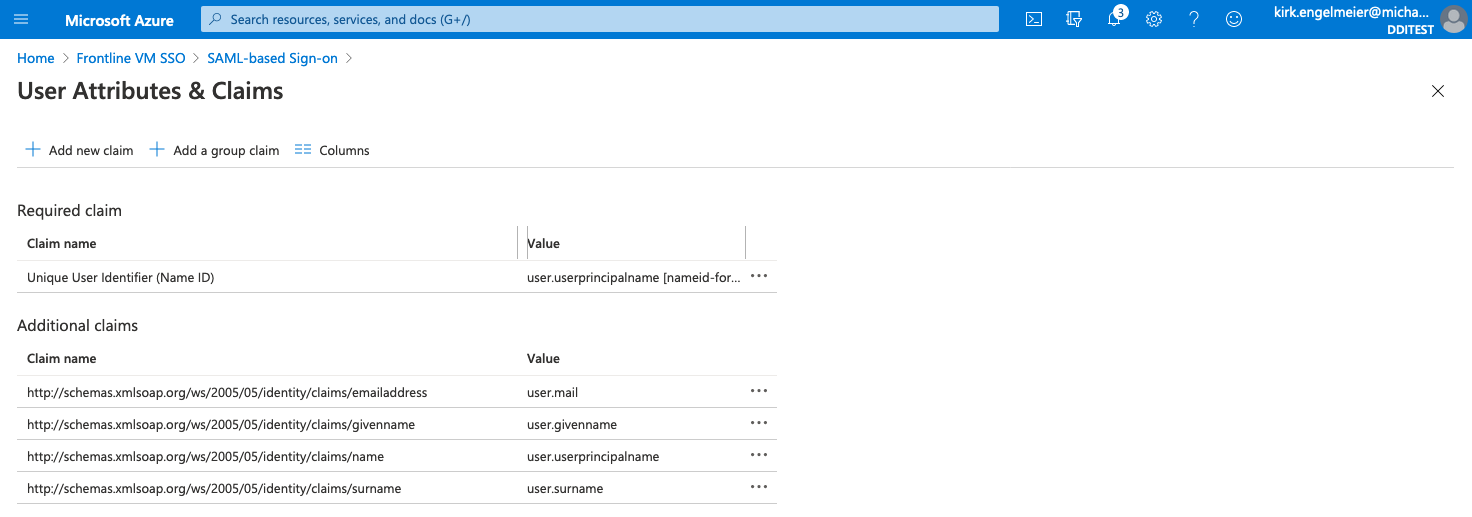
Add a custom claim to Section 2 (User Attributes & Claims) of the Azure AD Set up Single Sign-on with SAML page. This is to transform user supplied emails to lower case as upper case emails will cause authentication to fail.

-
In Section 2, select Edit.
-
On the User Attributes & Claims page, select Add new claim.
-
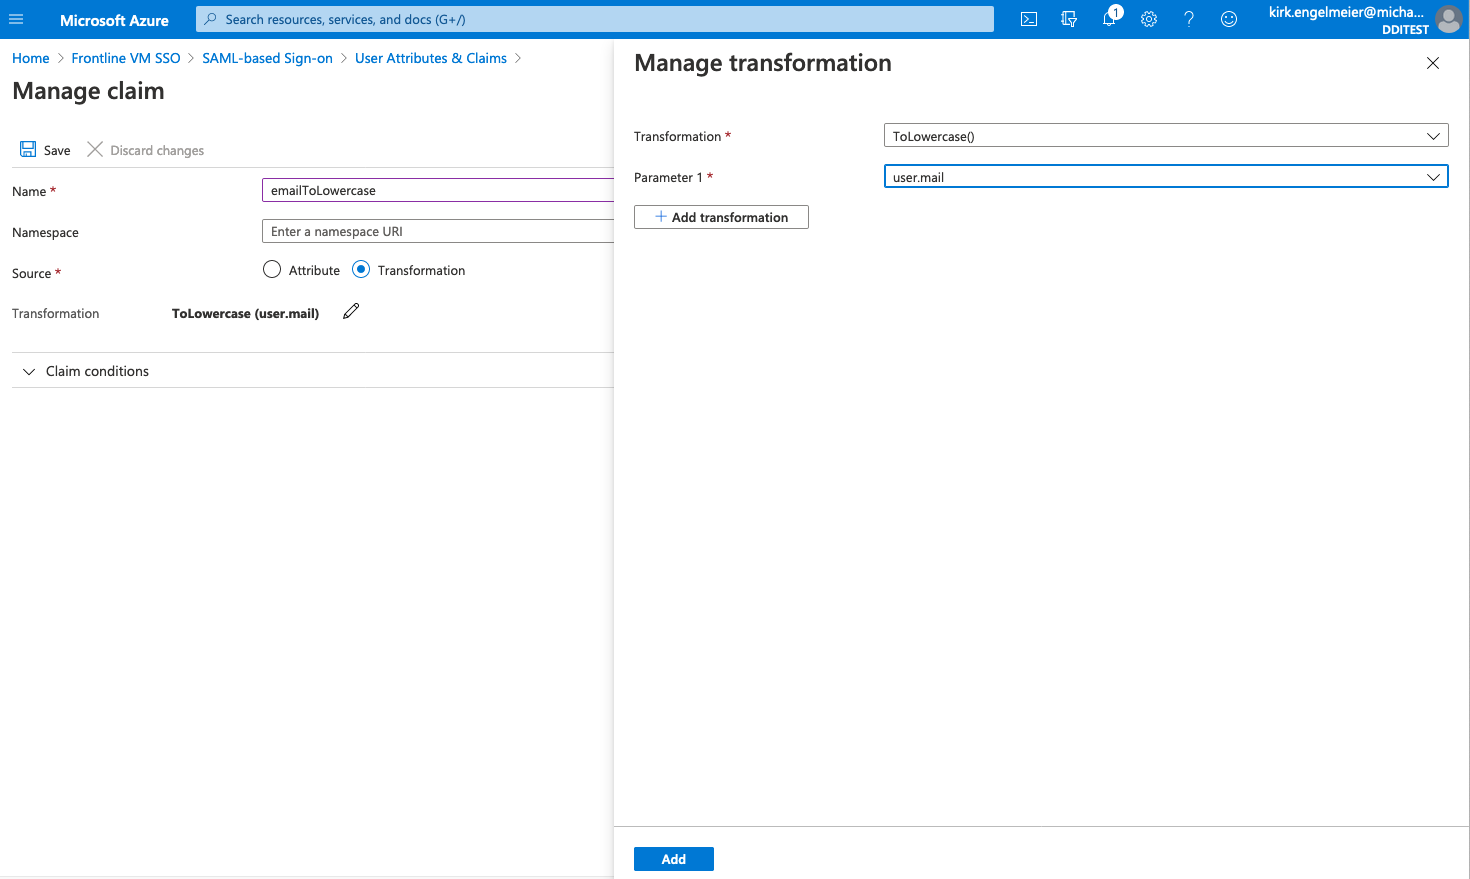
On the Manage claim page, do the following:
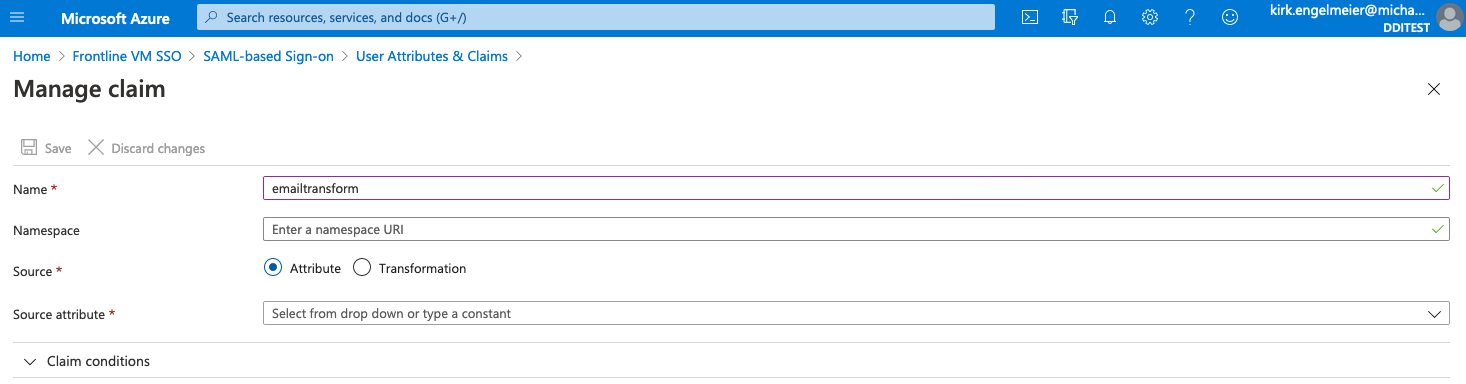
- For Name, enter a unique value (for example, emailToLowercase).
- For Namespace, leave the box empty.
- For Source, select Transformation. The Manage Transform sheet will open.
- On the Manage Transform sheet, select ToLowercase() for Transformation
- On the Manage Transform sheet, select user.mail for Parameter 1.
- Select Add at the bottom of the page.
- Select Save on the Manage claim page.
-
Close the User Attributes & Claims page.
For additional information regarding custom claims for SAML:
https://docs.microsoft.com/en-us/azure/active-directory/develop/active-directory-saml-claims-customization
For additional information regarding Azure AD and SSO:
https://docs.microsoft.com/en-us/azure/active-directory/manage-apps/add-application-portal-setup-sso