Forescout Integration
Forescout is a unified device visibility and control platform for converging IT and OT networks. It allows organizations to gain total situational awareness of all devices in their interconnected environment and coordinate actions to mitigate both their cyber and operational risk. The Forescout platform shows what is on your extended enterprise network with 100% device visibility. This visibility enables an accurate device inventory, continuous compliance enforcement, policy-based access control and rapid response to security incidents. Click here for more information.
To integrate with Forescout, perform the following (see below for detailed instructions):
- Generate a Fortra VM API Key
- Insert Key into CounterACT
- Change Severity Level Detection
- Import Data Exchange (DEX) Web Service Requests
- Import Policies into CounterACT
Generate a Fortra VM API Key
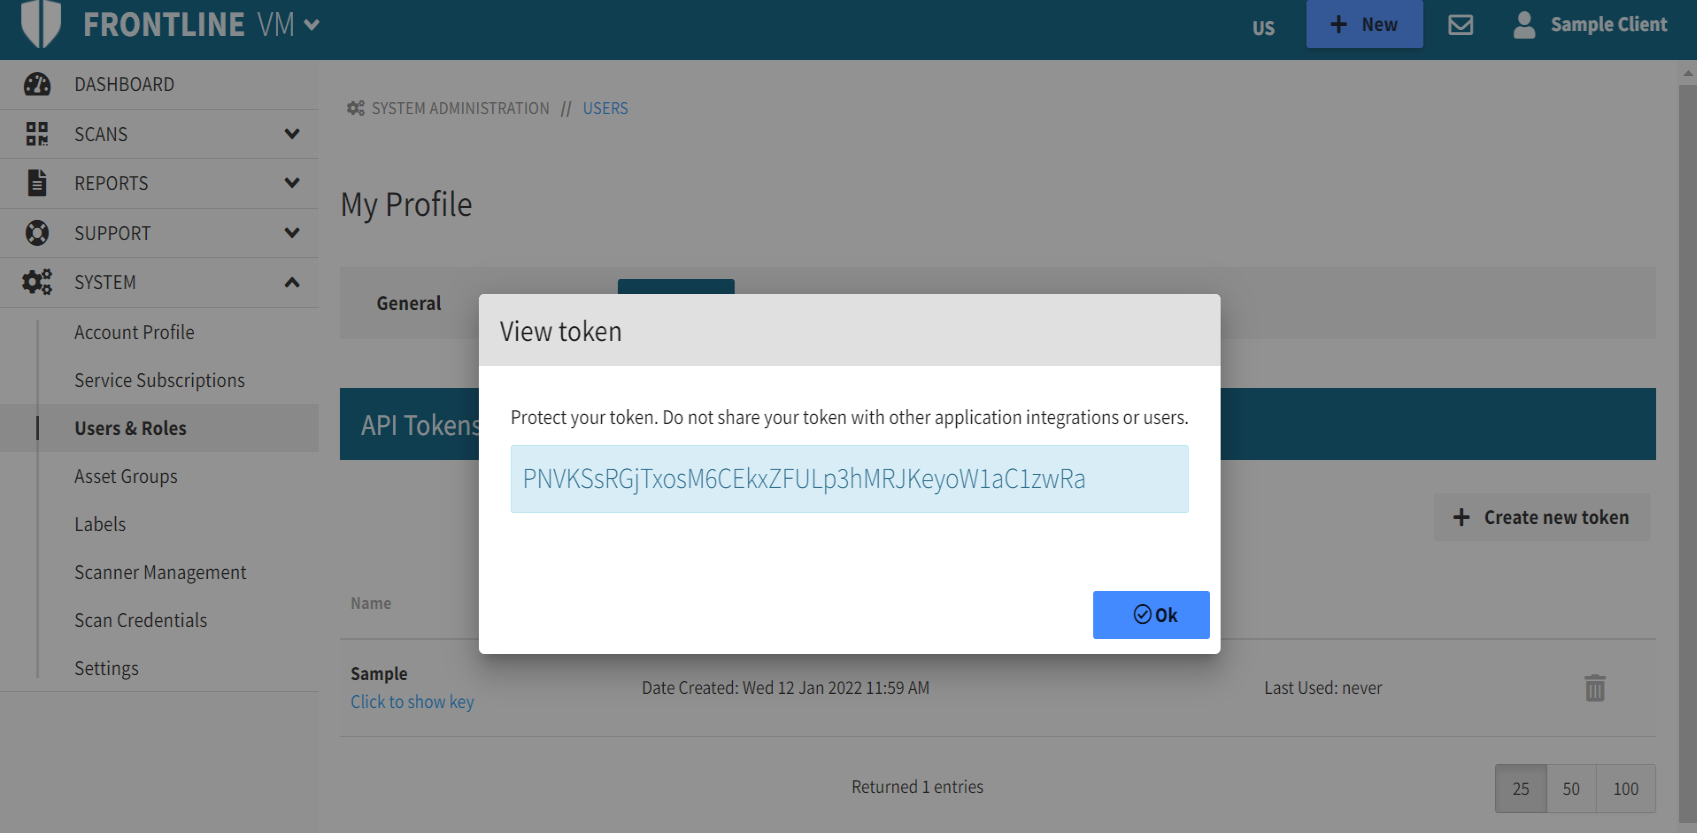
-
Log in to Fortra VM.
-
In the site heater, select your name and choose My profile.
-
On the API Tokens tab, select Create new token.
-
In the Add New Token dialog, type the token name and select OK.
-
Below your token name, selecting Click to show key displays your API Key.
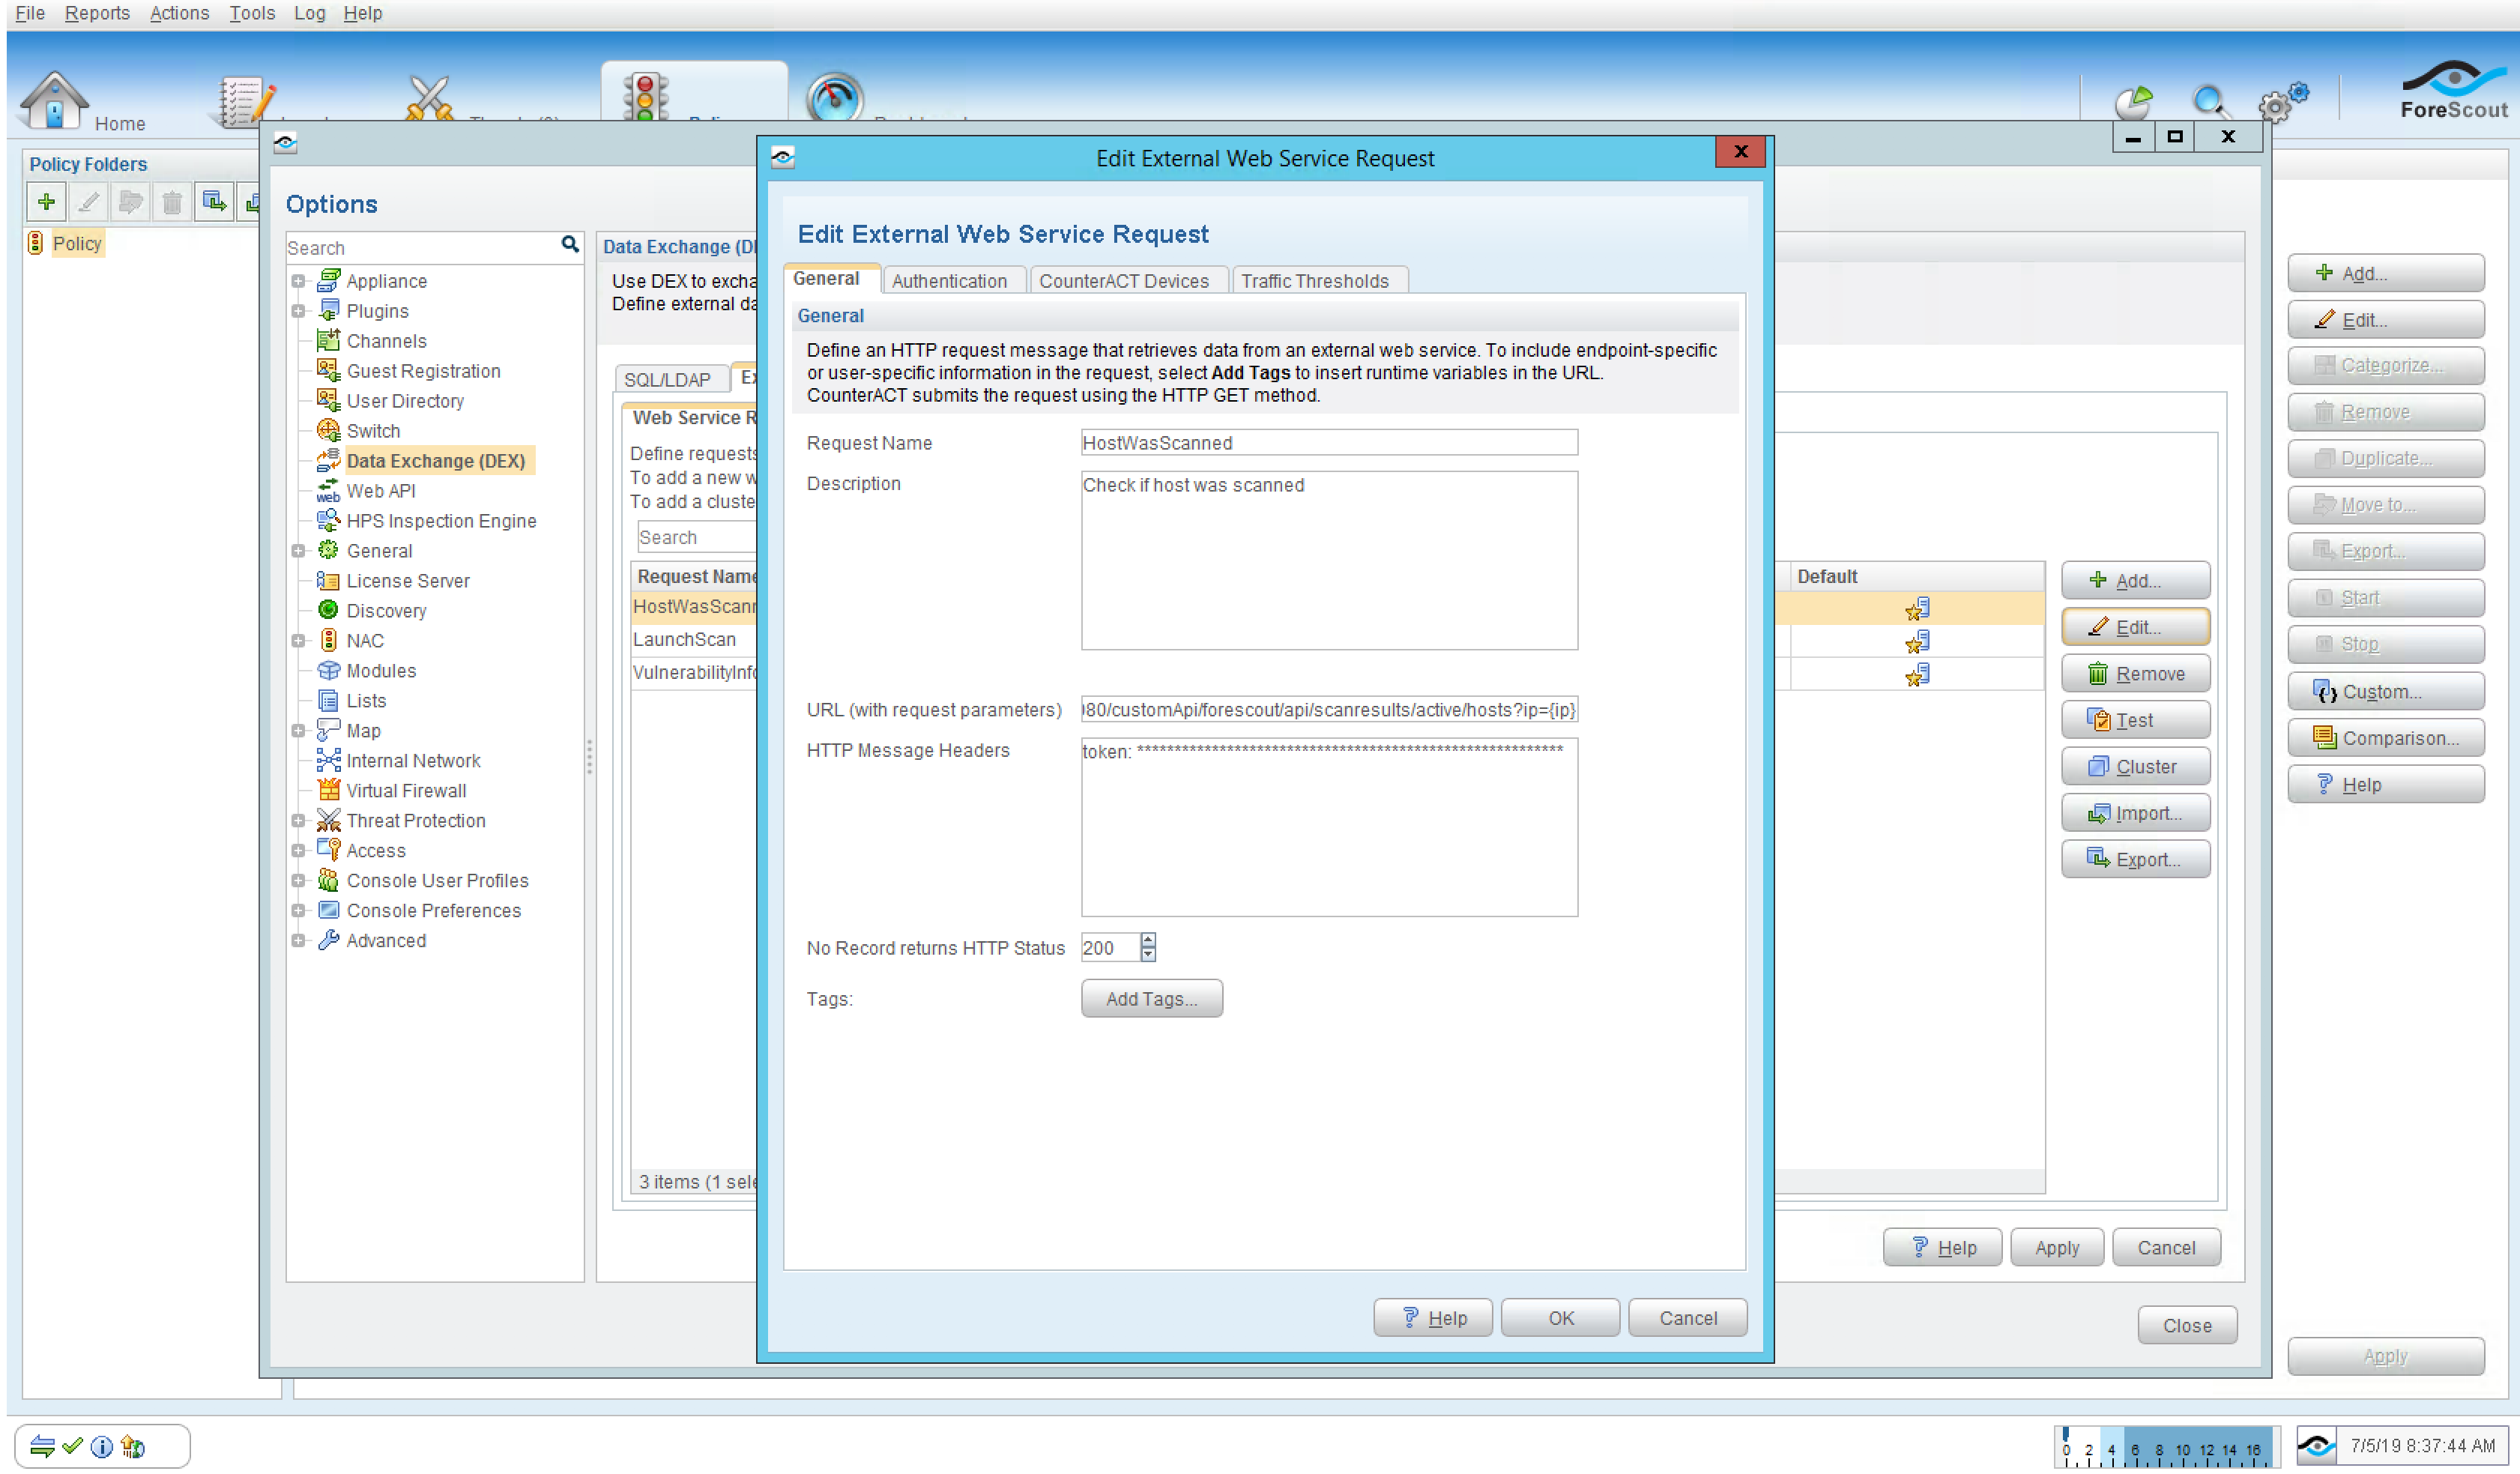
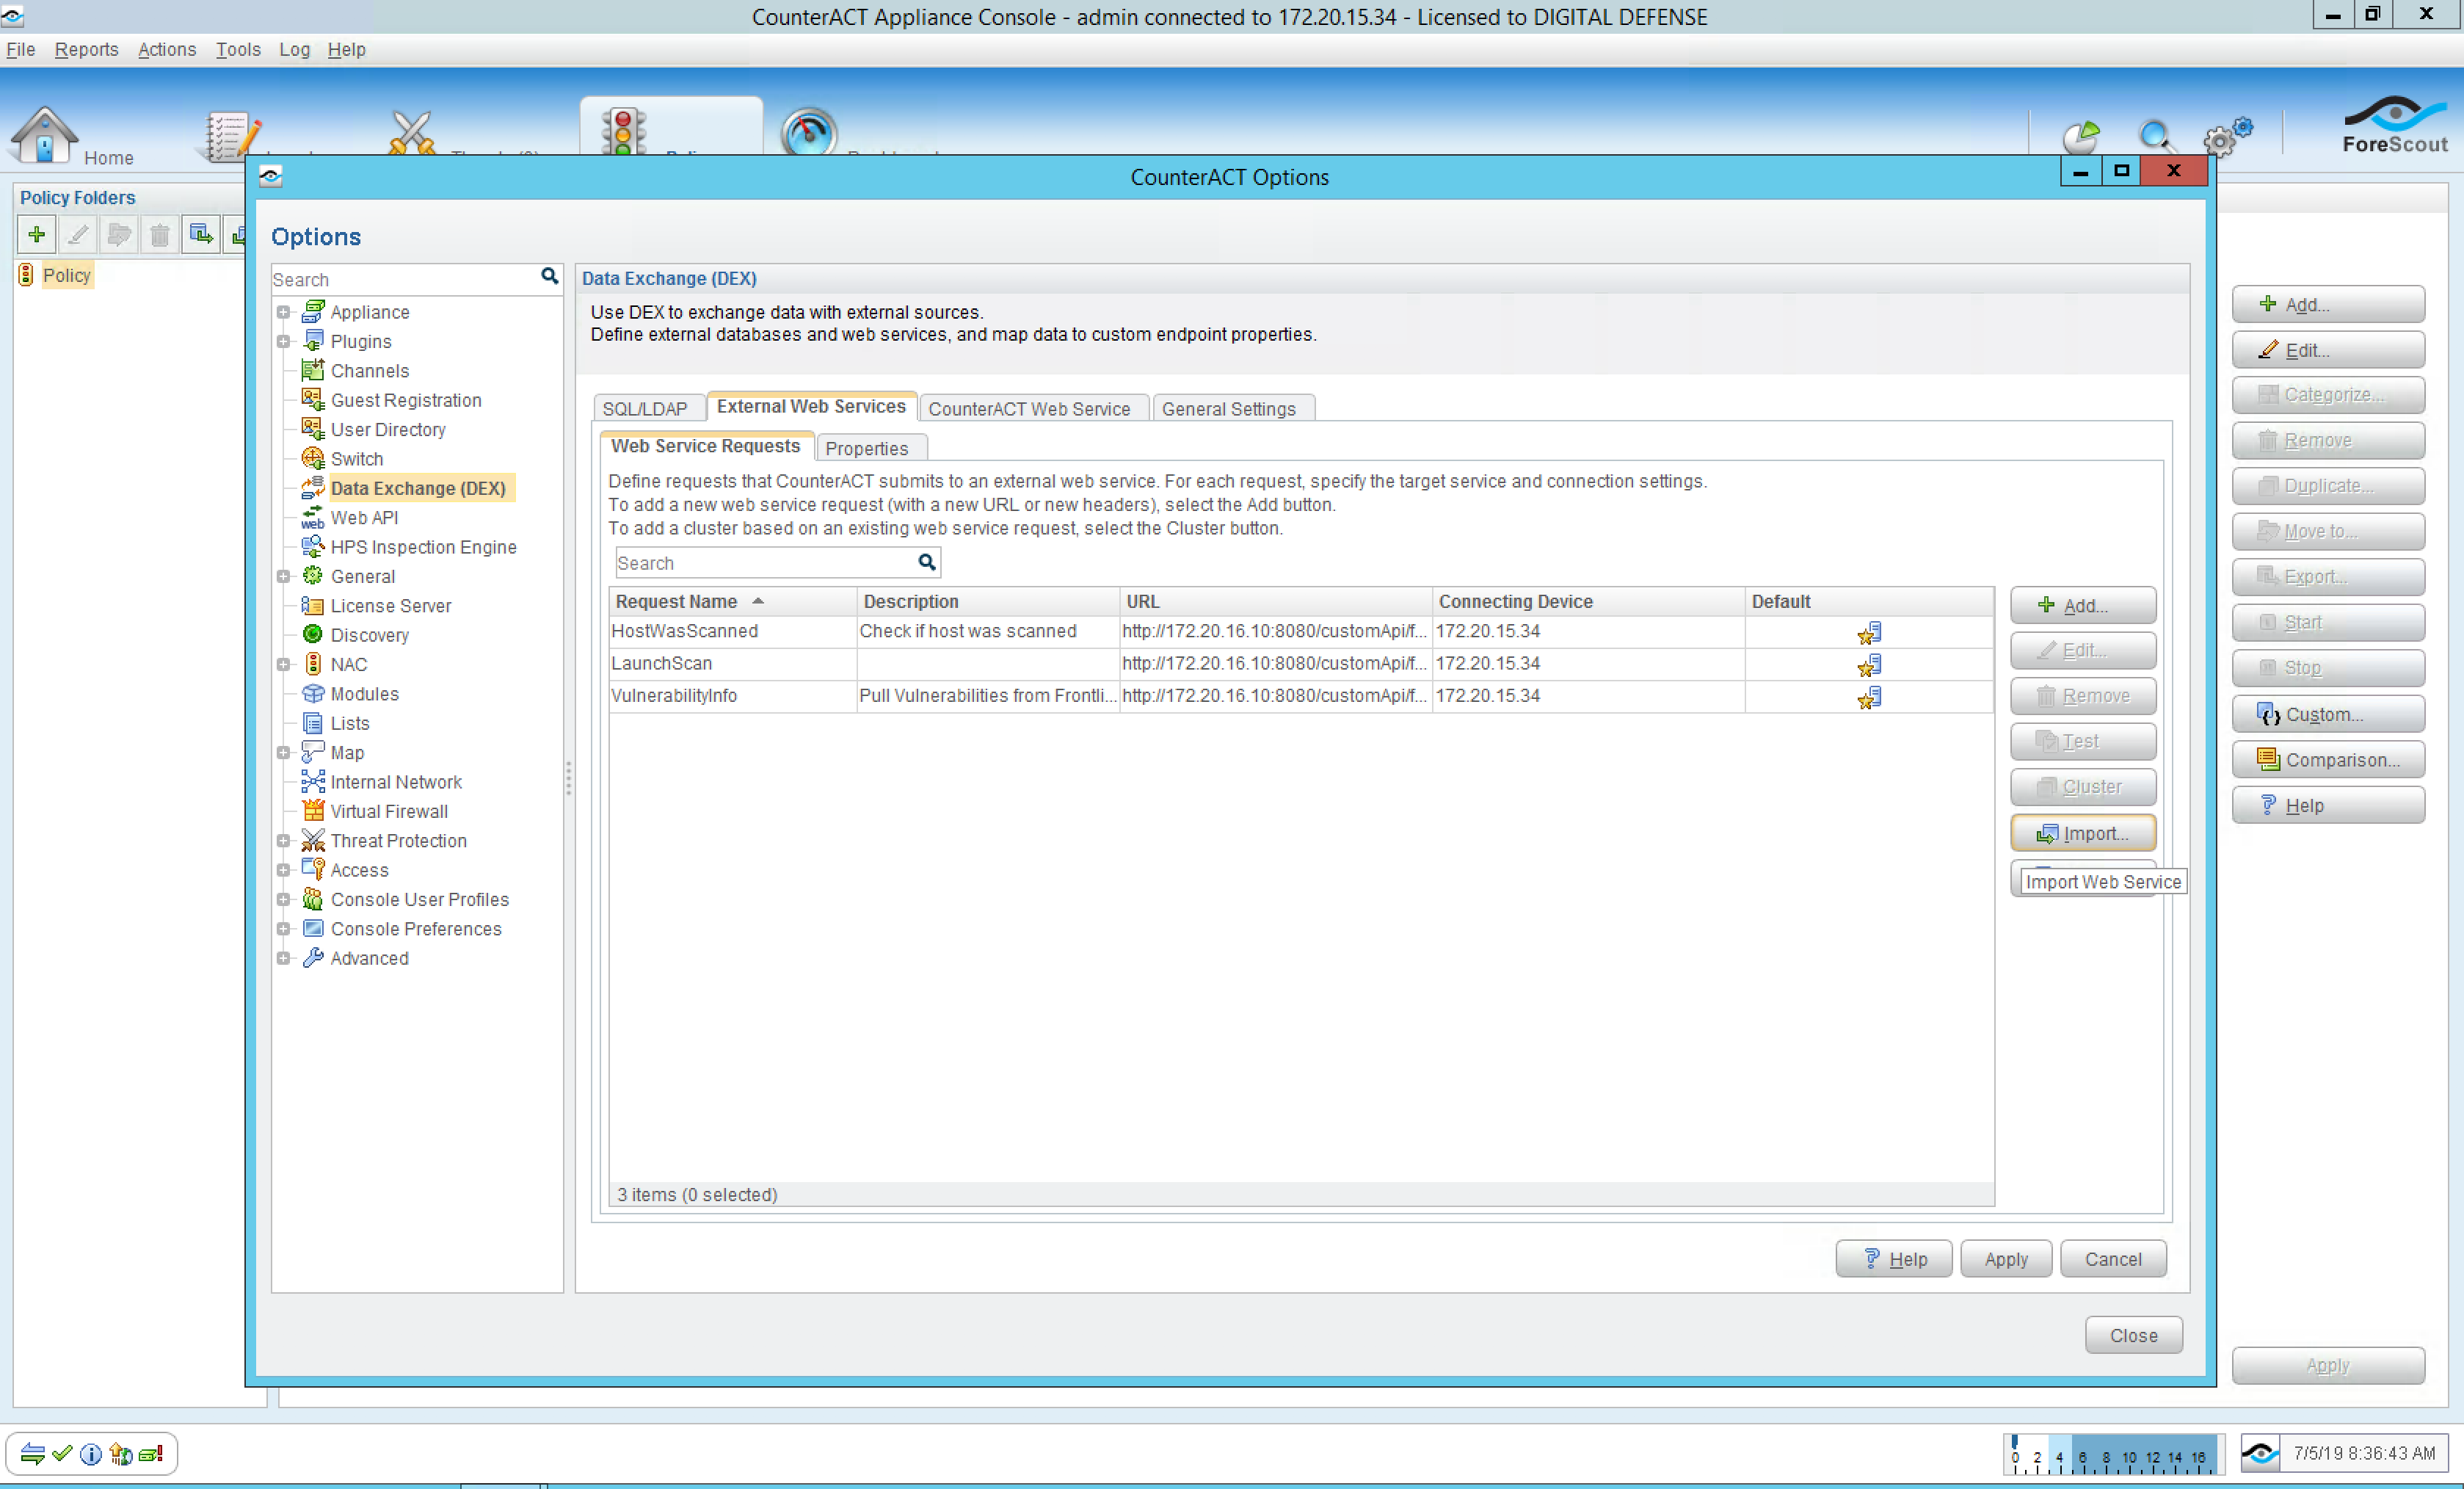
Insert Key into CounterACT
Open the Options menu in the CounterACT Appliance Console.
- From the Options menu, select Data Exchange (DEX).
- Click on the External Web Services tab.
- Click on the first Web Service Request and select Edit on the right.
- In the HTTP Message Headers section replace the asterisks with your FVM API key.
- Repeat the process for the remaining Web Service Requests.
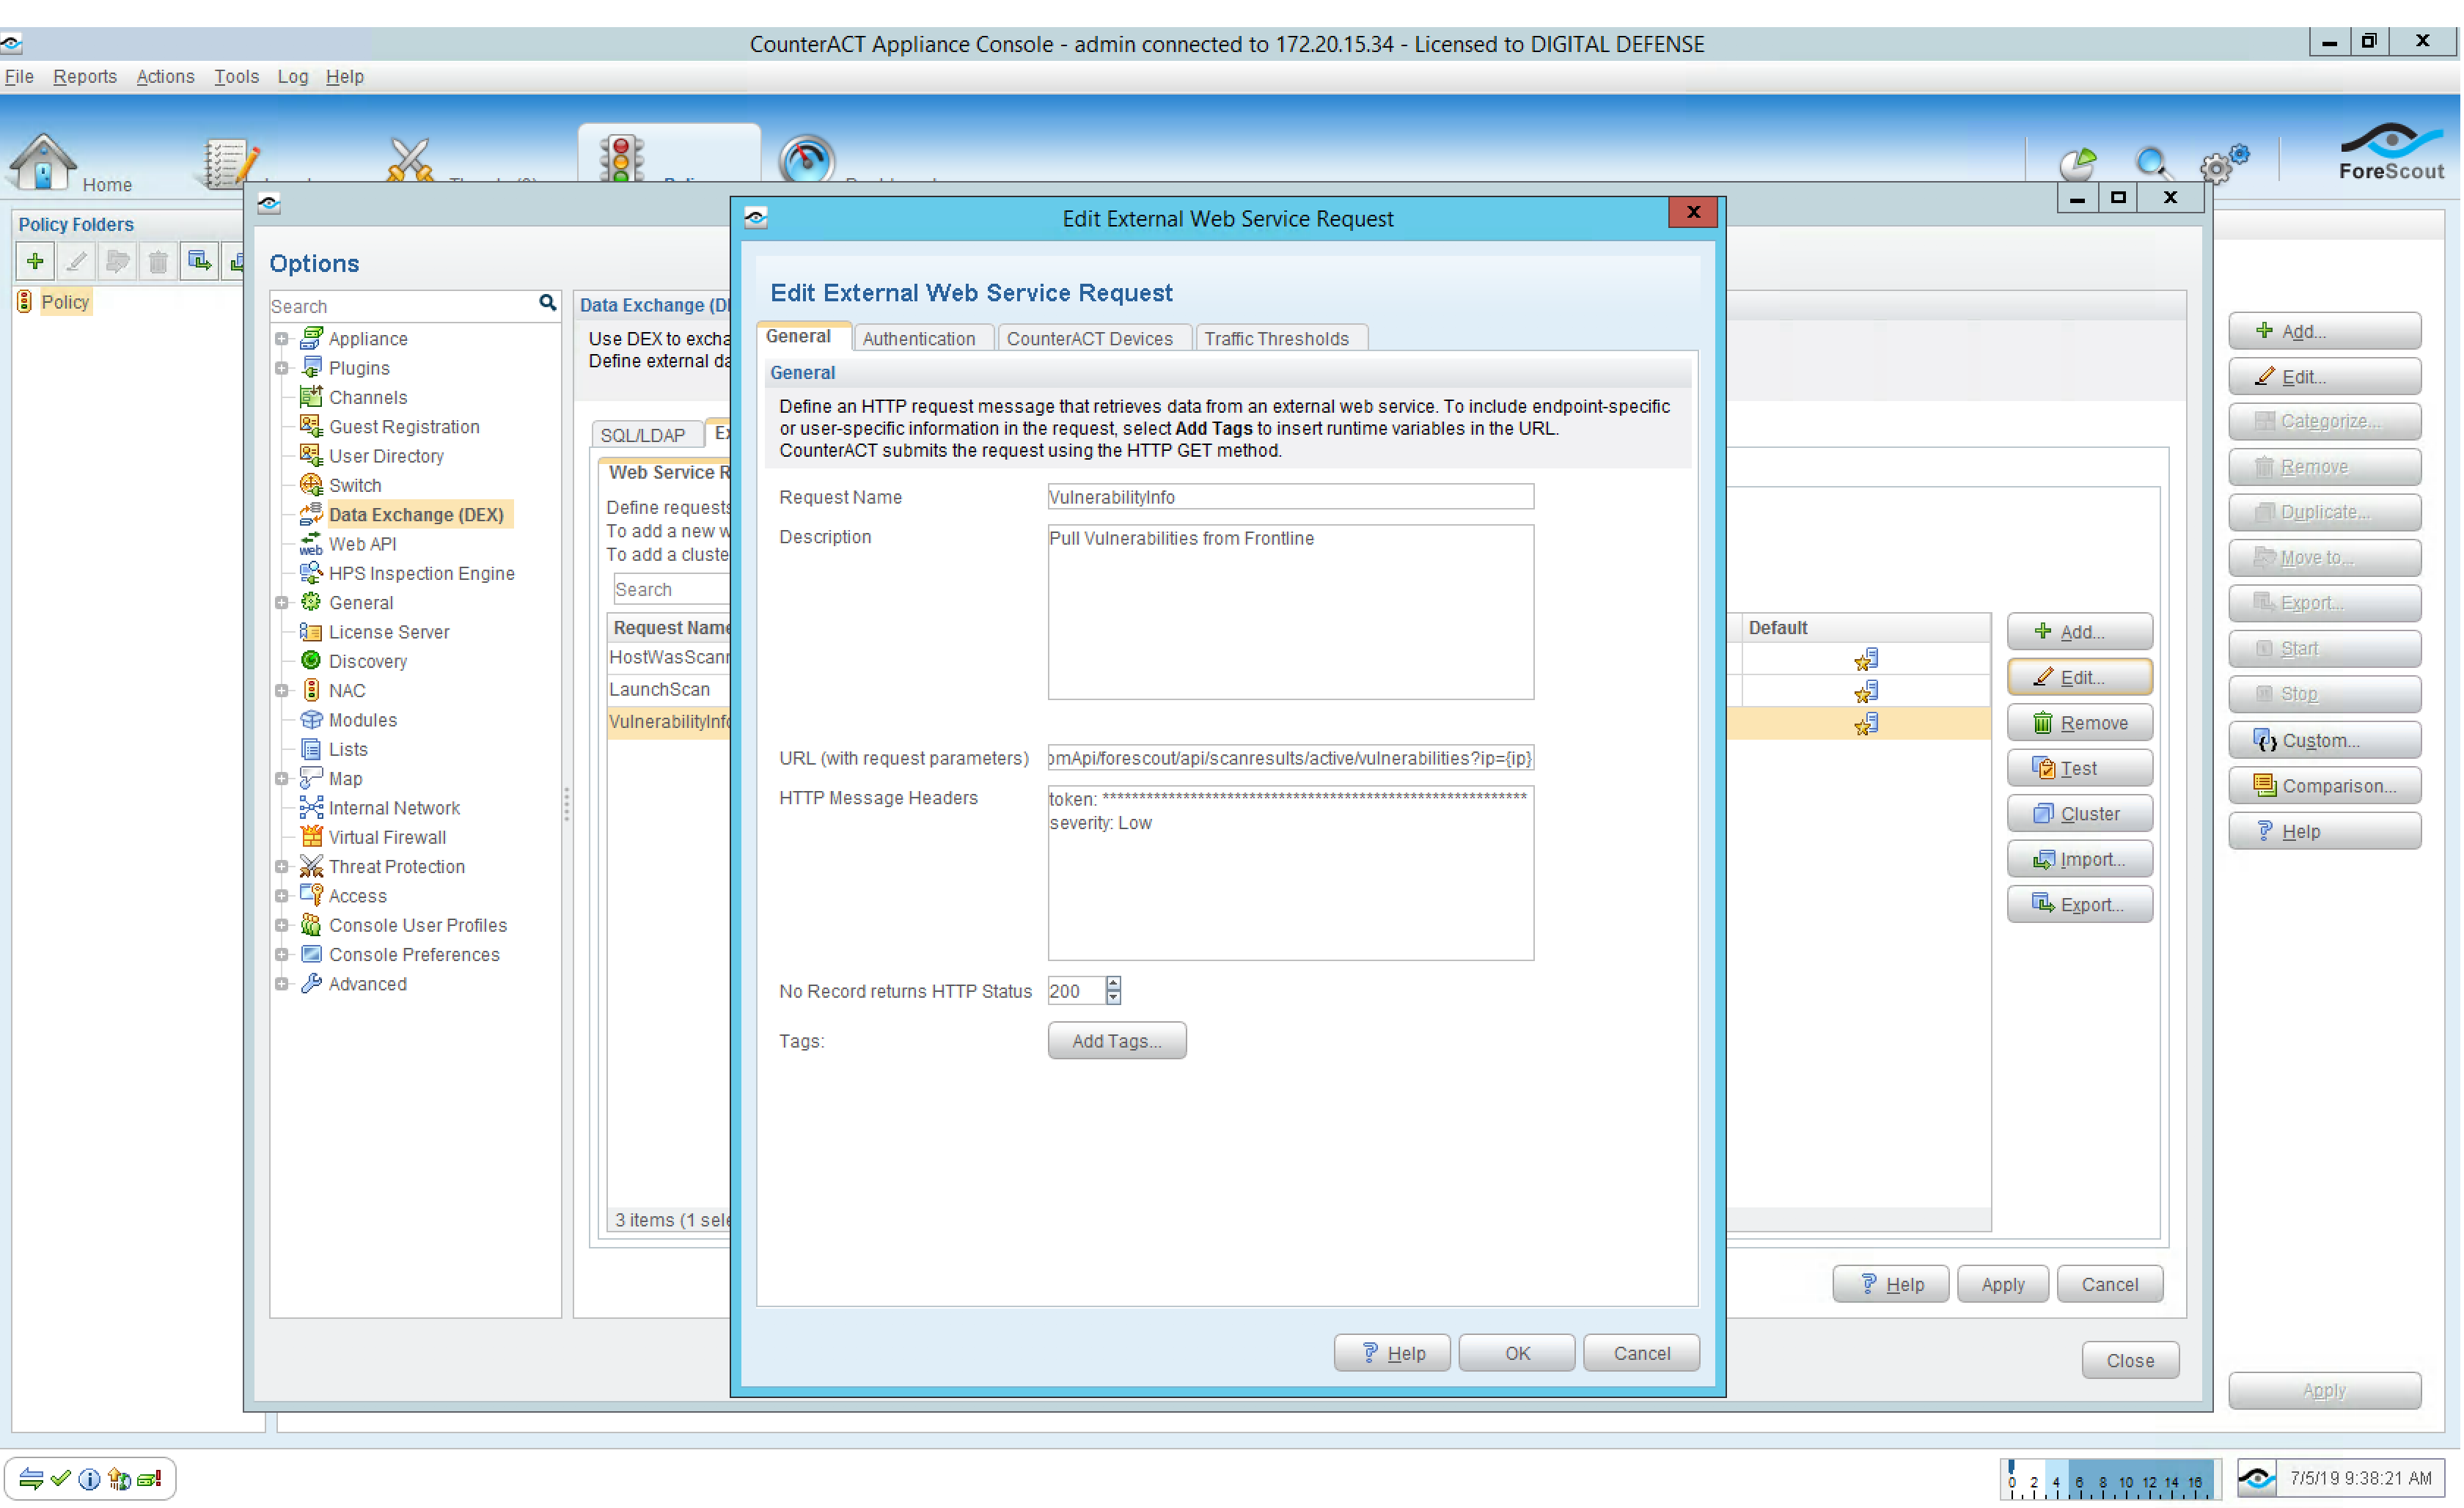
Change Severity Level Detection
Open the Options menu in the CounterACT Appliance Console.
- From the Options menu, select Data Exchange (DEX).
- Select the External Web Services tab.
- Click the Vulnerability Info Web Service Request and select Edit on the right.
- From the HTTP Message Headers section locate Severity.
- Set this value to the minimum value to be detected, i.e., High will detect High and Critical vulnerabilities. {Trivial, Low, Medium, High, Critical}
Import Data Exchange (DEX) Web Service Requests
Open the Options menu in the CounterACT Appliance Console.
- From the Options menu, select Data Exchange (DEX).
- Click on the External Web Services tab.
- Select Import from the right hand side.
- Browse and select the file to import (dex_webserver_table.xml).
- Select the Properties tab.
- Follow the previous steps to import the properties file (dex_property_table.xml).
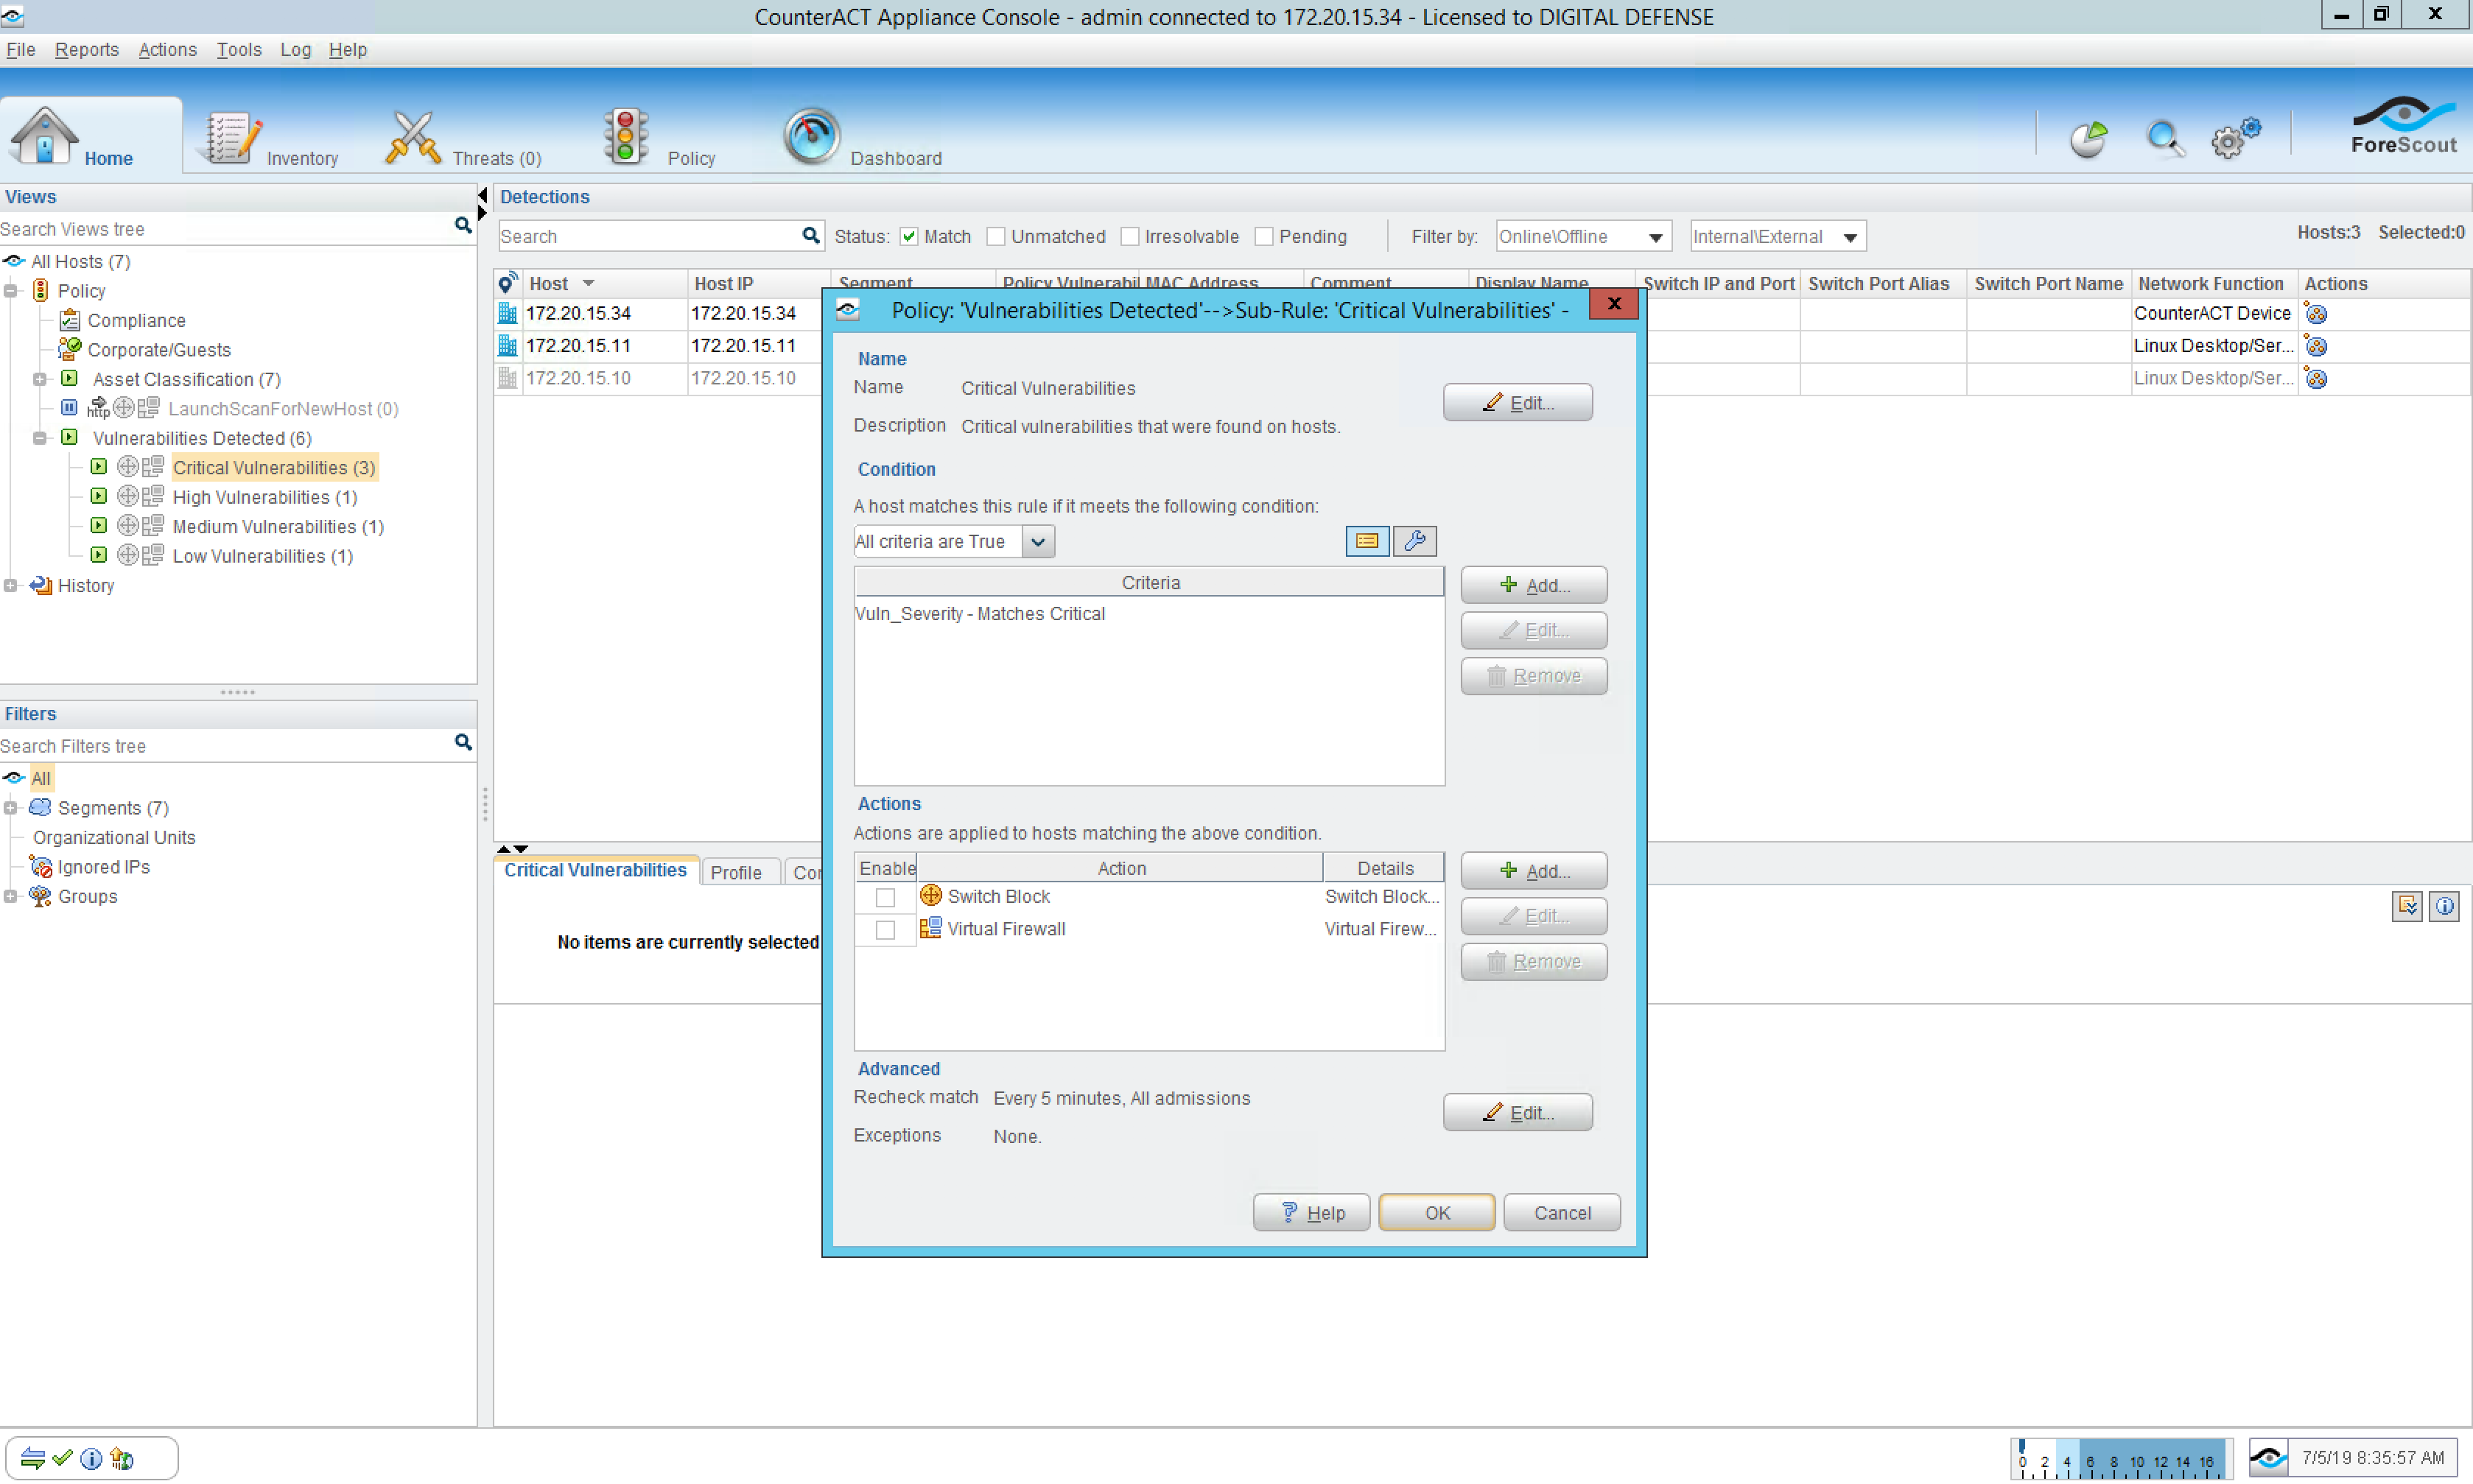
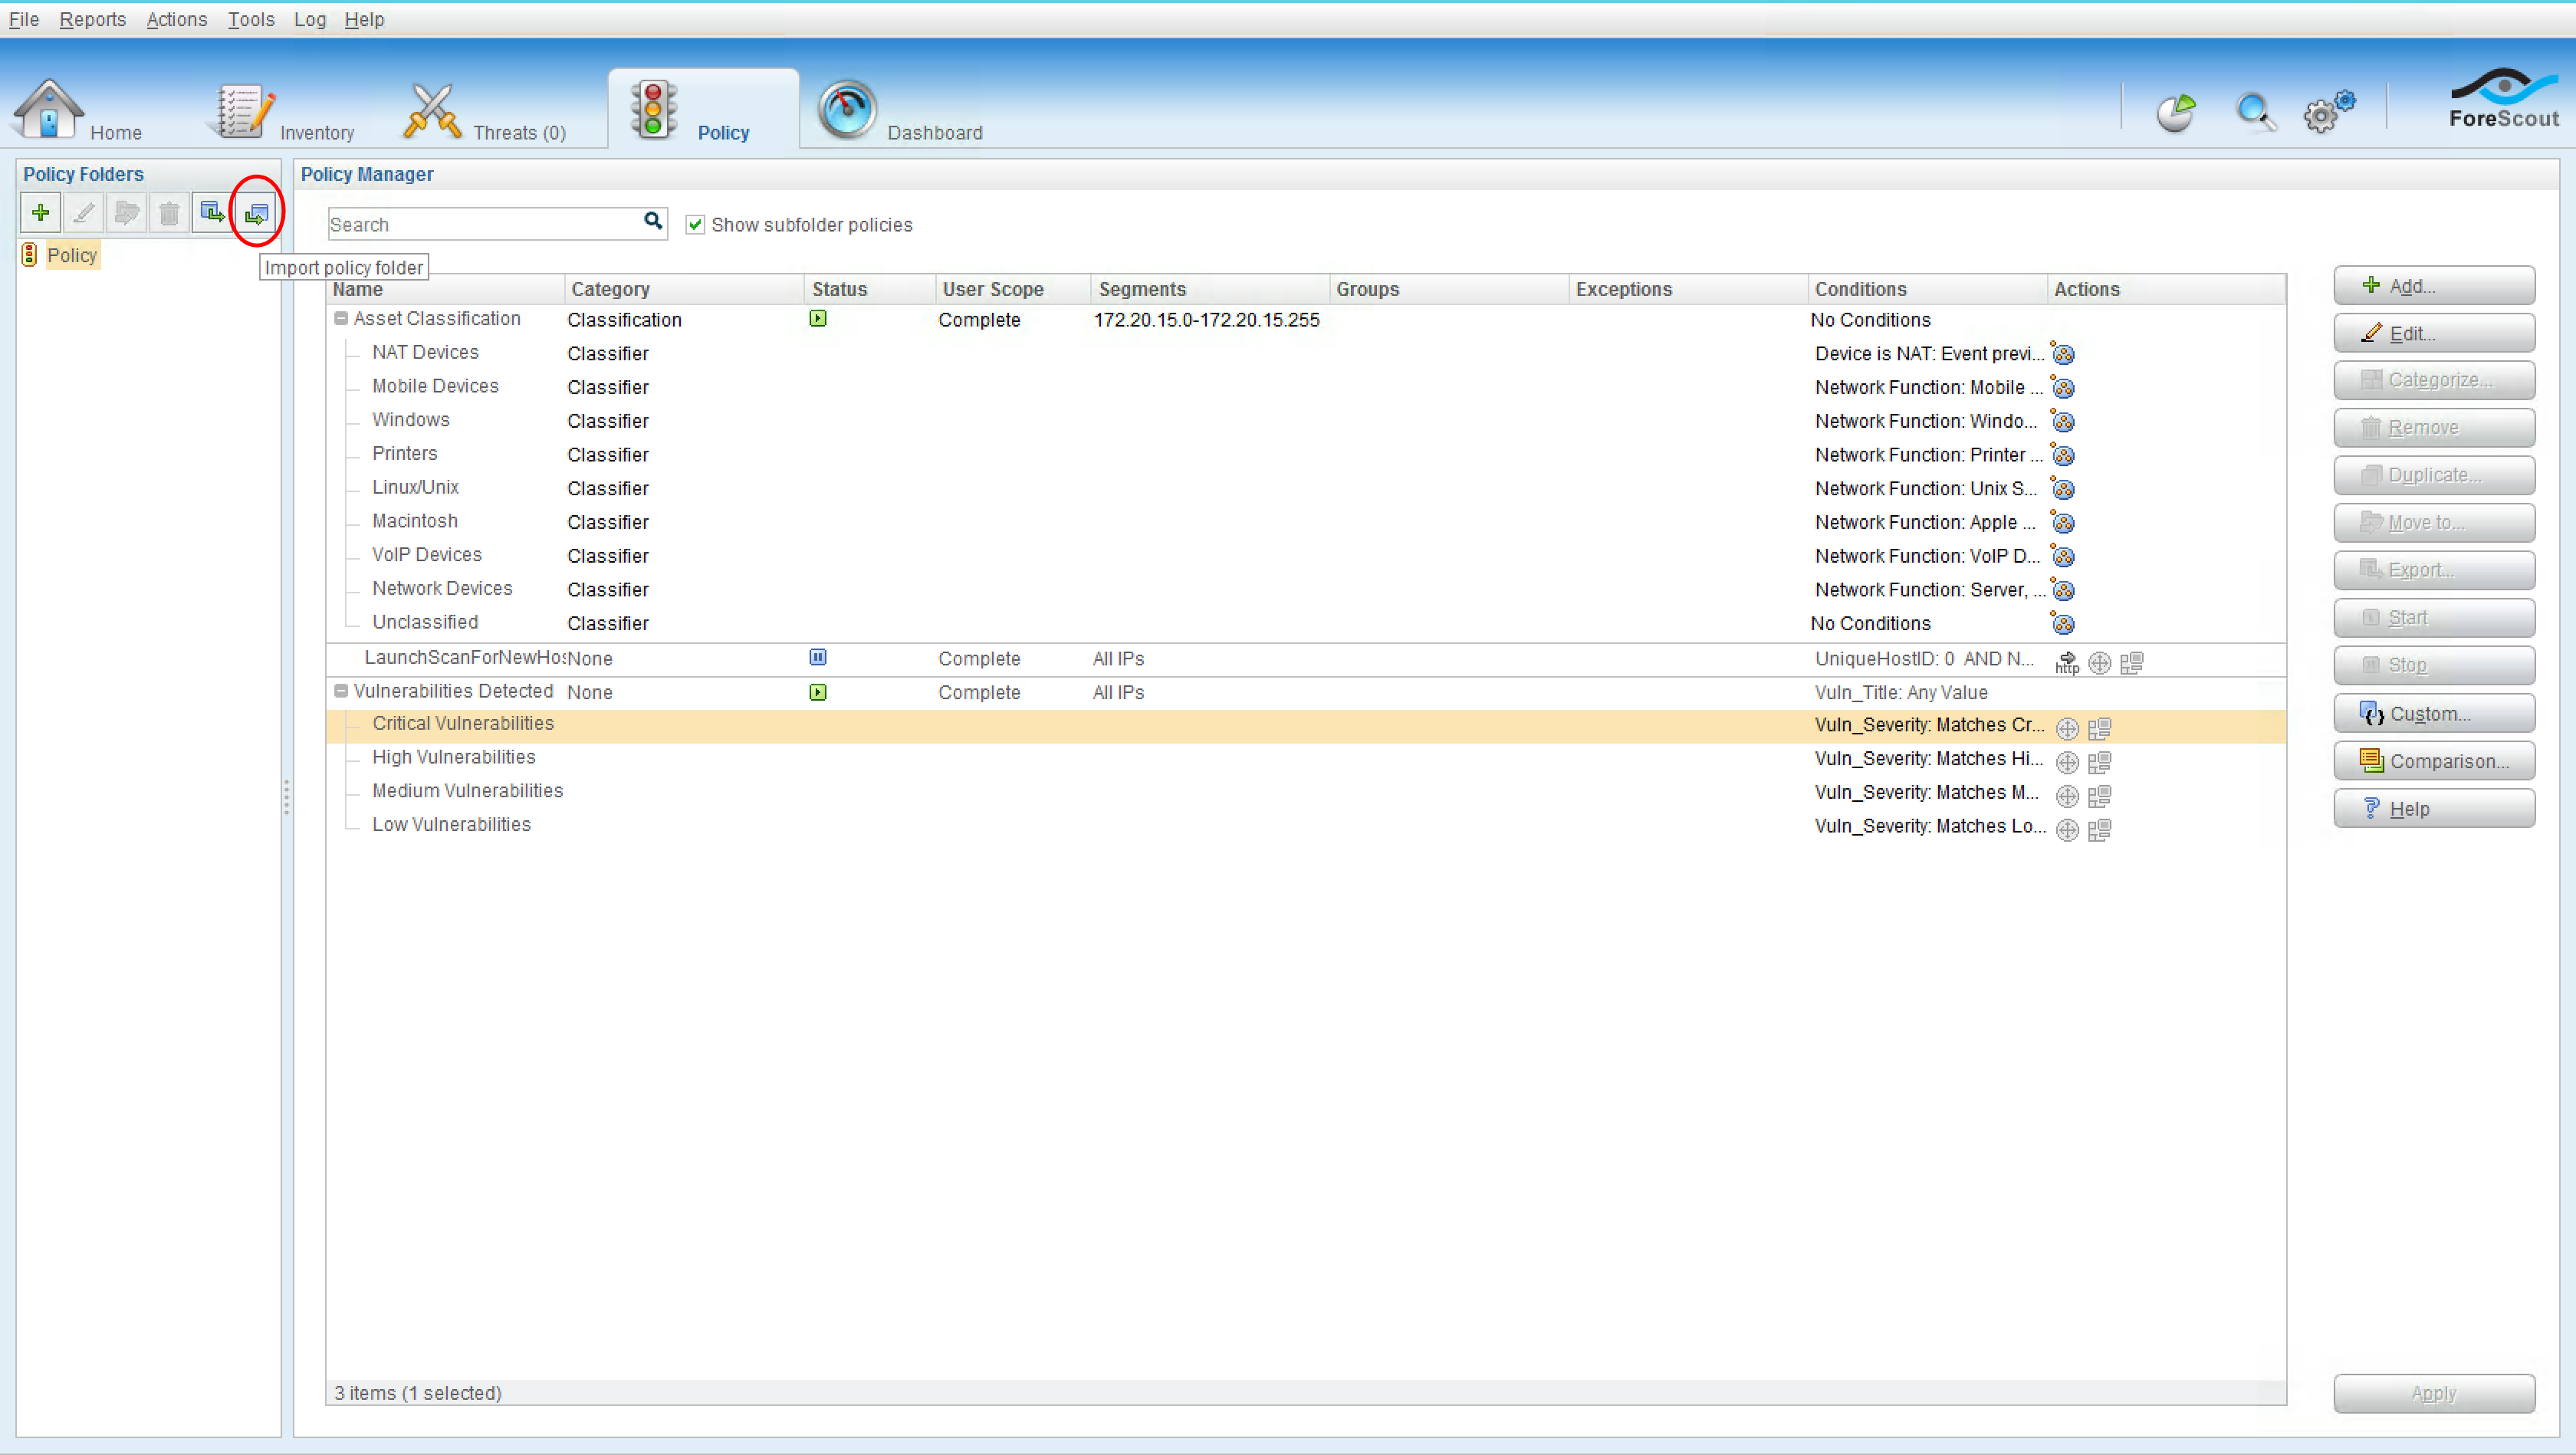
Import Policies into CounterACT
Open the Policy menu in the CounterACT Appliance Console.
- On the left hand side click the Import Policy Folder button. (It’s the farthest right button under the Policy Folders section).
- Select your target and import mode.
- Browse for the policy file (LaunchScanForNewHost.xml, VulnerabilitiesDetected.xml).
- Click OK.
Edit Policies in CounterACT
Once policies have been created you have the opportunity to edit them as well.
- Select the policy to be edited.
- Change the Name, the Criteria and Actions as needed.
- Click OK when complete.