Palo Alto Networks
Integrated with Palo Alto Networks, Fortra VM users can further enhance the efficacy of the Cortex platform in the protection of their information assets. The integration with Cortex will consume vulnerability and threat intelligence produced when scanning systems and networks with our Fortra VM platform. Fortra recommends watching the Palo Alto Tutorial for integration guidance.
To integrate with Palo Alto Networks perform the following (see below for detailed instructions):
- Generate a Fortra VM API Key
- Access Cortex Apps in Palo Alto Networks
- Authorize App
Requirements
- Palo Alto Networks Cortex
- Fortra VM version 6.2.2.6 or later
- Fortra VM API Key
Generate a Fortra VM API Key
-
Log in to Fortra VM.
-
In the site heater, select your name and choose My profile.
-
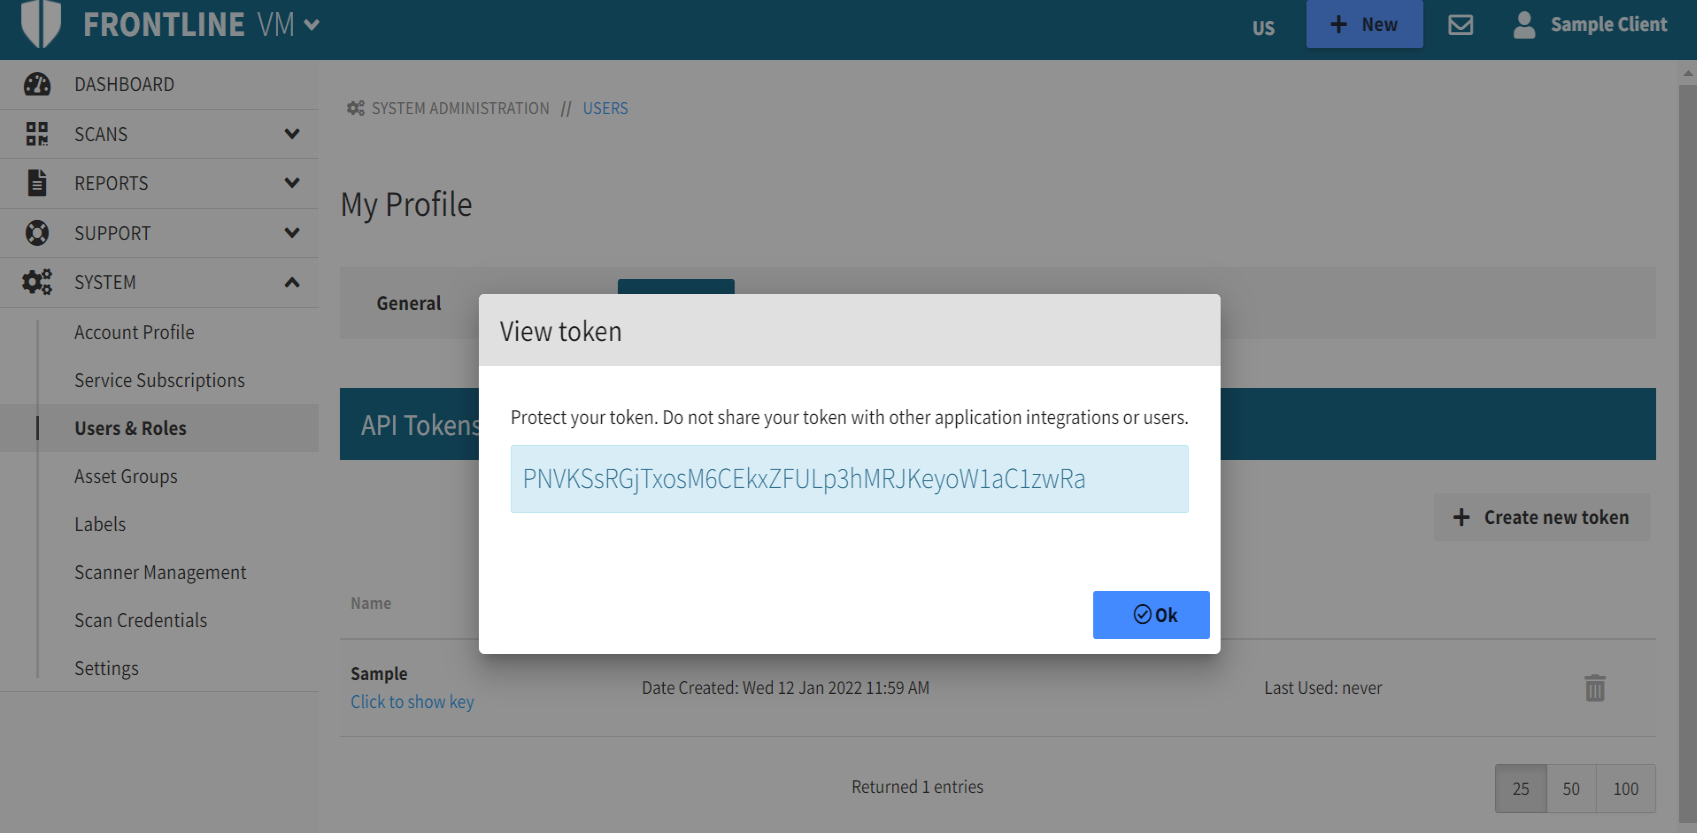
On the API Tokens tab, select Create new token.
-
In the Add New Token dialog, type the token name and select OK.
-
Below your token name, selecting Click to show key displays your API Key.
Access Cortex Apps in Palo Alto Networks
Log into your Palo Alto Networks account to access your Cortex Apps.
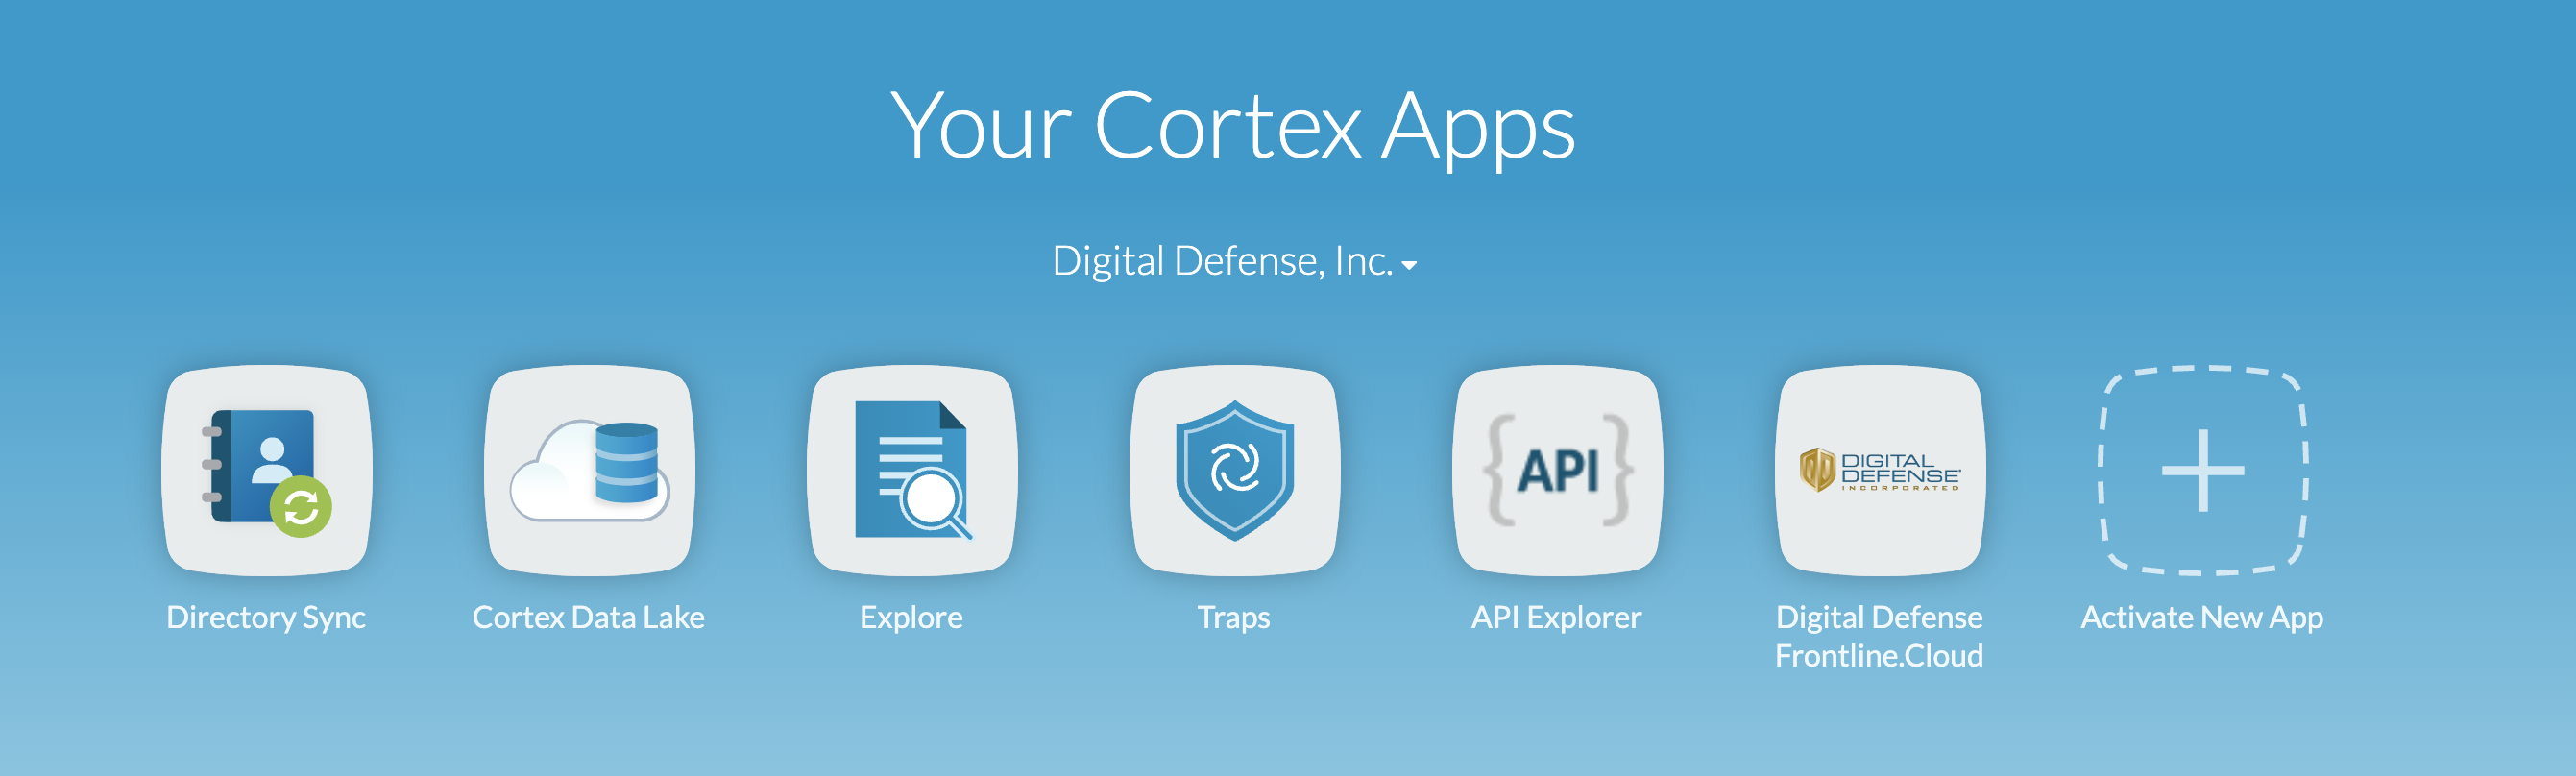
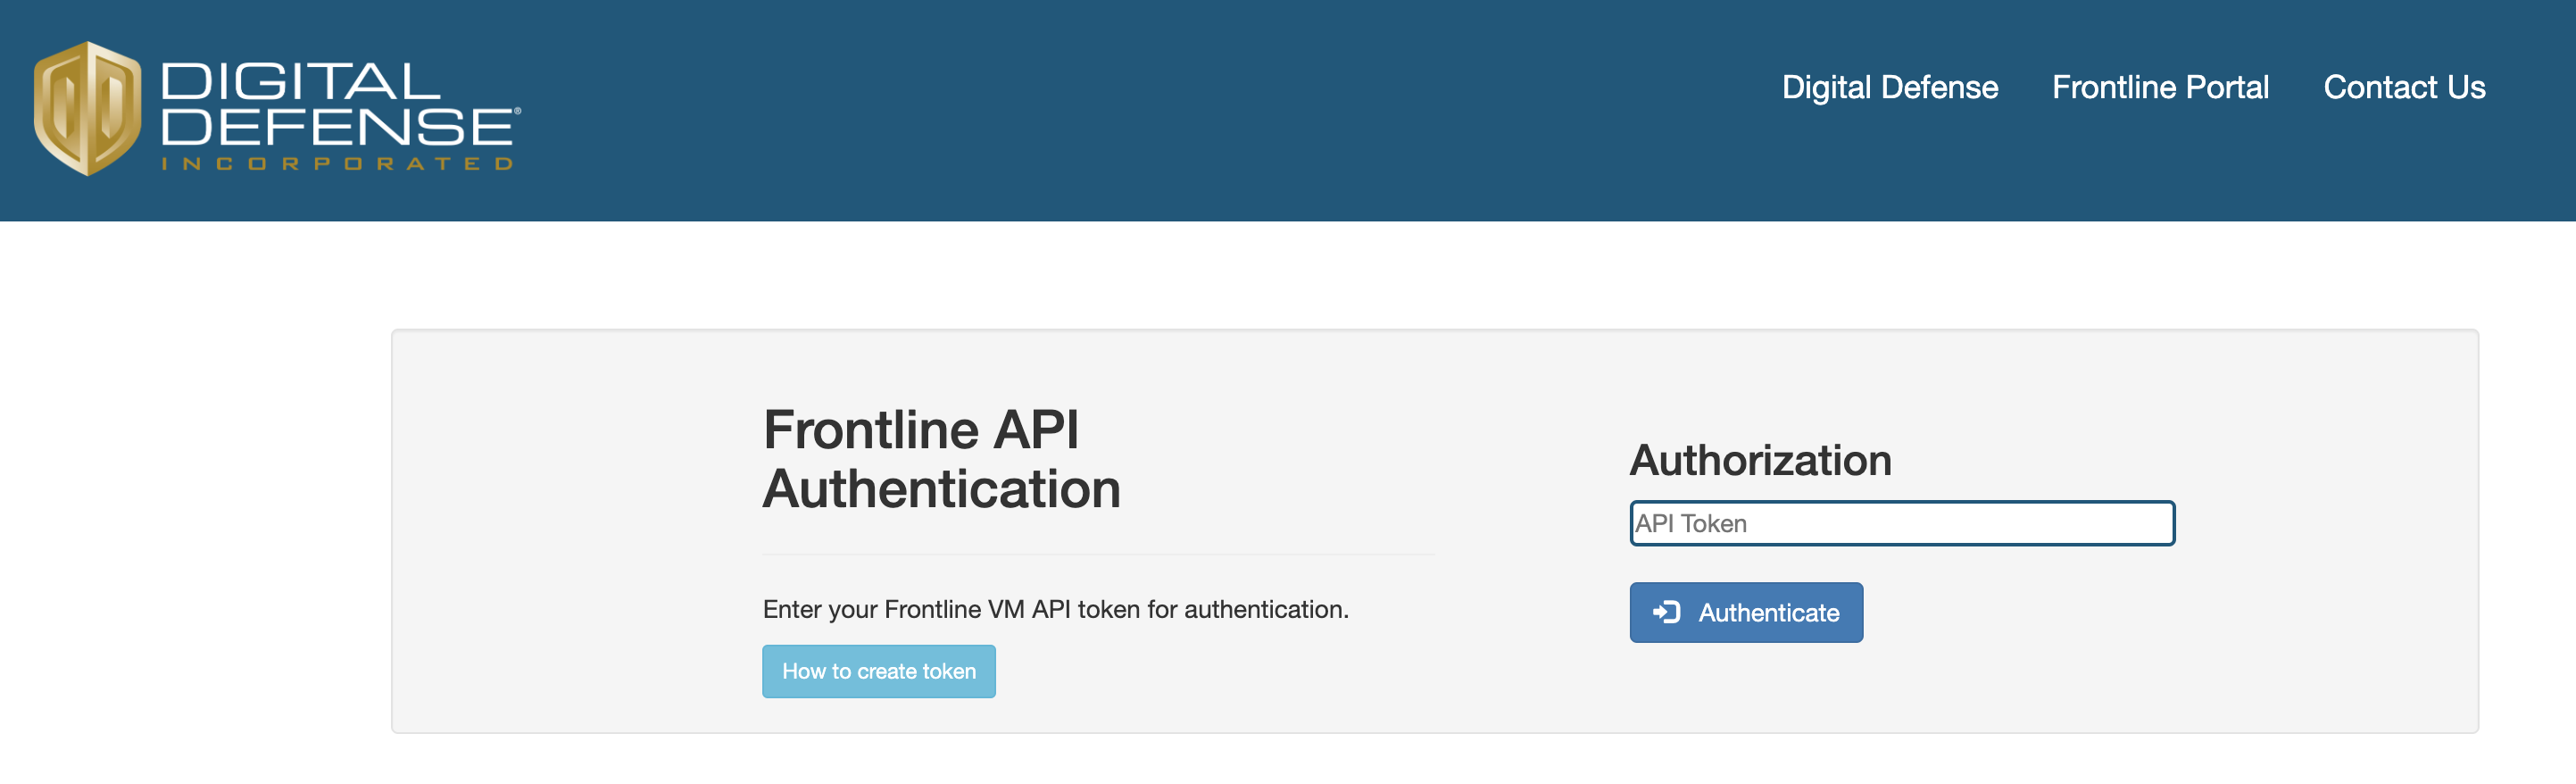
Clicking on the Fortra Fortra VM app will begin app initialization and direct you to log in using a Fortra VM API token.
- Enter your API token.
- Click Authenticate.
Authorize App
Once logged in, a status page will show all current app instances.
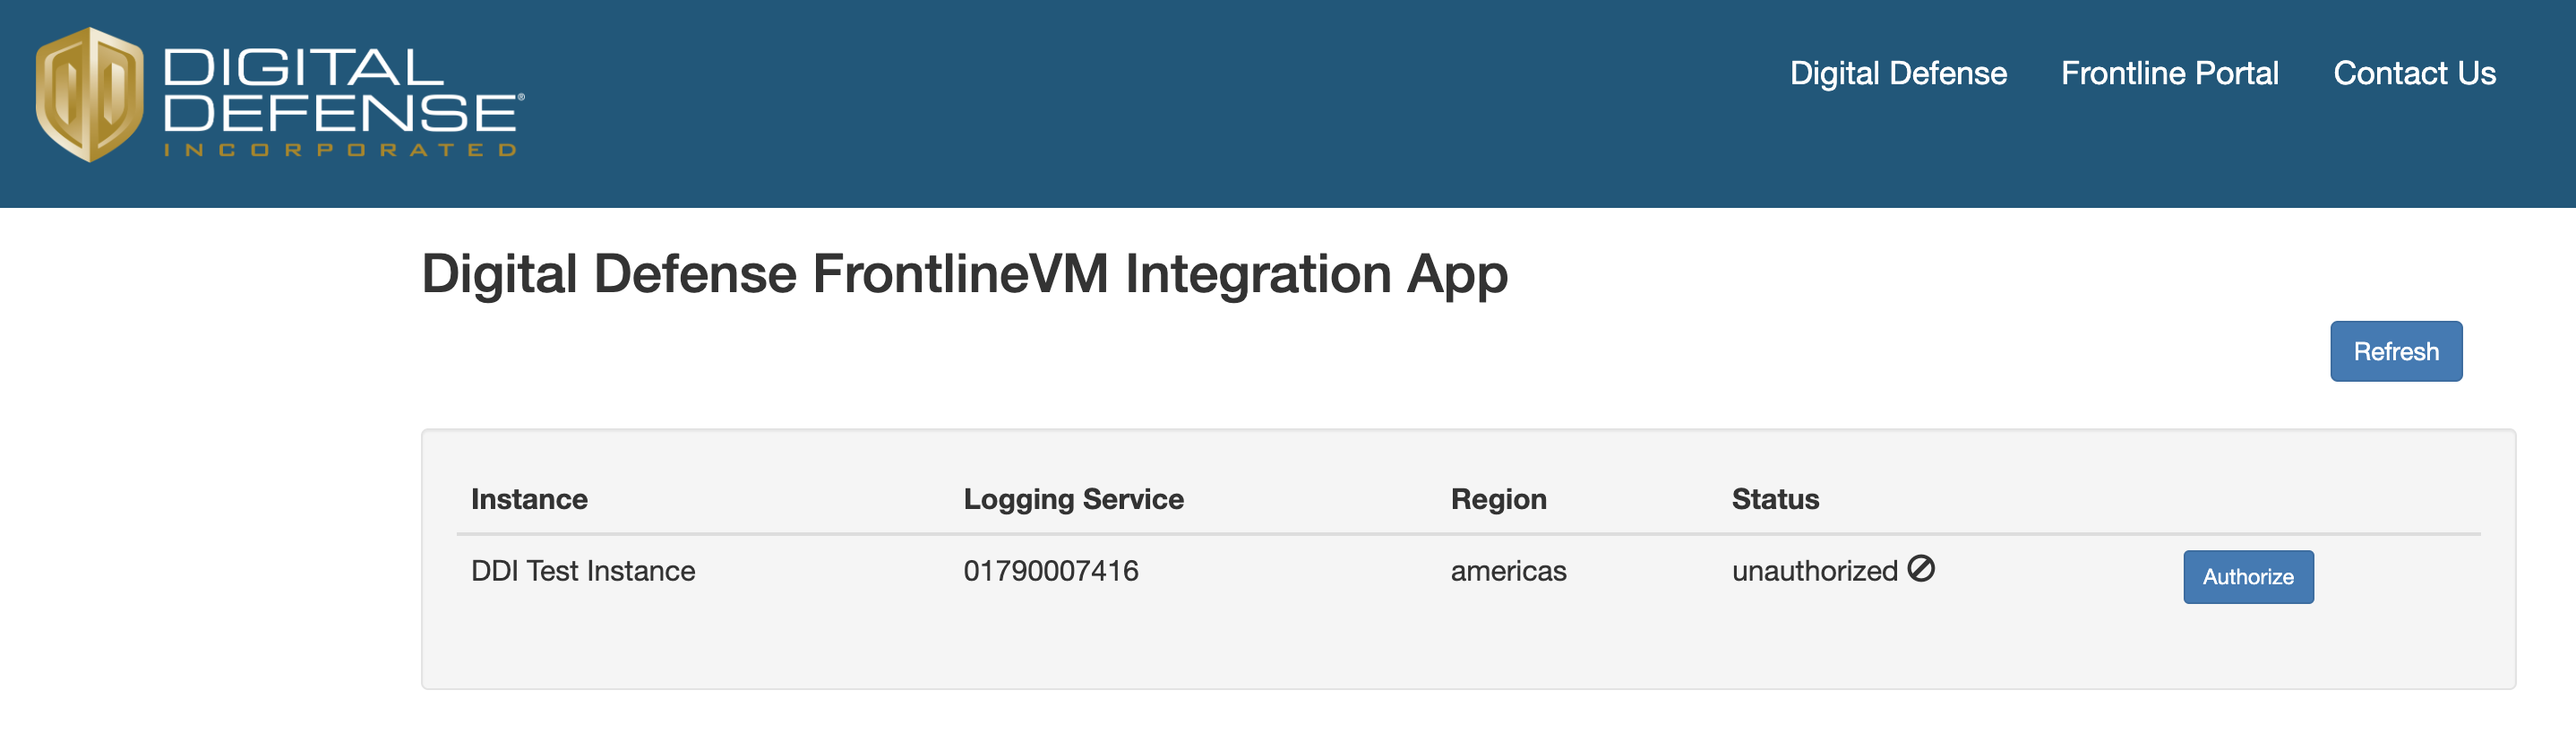
Each instance will show:
- Instance name
- Logging service number of the app
- The region
- The status of the app (authorized or unauthorized)
If the instance is unauthorized, the app will not run and will not pull any information from Palo Alto Networks into your Fortra VM account.
To authorize an app instance:
- Click the Authorize button.
- Click Allow.
Site will be redirect to Request for Approval from Palo Alto Networks. The Fortra Fortra VM app requests permission for reading logging service data from Palo Alto Networks.
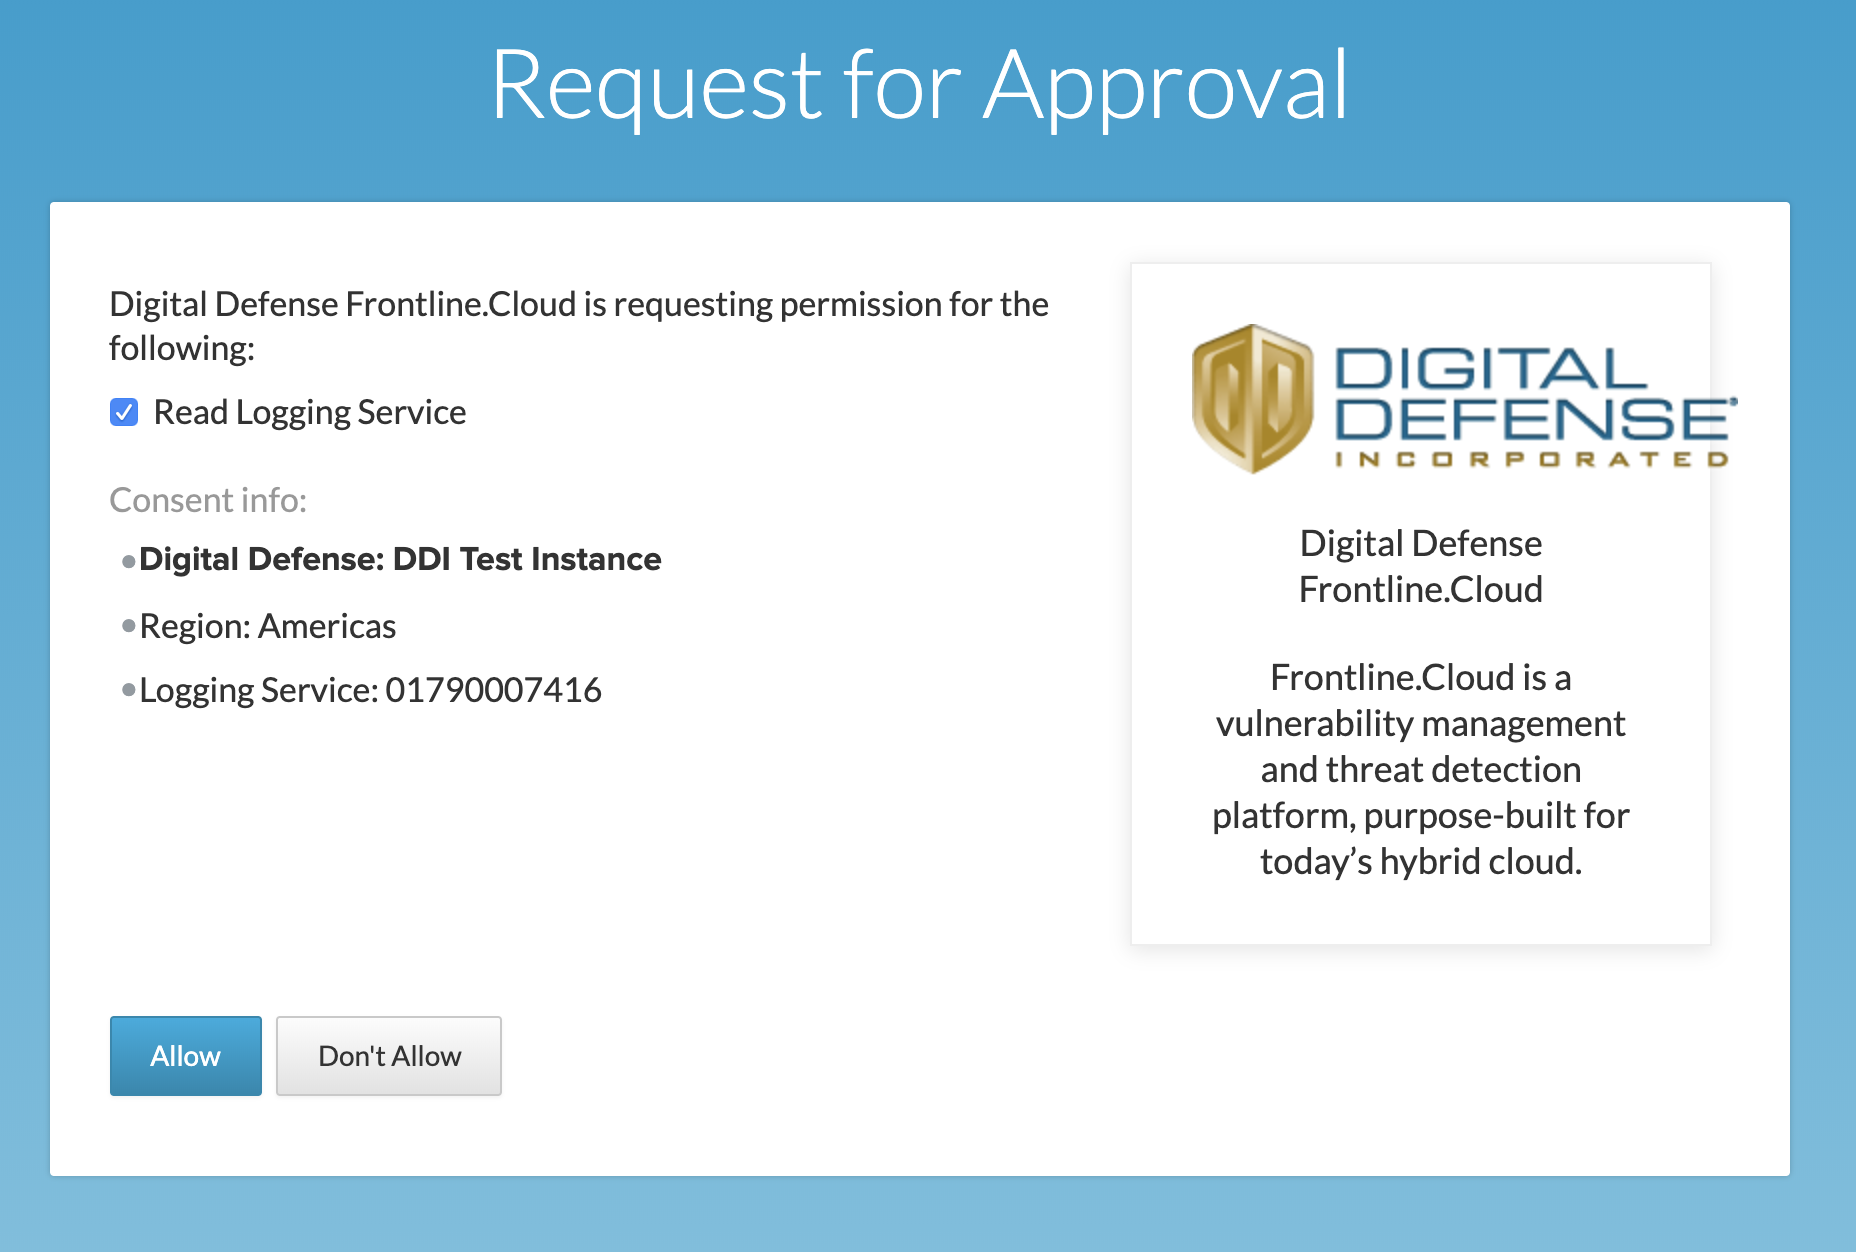
- With request approval, you will be directed back to the status page which will now display the app as Authorized.
- Denial of request approval will also redirect you back to the status page, but the app status remains Unauthorized.
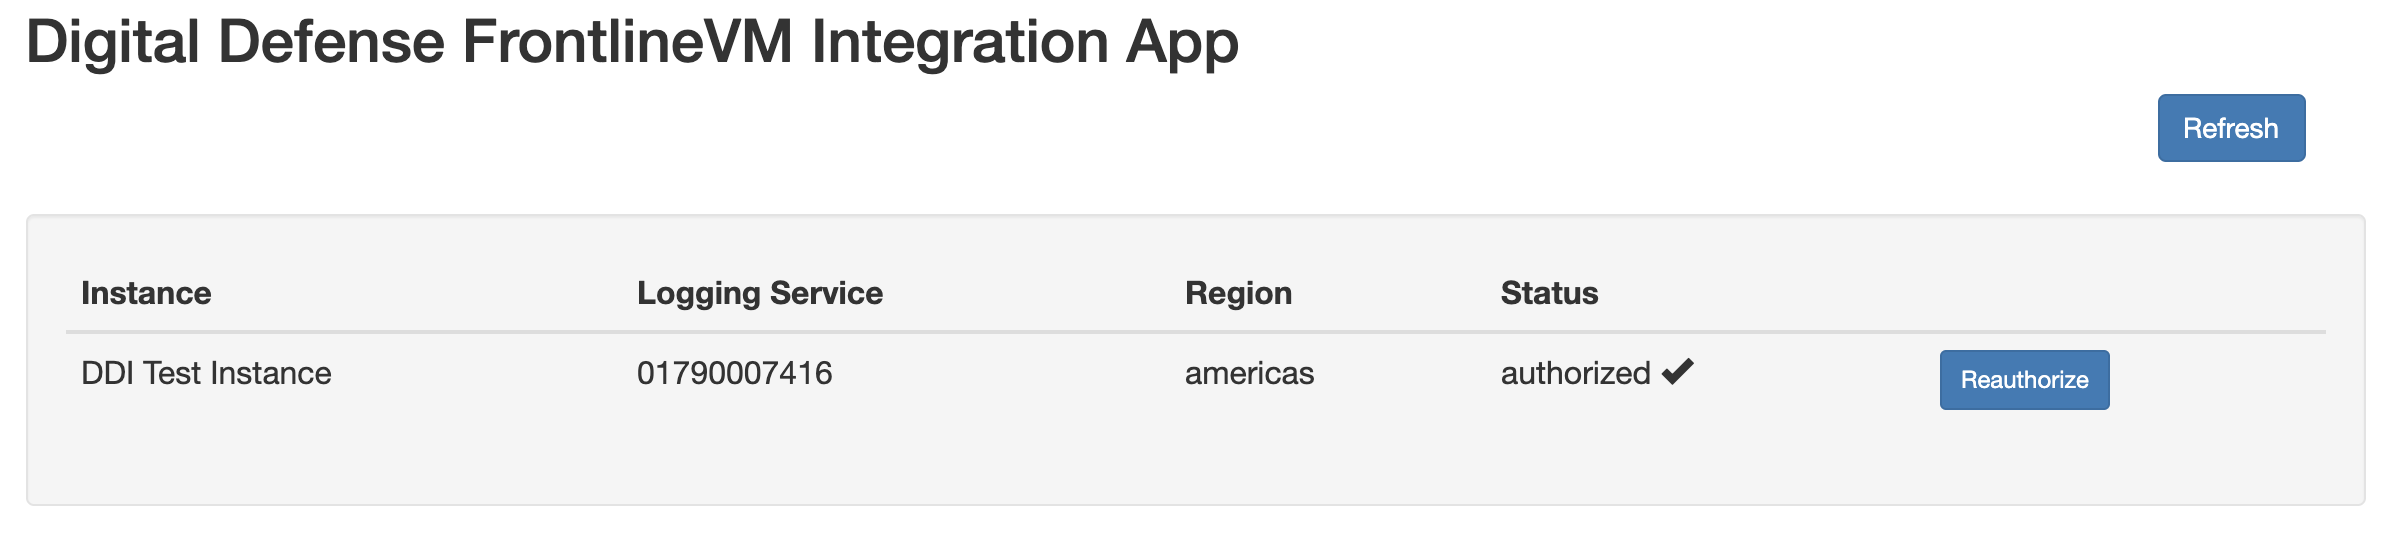
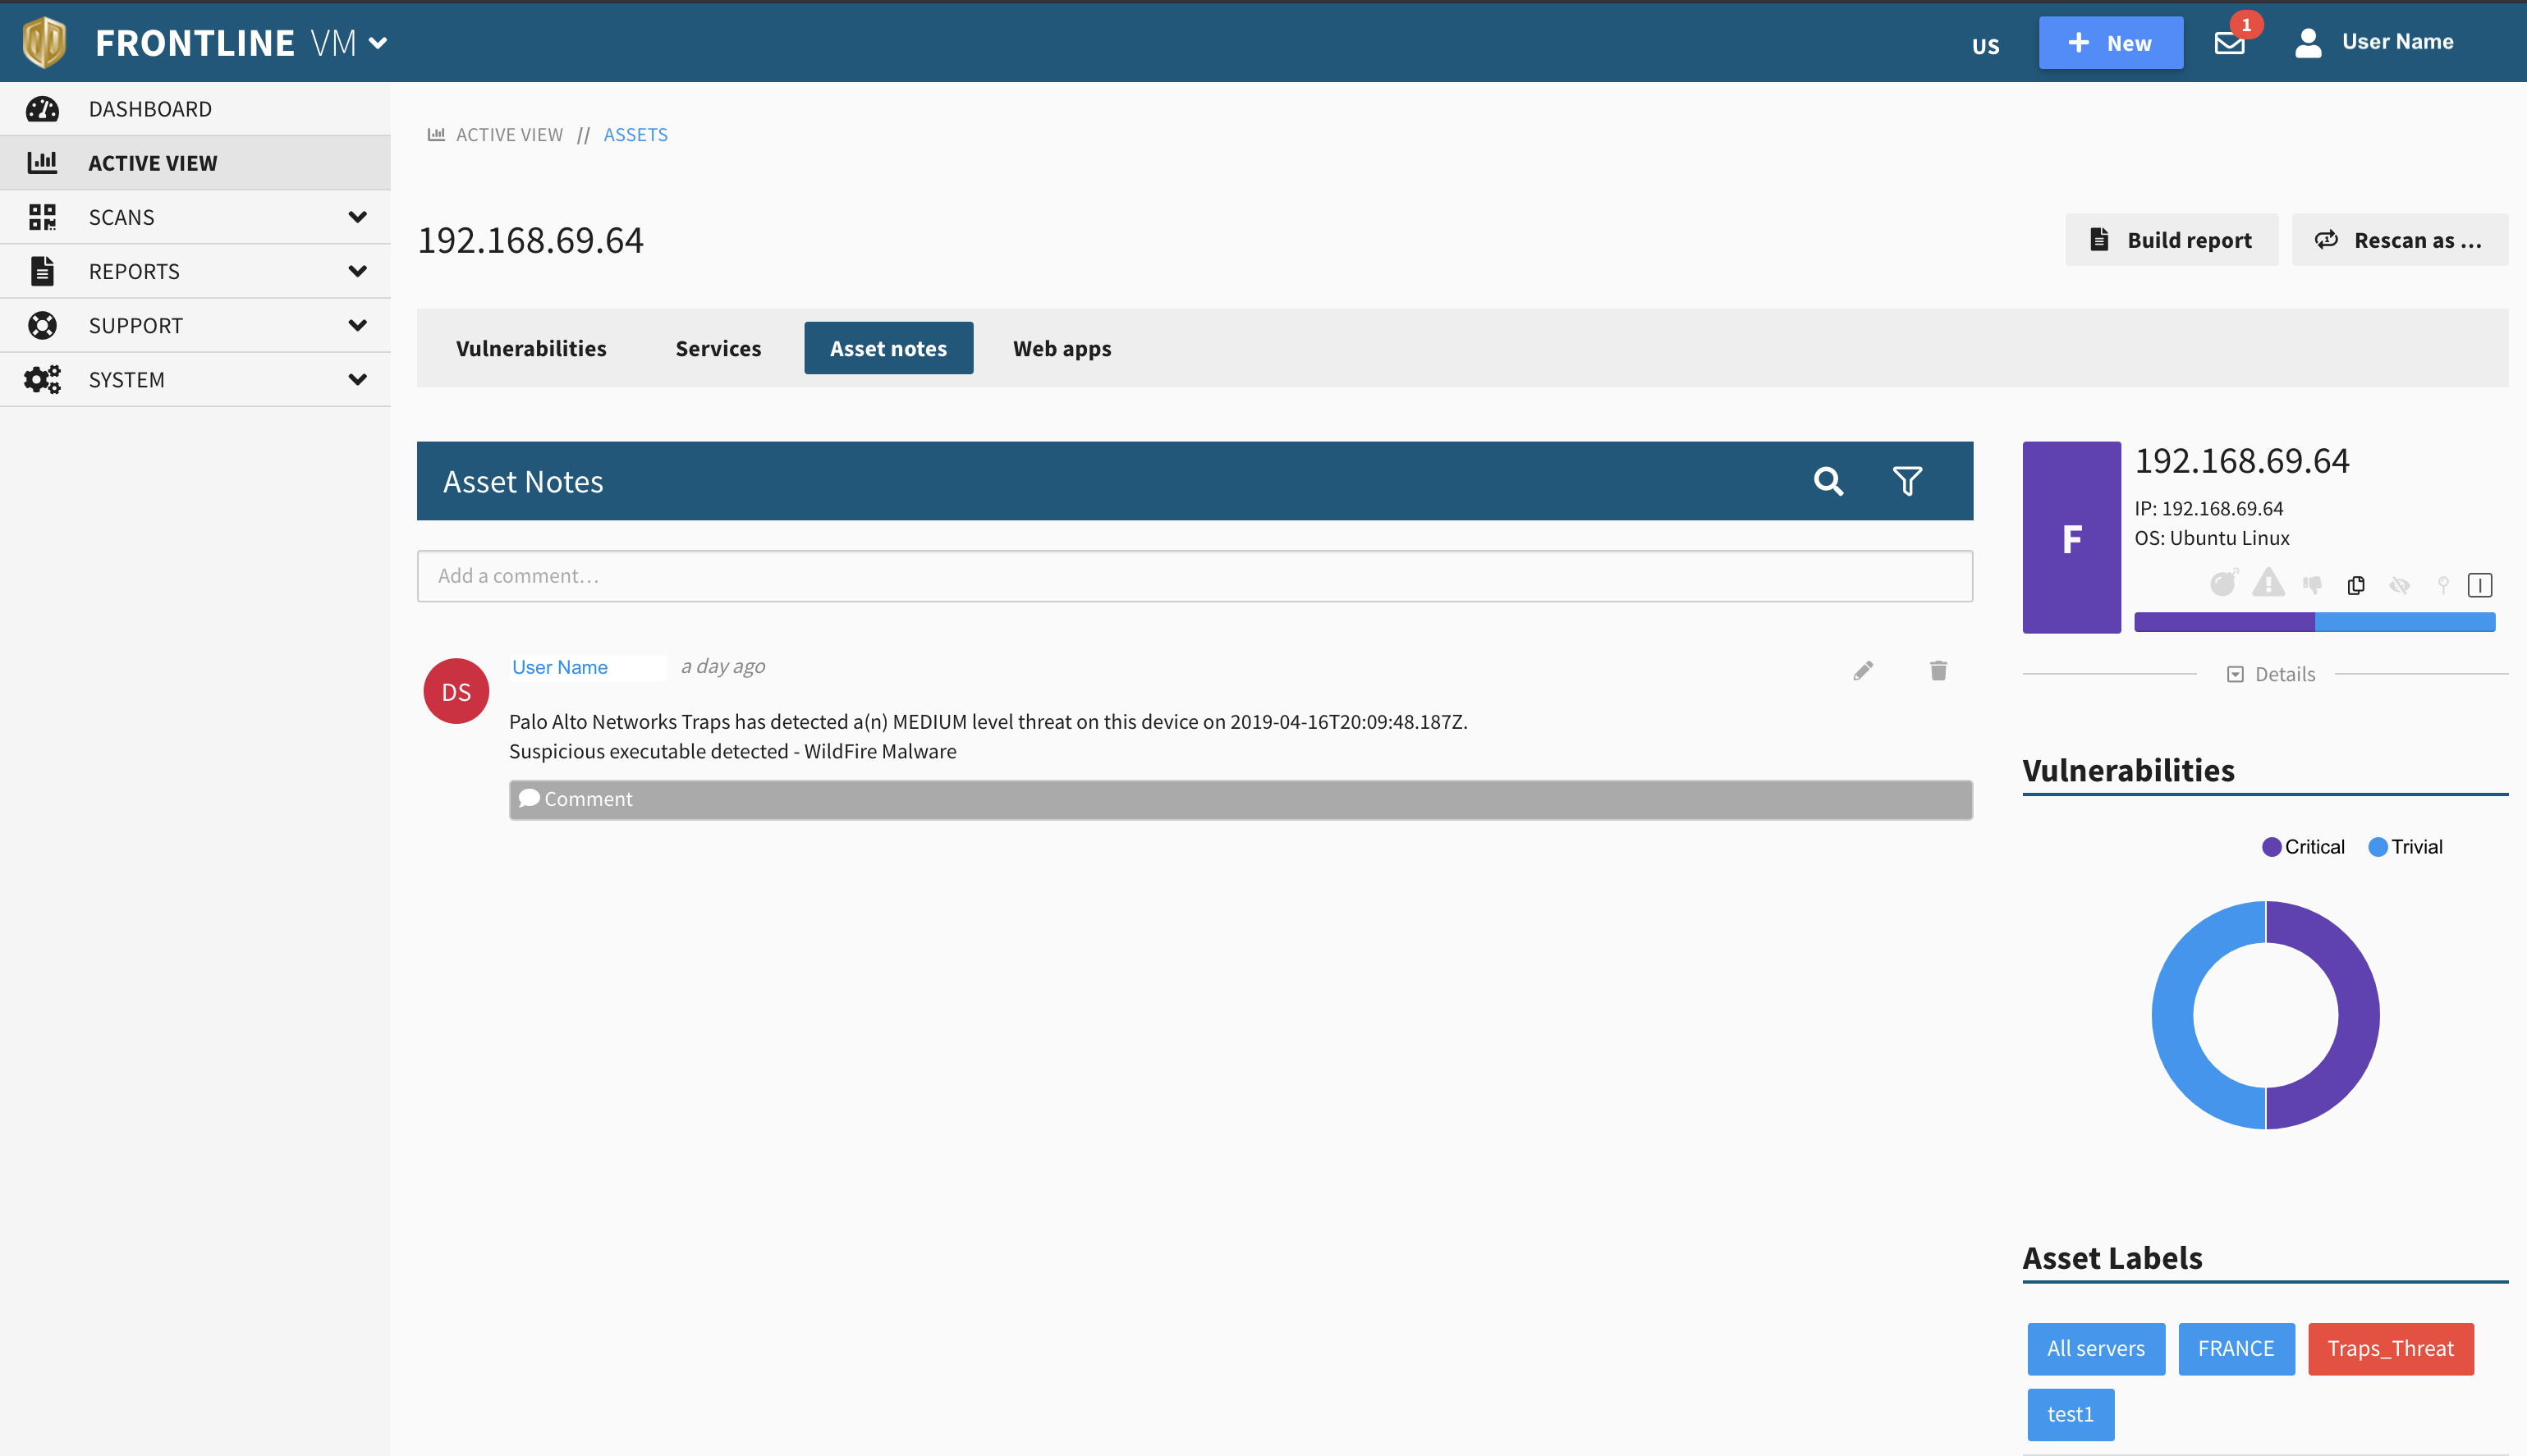
Once authorized, the app will begin pulling Next Gen Firewall and Trap data into your Fortra VM account.
Palo Alto Integration Tutorial