Install and Set Up AWS AMI Scanning
Set up Amazon Web Services VPC Scanning
In addition to scanning both external and internal networks, Fortra VM is also capable of scanning Amazon Web Services Virtual Private Cloud (VPC) infrastructures through our RNA Amazon Machine Image (AMI) scanning appliance.
To configure your AWS VPC for scanning, do the following:
- Obtain a Fortra Scanning Appliance Activation Key.
- Subscribe and configure your scanning appliance.
- Attach the FortraVMScanner IAM Role to your scanning appliance.
- Target IP ranges can be entered as normal, but hosts are always discovered through use of ec2-describe-instances API within the entered ranges, once the scan has started.
- Hosts outside of the VPC hosting the scanner will not be scanned and no traffic will be sent to them.
- After the scanner is provisioned, an IAM role must be attached to allow for use of the ec2-describe-instances API call, as this is required for host discovery.
- If the IAM instance profile is not assigned, the scanner will fall back to network-based discovery
Obtain a Fortra Scanning Appliance Activation Key
- Log in to
- From the left navigation menu, select Scan Settings > Scanners.
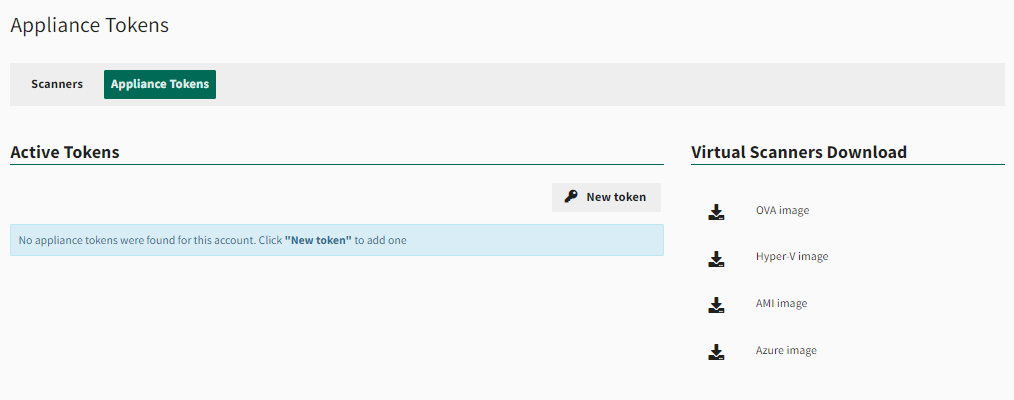
- Select the Appliance Tokens tab.
-
Select New Token to generate a new activation token. This generates a 10-character, alphanumeric key you can use to associate your AWS AMI scanning appliance to your account.
Subscribe and Configure your Scanning Appliance
There are a couple of different ways to subscribe and configure the Scanning Appliance.
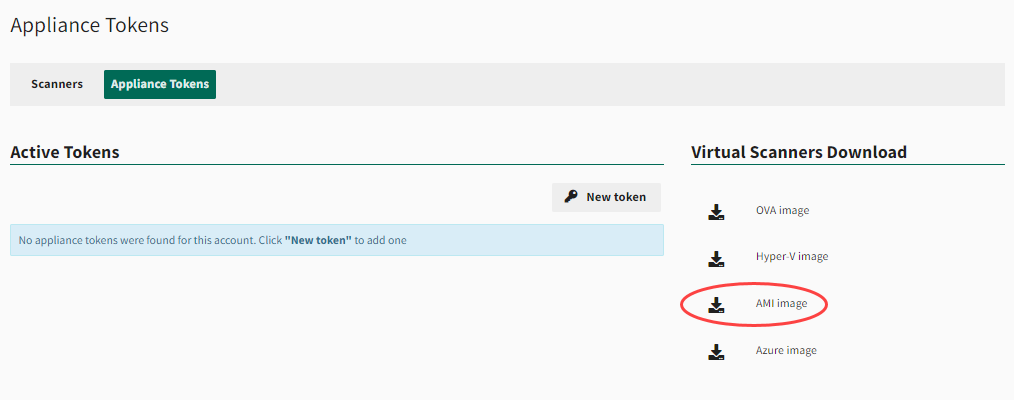
Select the AMI image link beneath the Virtual Scanner Download pane on the Appliance Tokens page.
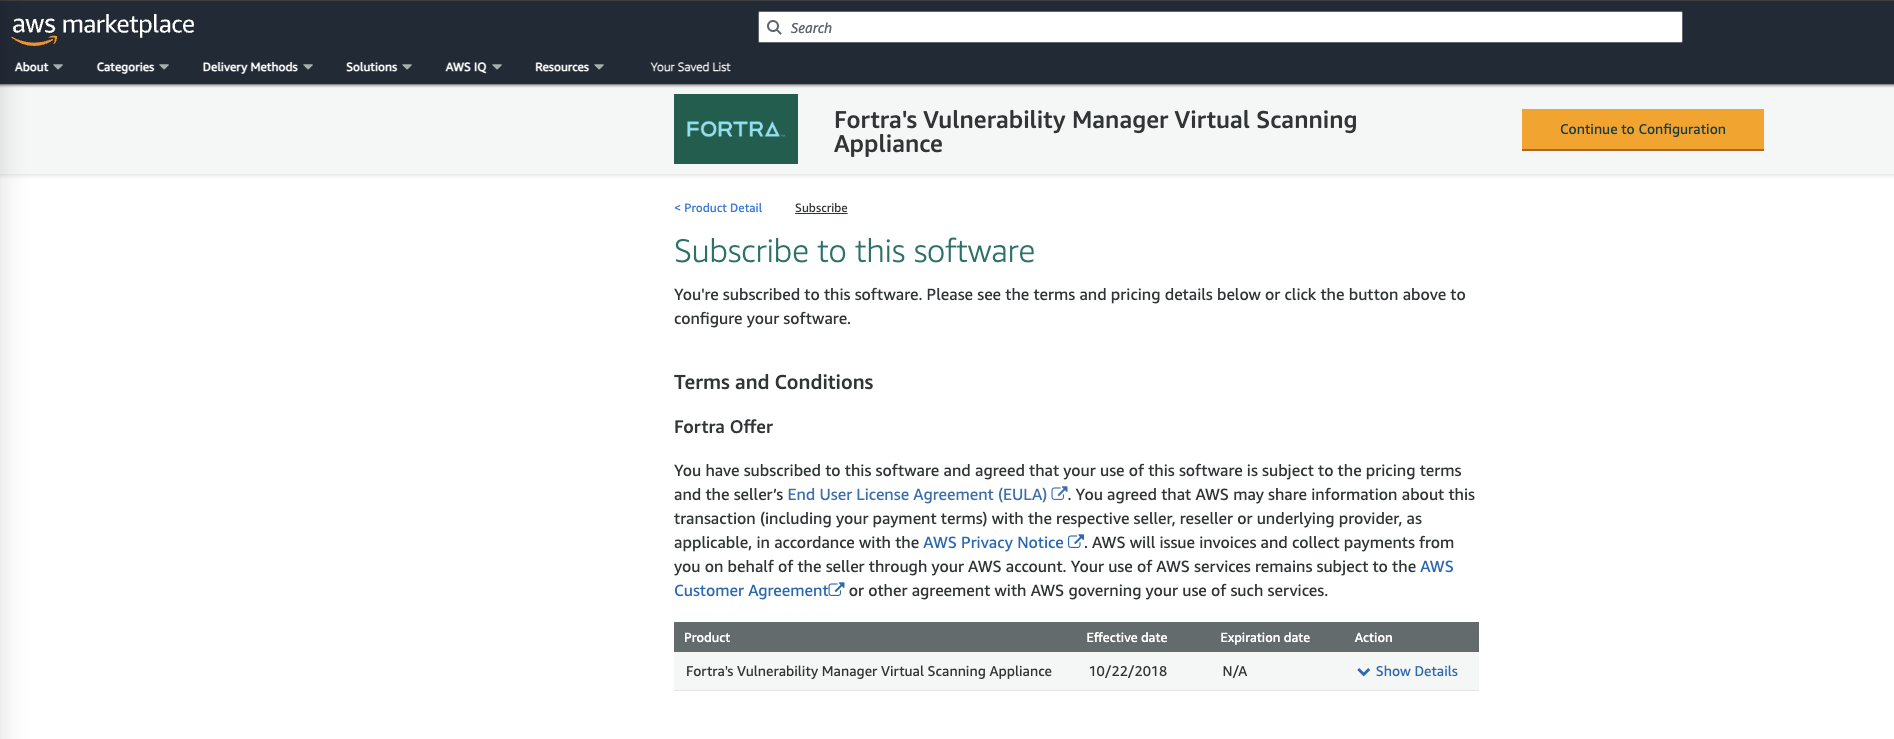
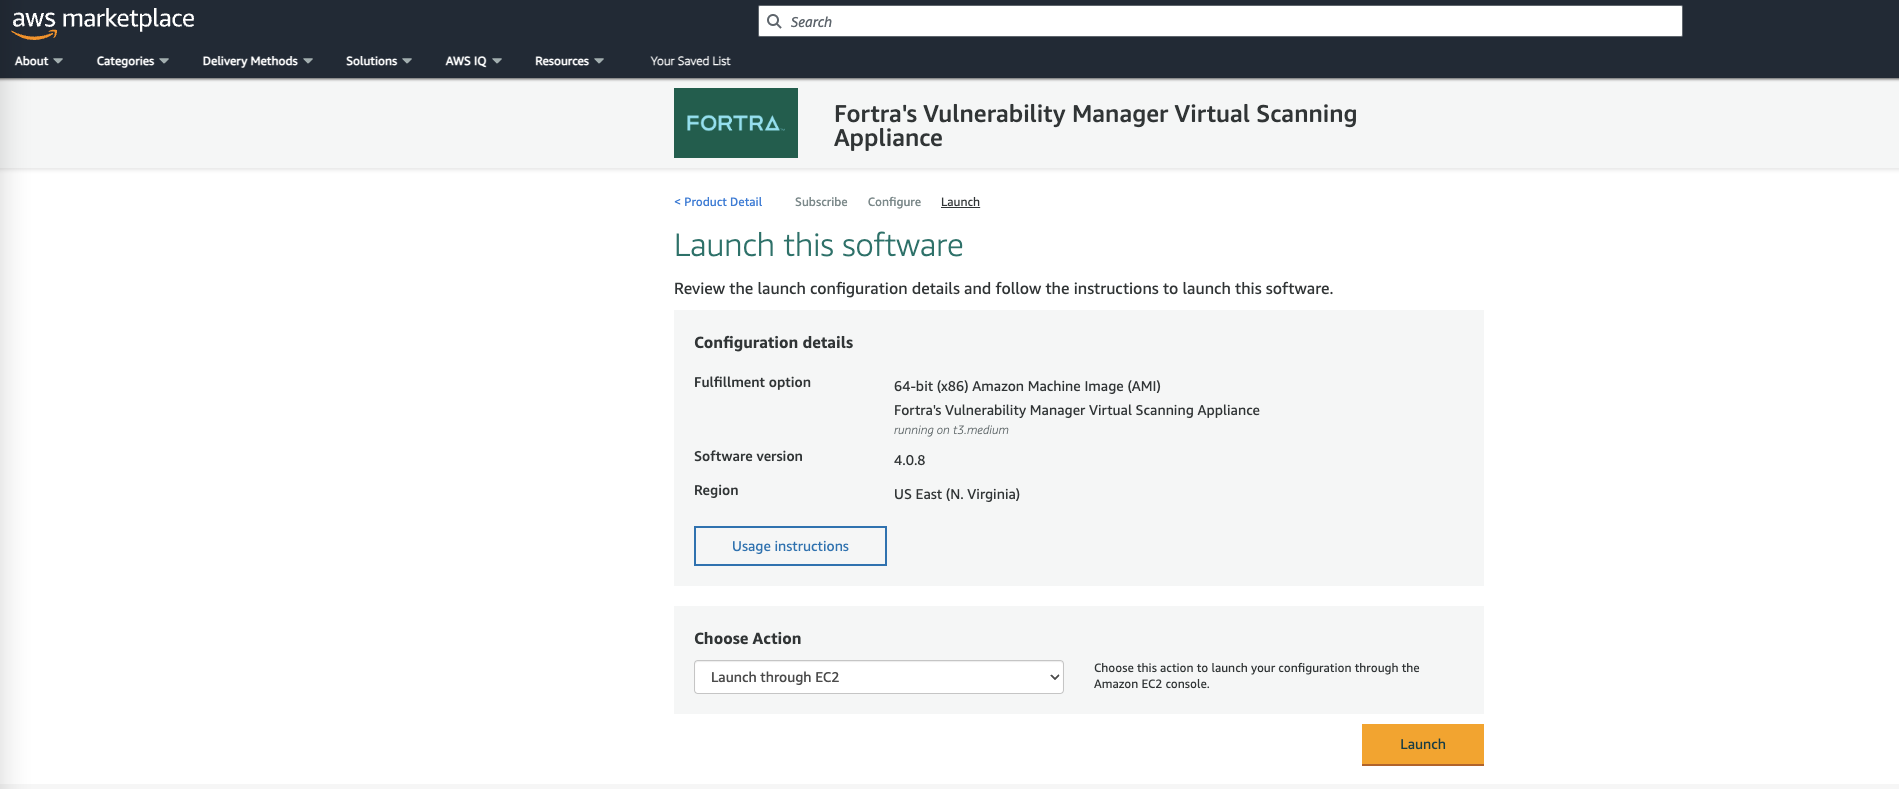
Alternatively, visit AWS Marketplace to subscribe and configure the Fortra's Vulnerability Manager Virtual Scanning Appliance.
-
Select Continue to Subscribe, found on the top right of the page. A EULA agreement will display and must be accepted to continue.
-
Once the EULA is processed (take note of "pending" status), select Continue to Configuration.
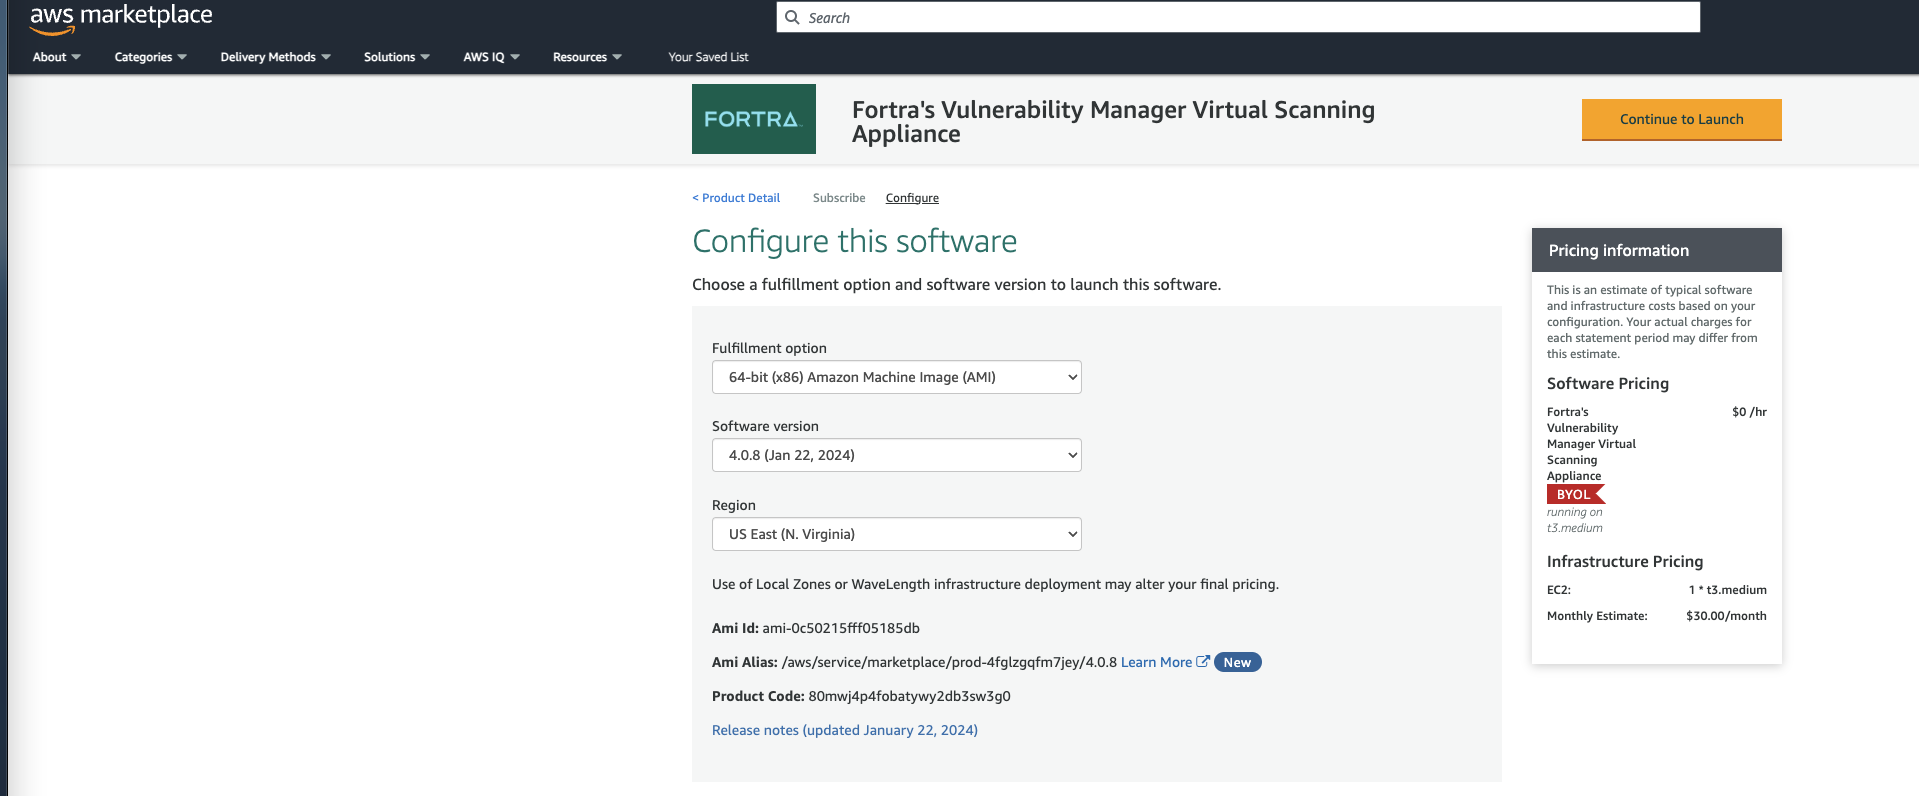
- Under Configure this software, select the appropriate Region for your FVM account, and then select Continue to Launch.
-
In Choose Action, select Launch through EC2. Select Launch to go to EC2.
-
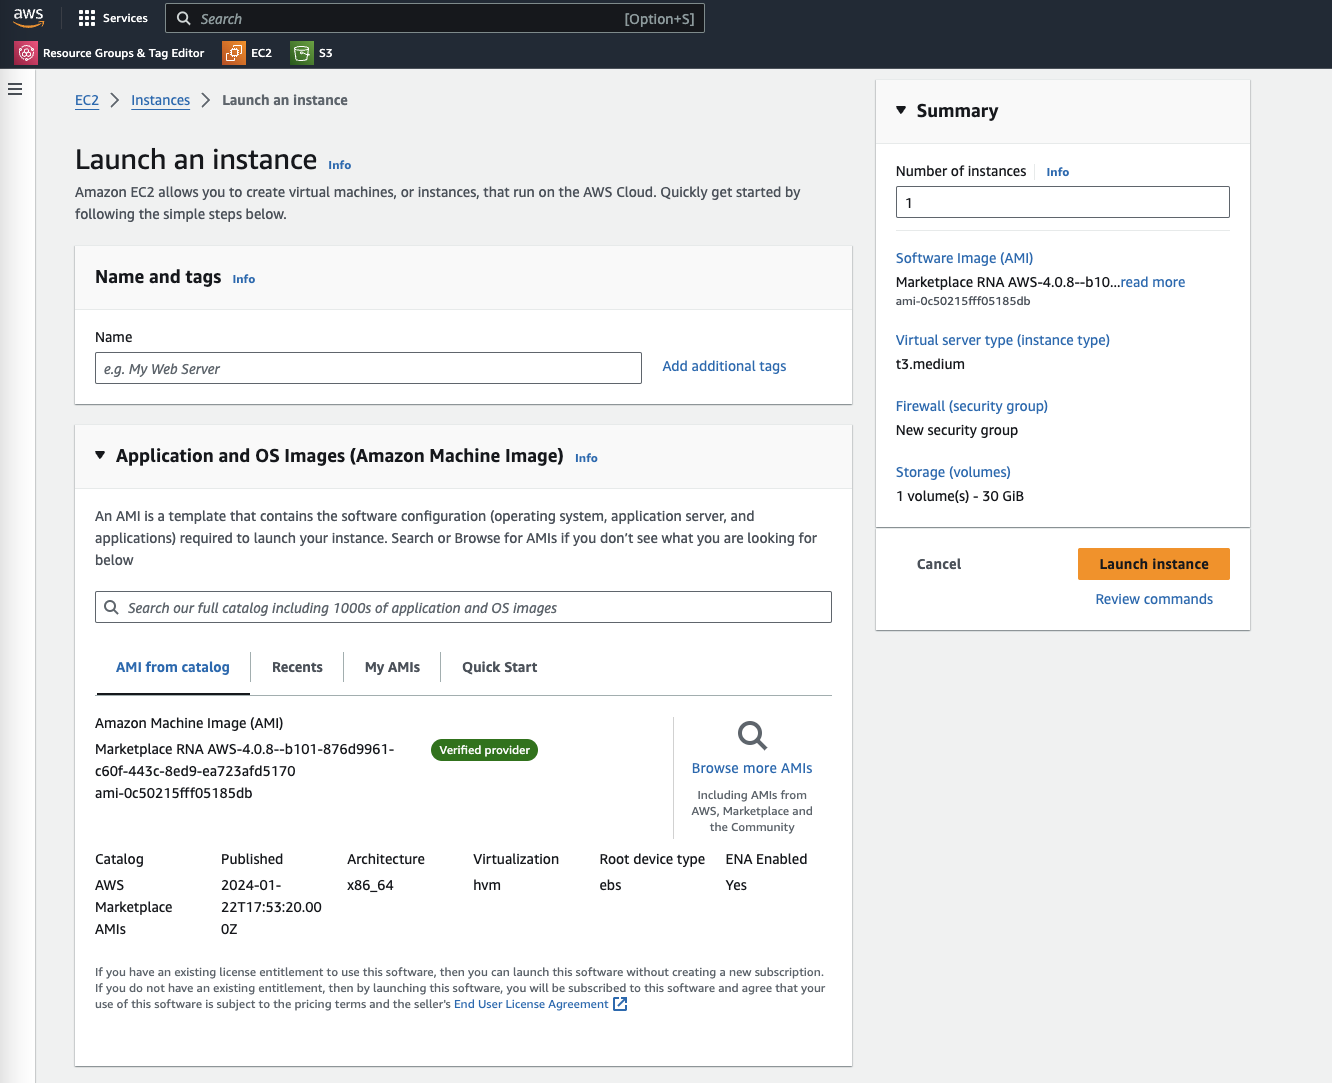
The form page allows you to select the Key pair. The virtual server type will preselect t3.medium which can be changed here, if necessary. Security groups can be configured here, but this guidance offers instruction on how add that information later.
-
Ensure the RNA has at least 20 GB of storage allocated to it.
-
Under the Advanced Details drop-down menu, enter the following string for User Data:
FRONTLINEKEY=<Your 10 Alphanumeric Activation Key>
-
Under Advanced details for the IAM instance profile, select the FortraVMScanner IAM role.
If the FortraVMScanner IAM role does not exist, perform the following actions:NOTE: Adding an IAM role is optional, but it will significantly speed up the host discovery process when scanning assets located within the same VPC as the RNA, resulting in less network traffic. However, if the intent is to use the RNA to scan assets that may be outside the VPC, then the role needs not to be applied, as it limits host discovery to only assets located within the VPC. Removing the role reverts to the standard probe-based host discovery, which can detect assets both inside and outside the VPC.-
Select Create new IAM profile (located next to IAM instance profile).
-
From the left navigation menu, select Policies.
-
Select Create policy.
-
Select the JSON tab.
-
Paste the following JSON code into the policy editor:
NOTE: Ensure there are no tabs or spaces before the opening "{" character after the pasting the JSON code into the AWS Console.Copy{
"Version" : "2012-10-17",
"Statement": [
{
"Sid": "AllowRNAToViewVPCInfrastructure",
"Effect": "Allow",
"Action": [
"ec2:DescribeInstances"
],
"Resource": "*"
}
]
} -
Name the policy FortraVMScanner.
-
Select Create policy.
-
From the left navigation menu, select Roles.
-
Select Create role.
-
Under Trusted entity type, select AWS Service.
-
Under Use case, select EC2.
-
Select Next.
-
On the Add permissions page, filter to the recently created FortraVMScanner policy and then select the checkbox next to it.
-
Select Next.
-
On the Name, review, and create page, add FortraVMScanner to the role name field.
-
Select Create role.
-
Back on the Launch Instance page, select the newly created FortraVMScanner role for the IAM instance profile field.
-
-
-
Select Launch instance.
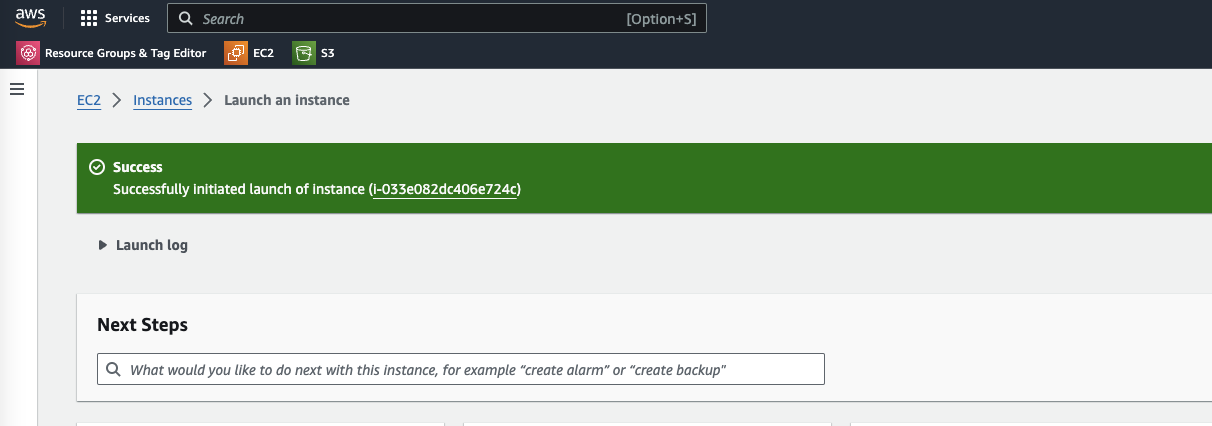
Your Fortra VM AMI scanner will provision itself using the provided key and come online within 5-10 minutes. It should show up as Online under Scan Settings > Scanner Management from the Fortra VM interface.
Do not clone the AWS AMI vRNA before, or after, activating it. Cloning the vRNA may prevent successful communication between the vRNA and the Fortra VM platform.
Configure your AWS VPC security groups to allow scanning.
Two types of security groups need to be provisioned. One is for the RNA to allow touch-backs from the targets scanned and the other ensures targets to be scanned allow the RNA scanning access.
Assign security group to RNA
The security group the AMI RNA uses must allow the following ranges for the RNA ports:
-
All traffic to ports 1025-65535
-
Custom UDP Rule for ports 69, 135, and 53
-
Custom TCP Rule for port 445
-
Internet outbound on port 443
Assign security group to targets
AWS VPCs often employ security groups as a means of restricting traffic. To scan EC2 instances within your AWS VPC, the Fortra AMI Scanner must be allowed to send network traffic to target instances.
This can be accomplished either by modifying a default security group that the instances currently share, or by creating a new security group and assigning it to all instances you wish to scan.
To create a new security group, perform the following steps:
- In the EC2 console, navigate to Network & Security > Security Groups.
- Select Create Security Group. Give the group a descriptive Security group name, such as "Allow Fortra Scanner." For Description, use something like, "Allow Fortra scanner to scan assets."
- Under Inbound Rules, select Add Rule.
- Under Type, select All Traffic.
-
Specify the source. For example, using the Security Group ID from step 1 in the previous section, enter AWSMP to find your Security Group ID easily.
NOTE: The source can either be the IP address of the scanner or the Security Group ID of the scanner. The preferred source is the Security Group ID as the IP address of the appliance may change if not configured to be static. - Select Create Security Group > Create.
-
Now, assign this new security group to EC2 instances you wish to scan by navigating to Instances > Actions > Security > Change Security Groups.
-
In the search field, search for your newly created Security Group and then select Add Security Group.
- Select Save.
You should now be able to scan your AWS VPS assets.