Fortra VM (FVM) Agent Scans
Overview
Featuring minimal impact on systems, now you can easily obtain patch scan results automatically and ensure more comprehensive coverage for your vulnerability management program with FVM Agent Scanning. Agents scan from anywhere with connectivity and relieve scanning systems over a variety networks. FVM scanning can accommodate remote environments with agents which use local host resources to reduce bandwidth requirements and prevent challenges due to slow network connections. The agent will automatically detect host changes and send them in near real-time to Fortra VM. This automated feature creates a benefit for those scanning large numbers of assets. Instead of running scans that require days to run through all assets, agents can be installed on each asset for faster results with authenticated scans. Additionally, agents ensure endpoints are scanned when they are not accessible by way of network-based scanning appliances.
Fortra VM's agent is designed to incur minimal impact on the system and the network, to allow the opportunity to gain direct access to the host without system disruption to end-users. After deployment FVM Agents are self-regulating as they assess local configurations and download updates, without user initiation or reboot requirement.
FVM macOS Agent requires less than 200 MB of disk space and uses less than 20 MB of RAM. Expect minimal CPU impact when idle with peaks of around 2% usage while scanning.
FVM Windows Agent requires less than 5 MB of space for the agent, up to 100 MB for logging, and uses less than 20 MB of RAM. Expect minimal CPU impact when idle with peaks of around 8% usage while scanning.
FVM Linux Agent requires less than 100 MB of disk space and uses roughly 90 MB of RAM. Expect minimal CPU impact when idle at less than 1% utilization, and peaks of 1.5% usage while scanning.
Agent Scanning requires an internal scanner to be configured for your account. The agents do not use the internal scanner directly, however, the scanner will be associated to the scan results and used for any manual rescans from Fortra VM.
Supported Operating Systems
FVM Agent Scans is supported for the following 64-bit operating systems:
Windows
-
Windows 10
-
Windows 11
-
Windows Server 2012 + R2
-
Windows Server 2016
-
Windows Server 2019
-
Windows Server 2022
macOS
-
macOS Ventura
-
macOS Sonoma
-
macOS Sequoia
Linux
-
Amazon Linux 2
-
Ubuntu 20
-
Ubuntu 22
-
Debian 11
-
Red Hat Enterprise Linux 7
-
Red Hat Enterprise Linux 8
-
Red Hat Enterprise Linux 9
-
Oracle Enterprise Linux 7
-
Oracle Enterprise Linux 8
-
Oracle Enterprise Linux 9
Download the correct agent to coordinate with your operating system and system type.
Use FVM Agent Scanning
Once the installation is complete, the agents will start sending results back to Fortra VM. All agent scan results get assembled into a scan and then added to Fortra VM in a recurrence that you specify. Agents will only send back results when they detect a change in the endpoint or notification of a new agent scanner definitions package. All recurrence intervals are relative to midnight UTC on January 1st of every year, regardless of the time or date of the agent installation or activation of the agent scanning service in Fortra VM.
The scan would be created in Fortra VM, assuming there are new agent scan results to present, at approximately midnight UTC on the day the recurrence schedule runs and every interval thereafter for recurrence rules that are less than one day. See Agent Scan Recurrence for all available intervals.
Agent Download
Download the appropriate agent package for Windows, macOS, and Linux from Fortra VM portal by selecting Scan Settings > Agents from the side menu. Select Download Agent, and then select the desired agent from the list.

Agent Site License Key
To access your Agent Site License Key, select Account > Settings. Scroll down to the Scanner and Agent Provisioning section to find the key and then copy it into the installer.

Agent Scan Recurrence
To configure the recurrence of how often scans may be created when changes are detected by agents, select Scan Settings > Settings from the navigation menu. Then, under the Agent Scanning section, select the desired option from the Scan recurrence list.
-
4x hour = 15 minutes
-
1x hour = 1 hour
-
8x day = 3 hours
-
4x day = 6 hours
-
2x day = 12 hours
-
1x day = Daily
-
1x week = Friday
-
3x week= Monday, Wednesday, Friday of the week
-
1x month = 1st Friday of the month
-
2x month = 1st and 3rd Friday of the month
-
1x quarter= Days 15, 105, 195, 285 of the year
-
2x quarter = Days 15, 60 ,105, 150, 195, 240, 285, 330 of the year
-
1x year = Day 15 of the year
-
2x year = Days 15 and 195 of the year
Other available Agent Scanning options:
-
Include superseded Microsoft Patches and Include superseded Apple patches - Currently, these are the only agent runtime scan options available in Fortra VM. Scans performed by FVM Agents are essentially patch scans.
-
Deactivate Days - Marks agents as inactive if they have not communicated back to Fortra VM within a specified time.

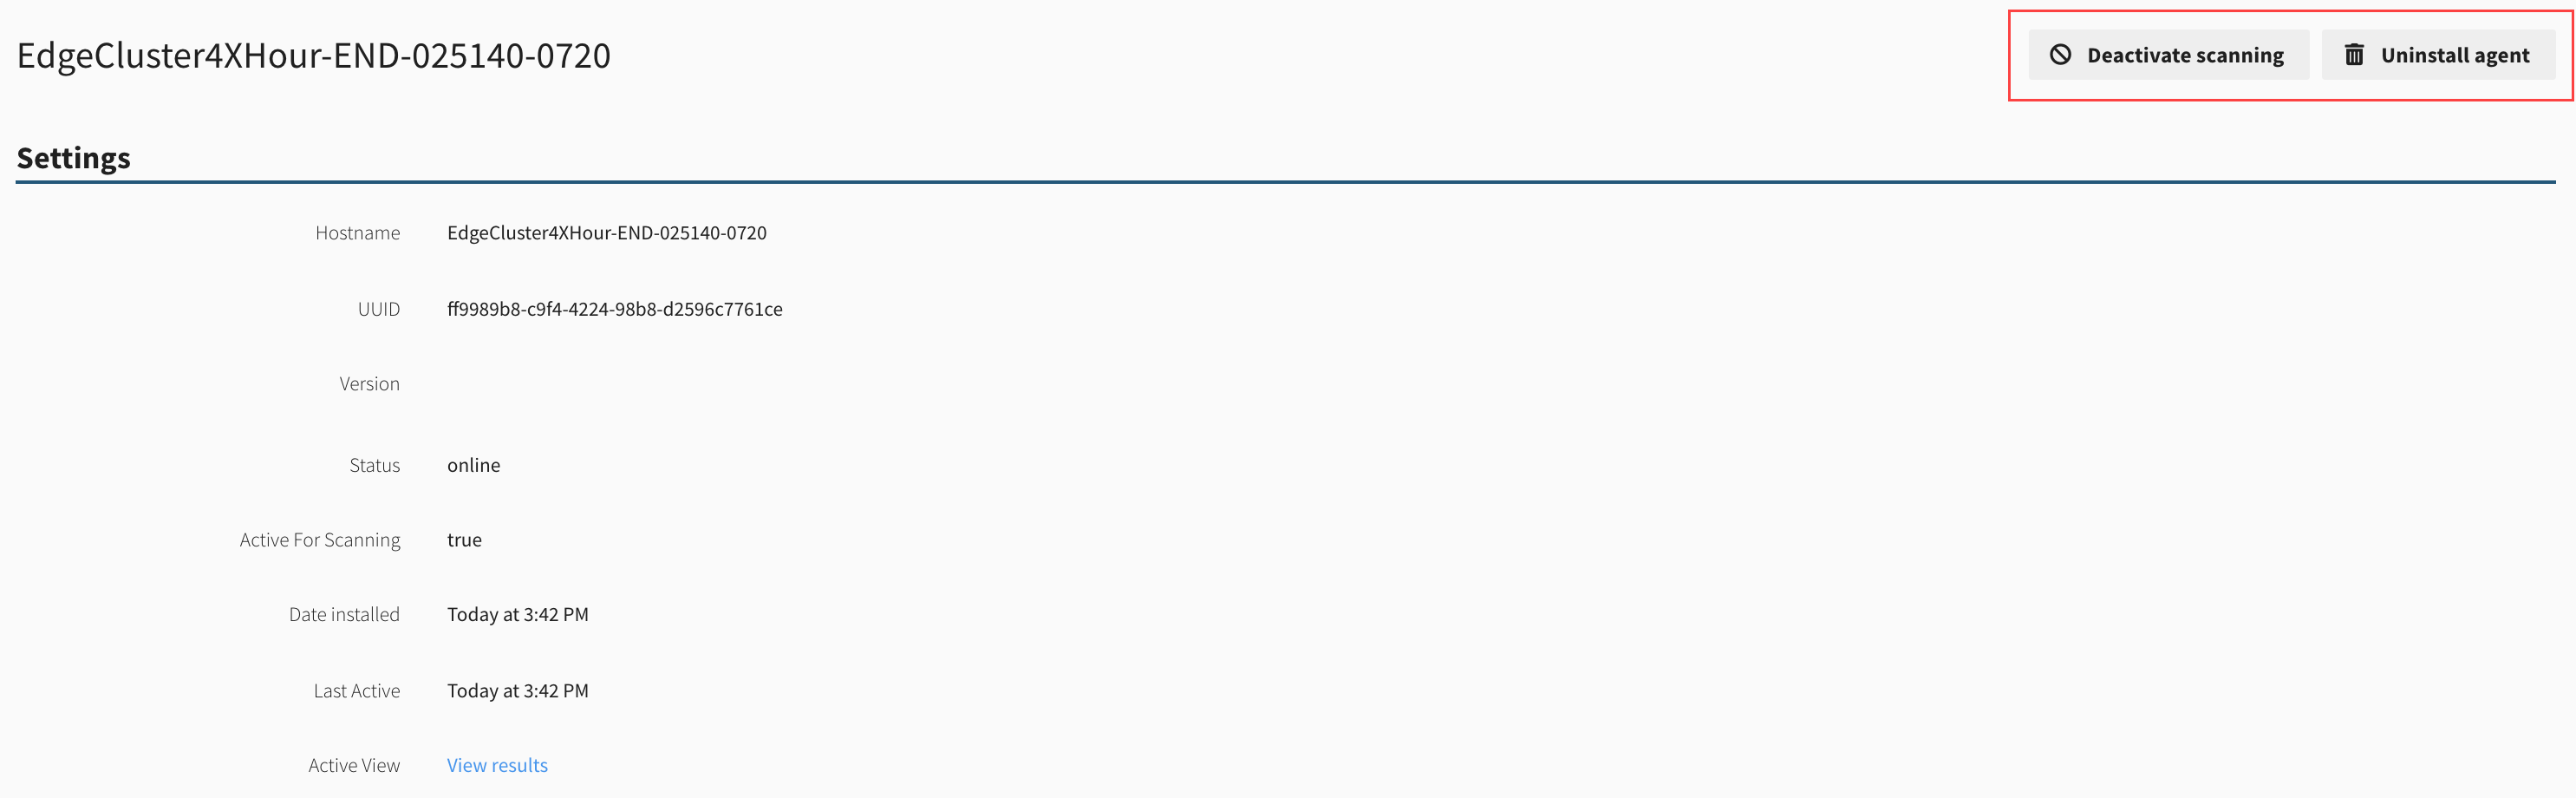
Deactivating an Agent
After drilling into an agent, you will see some basic information about the agent and the asset it is installed on, along with option to deactivate or uninstall the agent.
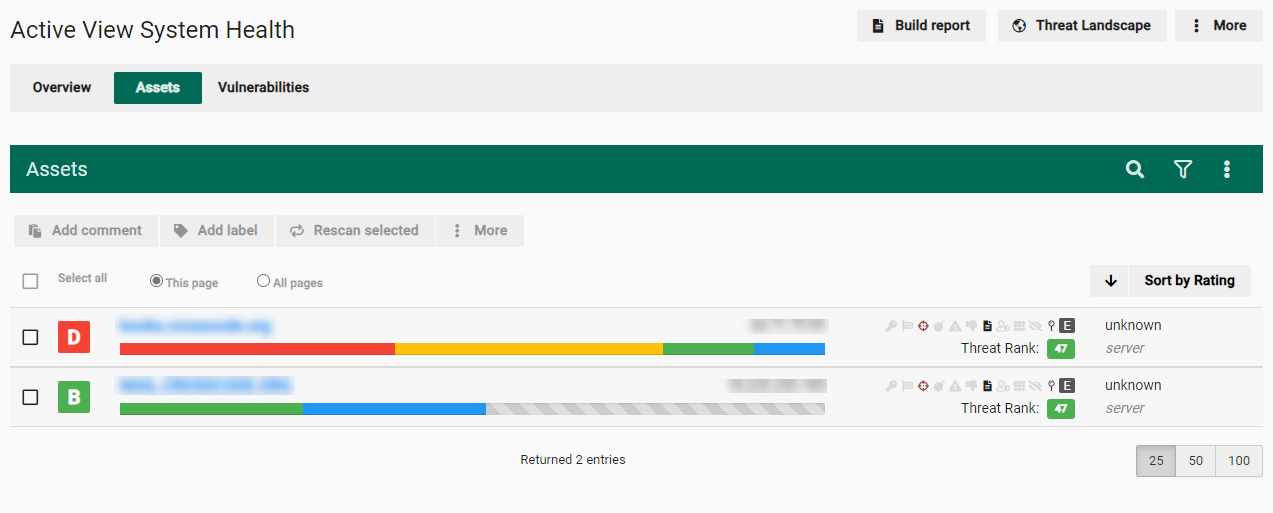
Agent Scan Results
To view the scan results for an agent:
-
Under Active View System Health, select the Assets tab.
-
A new icon appears, indicating the asset has already been scanned by an agent.

-
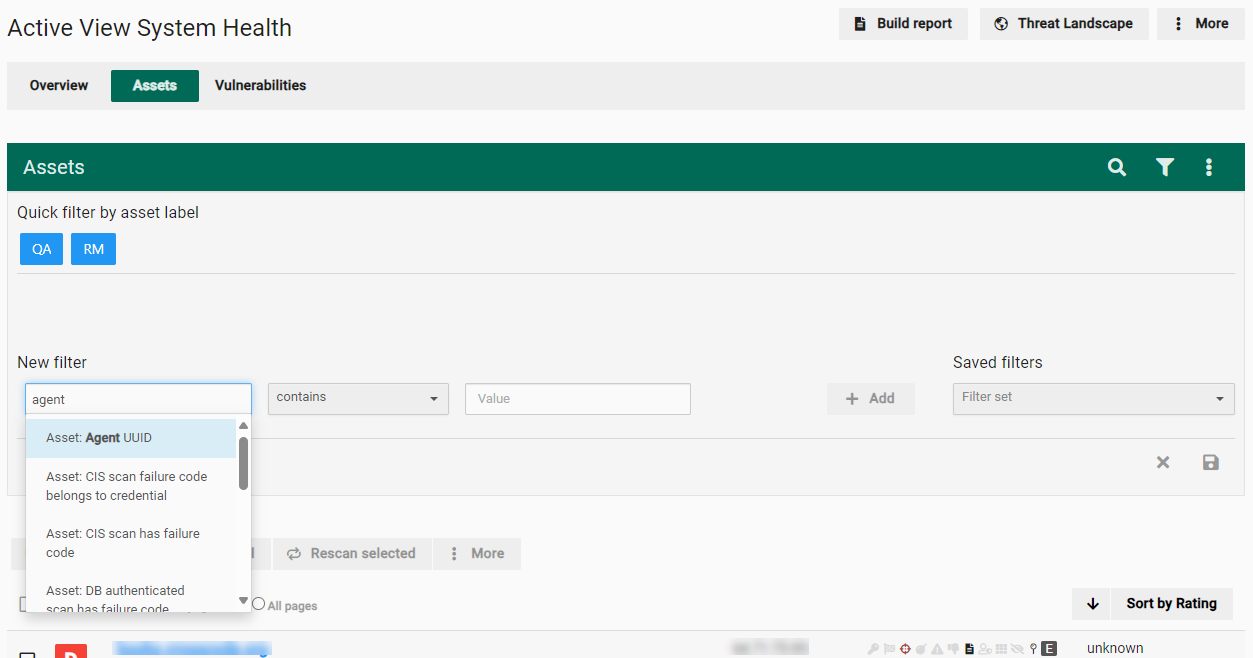
You can filter by these agent results.
Agent Installation
System Requirements:
-
64-bit: Windows 10, 11, Server 2012 + R2, Server 2016, Server 2019, Server 2022
-
TLS version 1.2
-
Port 443 open outbound
-
Internal scanner configured
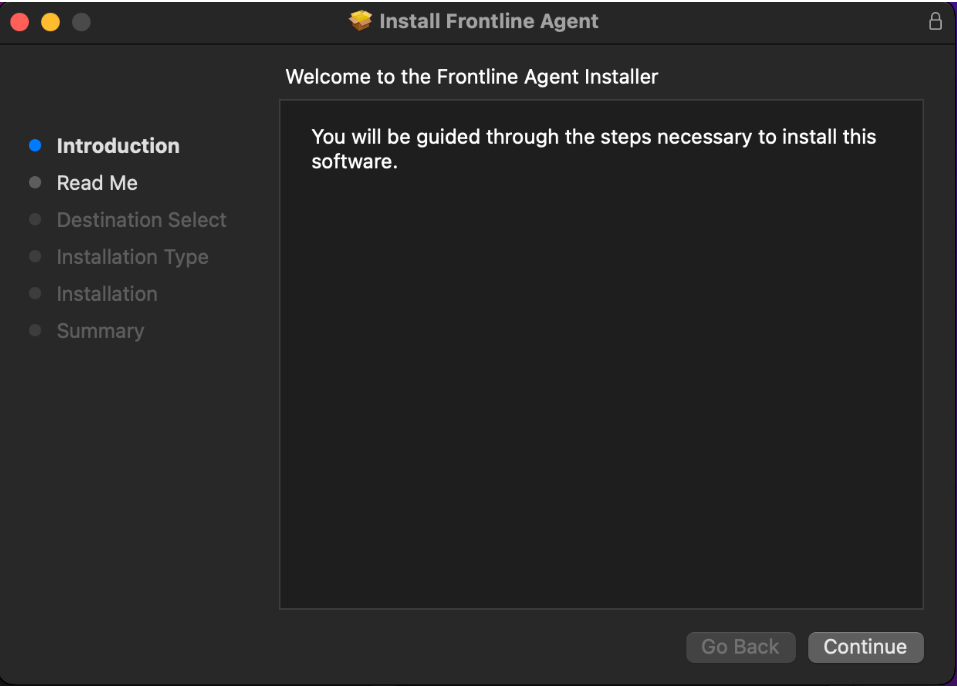
Using either the MSI installer package, the command line mass install method, or your own organization’s software distribution process (SCCM, etc.) install. Using the MSI installer package, follow the steps provided through the Wizard.
You can install the agent by way of a command line by running the following command from a command prompt that has been set to "run as administrator":
Run:
msiexec /i FrontlineAgentInstaller64.msi /quiet /log <path to the log file>
Example:
msiexec /i FrontlineAgentInstaller64.msi /quiet /log C:\logs\install.log
Licensing Windows Agent
The following command is used to activate the Windows agent where C: may need to be replaced depending on the install location of the Agent and <site license> is replaced with the site license obtained from the Fortra VM portal:
Run:
"C:\Program Files\Digital Defense\Frontline Agent\frontlineUtils.exe" activate --activatekey <your agent license>
Example:
"C:\Program Files\Digital Defense\Frontline Agent\frontlineUtils.exe" activate --activatekey xxxxxxxx-xxxx-xxxx-xxxx-xxxxxxxxxxxx
Agent Logs
Installation Logs
You can find agent Installer logs in the specified location by running:
Run:
msiexec /i FrontlineAgentInstaller64.msi /quiet /log <path to log files>
Example:
msiexec /i FrontlineAgentInstaller64.msi /quiet /log C:\logs\install.log
If you need more verbose installer logs, run the following command in the cmd window:
Run:
msiexec /i frontlineagentinstaller64.msi /quiet /l*v <path to log files>
Example:
msiexec /i frontlineagentinstaller64.msi /quiet /l*v C:\logs\install.log
Auto-Update logs
Auto-update logs can be found in the following location:
C:\Windows\Temp\faupdate.log
Agent Logs
FVM Agent logs can be found in the following location:
\Program Files\Digital Defense\Frontline Agent\log
Mass Agent Update Deployments
Use the following download URL to deploy agent updates in your organization by way of your roll out solution:
https://updates.<lineup domain>/agent/update/?type=windows64&license_id=<your agent site license from FVM>
Replace <lineup domain> with the lineup domain for your region:
-
US - updates.us.frontline.cloud
-
UK - updates.uk.frontline.cloud
-
JP - updates.jp.frontline.cloud
-
SE - updates.se.frontline.cloud
Example:
https://updates.us.frontline.cloud/agent/update/?type=windows64&license_id=xxxxxxxx-xxxx-xxxx-xxxx-xxxxxxxxxxxx
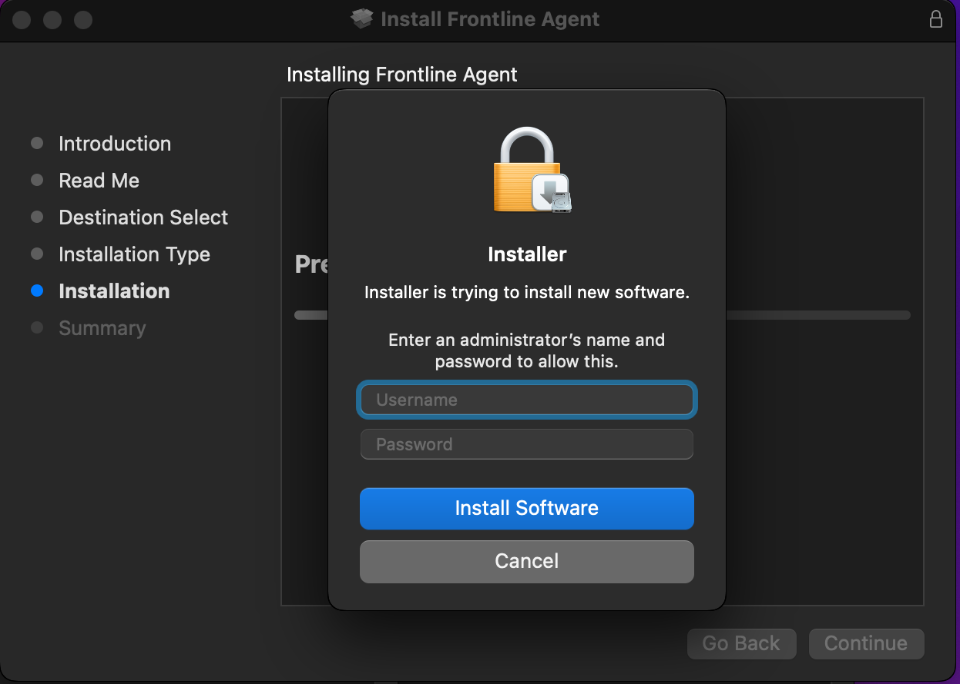
You can install MacOS agents using the GUI installer or a command-line.
System Requirements:
-
macOS Ventura, macOS Sonoma, or macOS Sequoia
-
TLS version 1.2
-
Internal scanner configured
-
Port 443 open outbound
Multiple agents running on a single host are not supported.
Command Line Agent Install
Run:
sudo installer -target / -pkg <path to installer package>
Example:
sudo installer -target / -pkg C:\FrontlineAgentInstaller.pkg
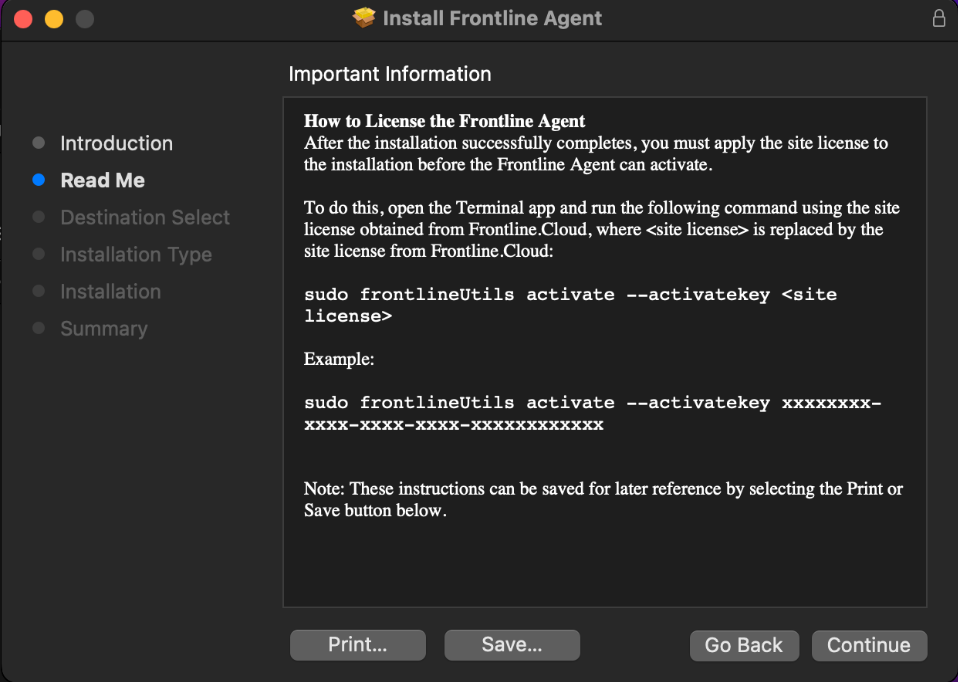
License the Agent
Run:
sudo /usr/local/bin/frontlineUtils activate -activatekey <your agent license>
Example:
sudo /usr/local/bin/frontlineUtils activate --activatekey xxxxxxx-xxx-xxx-xxx-xxxxxxxxxxxx
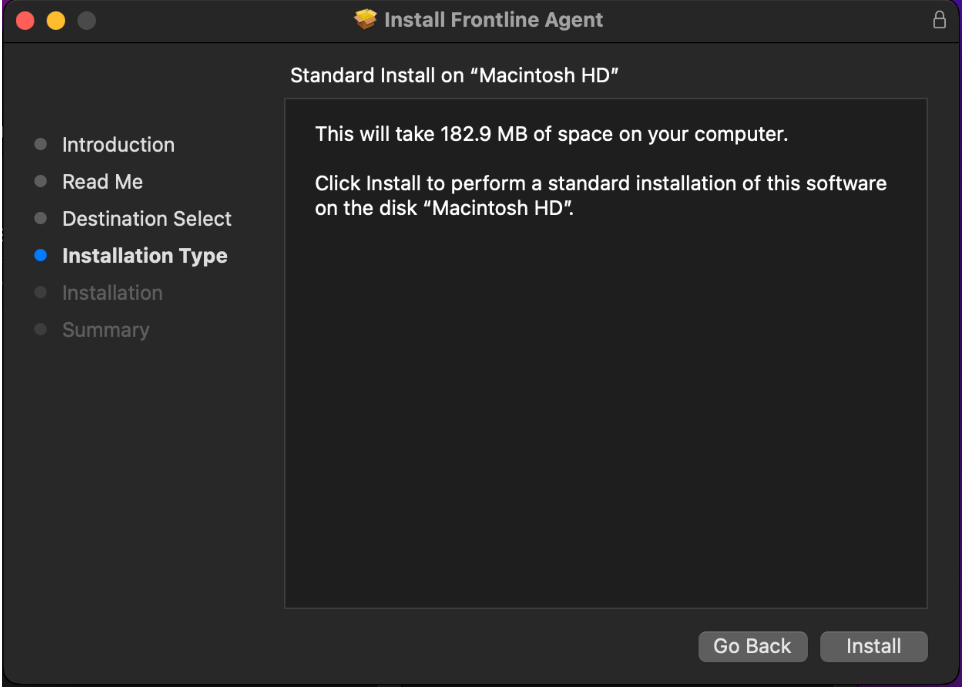
Install the Agent
The default agent install location is /Applications/Frontline Agent.app.

Agent Logs
The agent log for all MacOS versions is located in the /Library/Logs/com.digitaldefense.Frontline-Agent folder. Log files for the main service are prefixed with "agent" followed by the date of the first log message written to the file. For example, agent20231018.log.
You can open or manipulate this file using any standard Unix utility such as vi, cat, tail, etc.
Updating
Automatic Software Updates
The agent will check for updates once a day. If the version of the installed agent is less than the agent available to update to, the installed agent will download the new version and update itself. Additionally, if the agent sends scan results to Fortra VM that are rejected due to a version mismatch then the agent will also check for updates to both scan definition and agent version. It will also update if the service is restarted.
Scan Definition Updates
The agent will check for new scan definition updates once a day at the same time it checks for updates to the agent binaries. It will also check for new updates if the agent receives a negative status message (such as wrong scan version) from the Controller when submitting scan results.
Mass Agent Update Deployments
Use the following download URL to deploy agent updates in your organization by way of your roll out solution:
https://updates.<lineup domain>/agent/update/?type=mac64&license_id=<agent site license from FVM>
Replace <lineup domain> with the lineup domain for your region:
-
US - updates.us.frontline.cloud
-
UK - updates.uk.frontline.cloud
-
JP - updates.jp.frontline.cloud
-
SE - updates.se.frontline.cloud
Example:
https://updates.us.frontline.cloud/agent/update/?type=mac64&license_id=xxxxxxxx-xxxx-xxxx-xxxx-xxxxxxxxxxxx
Linux Agent Installers
The Linux Agent is offered in two available installation packages:
-
Linux Agent (64-bit Debian format)
-
Linux Agent (64-bit RPM format)
See Agent Download for the download location in Fortra VM.
System Requirements:
-
64 bit: Amazon Linux 2, Ubuntu 20, Ubuntu 22, Debian 11, Red Hat Enterprise Linux 7, Red Hat Linux 8, Red Hat Linux 9, Oracle Enterprise Linux 7, Oracle Enterprise Linux 8, or Oracle Enterprise Linux 9
-
TLS version 1.2
-
Internal scanner configured
-
Port 443 open outbound
Multiple agents running on a single host are not supported.
If you run a Linux distribution such as Debian, Ubuntu, or any other that uses .deb packages, the 64-bit Debian format needs to be selected to download. However, those running Red Hat, Oracle Linux, or another Red Hat-variant distro should choose the 64-bit RPM format.
For example, when running Ubuntu with the RPM tool suite installed the Debian format should be chosen over the RPM installer.
Install Agent
Once the installer is chosen for the specific distro to target, the downloaded installer can be copied to the appropriate Linux system using the scp command.
Example:
scp frontline-agent-LATEST-1.58.3.x86_64.rpm admin@my-redhat-server:/home/admin
Once the installer has been copied to the servers, the admin should log in and execute the following commands to install the agent:
Run:
sudo su
rpm -i <installer_file_name> (if on a Red Hat system)
dpkg -i <installer_file_name> (if on an Ubuntu system)
Example:
sudo su
rpm -i frontline-agent-LATEST-2.9.450.x86_64.rpm (if on a Red Hat system)
dpkg -i frontline-agent_LATEST-2.9.450_amd64.deb (if on an Ubuntu system)
The agent MUST be installed with root permissions. If all dependencies are met and the agent installs without error, it will be started automatically through system.
Register the agent using the site license key.
Activate Agent
Use the following instructions to activate the agent using the frontlineUtils binary.
Obtain your site license key in Fortra VM by navigating, see Agent Scan Recurrence for details.
To ensure the agent activates, execute the following commands:
Run:
cd /var/frontline/bin
./frontlineUtils activate --activatekey <your site license key>
Example:
cd /var/frontline/bin
./frontlineUtils activate --activatekey xxxxxxxx-xxxx-xxxx-xxxx-xxxxxxxxxxxx
Agent Logs
To retrieve Linux agent logs, run the following command:
journalctl -u frontline-agent
Mass Agent Update Deployments
Use the following download URLs to deploy agent updates in your organization by way of your roll out solution:
-
Debian installer:
https://updates.<lineup domain>/agent/update/?type=linuxdeb&license_id=<agent site license from FVM>
-
RPM installer:
https://updates.<lineup domain>/agent/update/?type=linuxrpm&license_id=<agent site license from FVM>
Replace <lineup domain> with the lineup domain for your region:
-
US - updates.us.frontline.cloud
-
UK - updates.uk.frontline.cloud
-
JP - updates.jp.frontline.cloud
-
SE - updates.se.frontline.cloud
Example:
https://updates.us.frontline.cloud/agent/update/?type=linuxdeb&_id=xxxxxxxx-xxxx-xxxx-xxxx-xxxxxxxxxxxx
Agent Support
Support Policy
The Fortra VM Agent is generally supported on an OS, as long as the vendor continues to support the version of the OS the Fortra VM Agent is installed on. Once an OS is no longer supported by the vendor, the Fortra VM Agent will continue to be supported for an additional three months on the end of life OS.
The agents will start returning a new detection titled "FVM Scan Notification: Agent Approaching End of Support for Host OS" to help identify agents that are running on an end of life OS and are approaching the end of support.
After the additional three month period, the Fortra VM Agent may continue to work as expected but no additional support or bug fixes will be provided. A Fortra VM Agent that is no longer supported on the OS will start to run a detection titled "FVM Scan Notification: Unsupported Agent OS" to help identify agents running on an unsupported host.
Proxy Setup
FVM Agent can be configured to use an HTTP proxy. Set the proxy host and port number using the frontlineUtils binary for the version of the agent for which you are configuring the proxy.
Windows Proxy Setup
On Windows, the frontlineUtils.exe. binary can be found in the \Program Files\Digital Defense\Frontline Agent folder. To configure the proxy settings, execute the following from an elevated command prompt (Administrator):
frontlineUtils.exe proxy --add host:port
Set the host to the IP address for host of the proxy and set the port to the appropriate port number.
Display proxy settings using the --display option:
frontlineUtils.exe proxy --display
Remove proxy settings using the --remove option:
frontlineUtils.exe proxy --remove
Linux Proxy Setup
For Linux systems, use the frontlineUtils binary located in the /var/frontline/bin folder. Execute the following command:
sudo /var/frontline/bin/frontlineUtils proxy --add host:port
Set the host to the IP address for host of the proxy and set the port to the appropriate port number.
Display proxy settings using the --display option:
sudo /var/frontline/bin/frontlineUtils proxy --display
Remove proxy settings using the --remove option:
sudo /var/frontline/bin/frontlineUtils proxy --remove
MacOS Proxy Setup
On macOS systems, use the frontlineUtils binary located in the /usr/local/bin folder. Execute the following command:
sudo /usr/local/bin/frontlineUtils proxy --add host:port
Set the host to the IP address for host of the proxy and set the port to the appropriate port number.
Display proxy settings using the --display option:
sudo /usr/local/bin/frontlineUtils proxy --display
Remove proxy settings using the --remove option:
sudo /usr/local/bin/frontlineUtils proxy --remove
Uninstalling
Generally, you can use the Uninstall function in Fortra VM which is available after you select an agent and go to Scan Settings > Agents.
Selecting an agent in this list will show an option to "Deactivate scanning" and "Uninstall the agent." Once the Uninstall process has been initiated, the agent will be completely removed on the system it was installed on. Note that this process will not be immediate and may take up to half an hour for the agent to check in and receive the uninstall command.
FVM Windows Agent
To uninstall the agent in Windows, use Add or remove programs and then use the Uninstall process in Fortra VM to complete the removal of the agent.
FVM macOS Agent
There are three options for uninstalling the FVM macOS agent. The agent can be uninstalled by using the uninstall.sh script directly, by way of the frontlineUtils, or following the Uninstall process in Fortra VM.
To uninstall using the uninstall.sh script:
sudo /Applications/Frontline\ Agent.app/Contents/Resources/uninstall.sh
To uninstall using frontlineUtils:
sudo /usr/local/bin/frontlineUtils uninstall
FVM Linux Agent
For manual uninstallation, choose one of the following commands to execute on the command line of the linux server, depending on whether the system is a Debian variant or a Red Hat variant:
Debian based Linux:
sudo dpkg -r frontline-agent
Red Hat based Linux:
sudo rpm -e frontline-agent
Both using the Uninstall button in Fortra VM and execution of either of these commands will completely remove the agent, including the folder it was installed under.
Troubleshooting
If you have issues with your FVM Agent, you may have to add a few domains to the allow list if you are using a web proxy or some other security technology that may block the agent’s outbound connection to Fortra VM.
Domains are different for each lineup:
- US
- edge-uplink.us.frontline.cloud
- us.frontline.cloud
- checkpoint.us.frontline.cloud
- updates.us.frontline.cloud
-
UK
-
edge-uplink.uk.frontline.cloud
-
uk.frontline.cloud
-
checkpoint.uk.frontline.cloud
-
updates.uk.frontline.cloud
-
-
JP
-
edge-uplink.jp.frontline.cloud
-
jp.frontline.cloud
-
checkpoint.jp.frontline.cloud
-
updates.jp.frontline.cloud
-
Testing Connectivity
Run the following utility to verify the agent appears to be working as prescribed. The command will check various connectivity related issues, including network connection, Fortra VM domain lookup, agent configuration, scan configuration, comm configuration, update functions, and site license validation. If there are any issues found during the verify checks, they will be displayed on the console to help either identify the issue or rule out connectivity prior to requiring support.
-
Windows OS
frontlineUtils.exe verify
TIP: The command file is located in the install directory of the agent. If you have not specified a custom path for the agent, the default path is C:\Program Files\Digital Defense\Frontline Agent. -
macOS
/usr/local/bin/frontlineUtils verify
-
Linux OS
/var/frontline/bin/frontlineUtils verify
OR
change the directory to the /var/frontline/bin folder and executing:./frontlineUtils verify
The command checks connectivity and then prints a status message to the command line declaring the status of the verification as either OK or Failed.
If the agent verify command shows that the agent can reach the required domains, but is failing on the messaging check; verify that the connection to the uplink subdomain is not being blocked by a web proxy or other similar network security device.
If you further exploration of a connectivity issue is needed, try running the following commands to test basic TCP connectivity to the required domains. If the tests are successful you should see something similar to the following "Connection to updates.us.frontline.cloud port 443 [tcp/https] succeeded!". If not, one or more of the domains may need to be allowed out.
- Windows OS
-
macOS or Linux
nc -v updates.us.frontline.cloud 443
nc -v us.frontline.cloud 443
nc -v edge-uplink.us.frontline.cloud 443
nc -v checkpoint.us.frontline.cloud 443
Powershell -command "Test-NetConnection -Port 443 -InformationLevel 'Detailed' -ComputerName 'checkpoint.us.frontline.cloud'"
Powershell -command "Test-NetConnection -Port 443 -InformationLevel 'Detailed' -ComputerName 'edge-uplink.us.frontline.cloud'"
Powershell -command "Test-NetConnection -Port 443 -InformationLevel 'Detailed' -ComputerName 'us.frontline.cloud'"
Powershell -command "Test-NetConnection -Port 443 -InformationLevel 'Detailed' -ComputerName 'updates.us.frontline.cloud'"
If any of these tests fail the agent will not run correctly. Check that you have added the appropriate host to the allow list for port 443 and check connectivity again.