Work with Labels
WAS labels organize your web applications, pages and vulnerabilities. For example, you could have a label for server-side web applications and another for easy-to-fix vulnerabilities.
You can create and assign custom labels to your assets and vulnerabilities. Fortra VM also does this for you based on preset criteria (that is, Smart Labels).
When labels are applied, you can quickly find specific data about assets and vulnerabilities in your environment.
See related: Find Information in WAS
Smart Labels
Smart Labels are automatically applied to vulnerabilities, pages, or web apps during a scan based on preset criteria.
- From the navigation menu, select Scan Settings > Labels.
- Select the Smart Labels tab. From here, you can manage WAS pre-configured Smart Labels or create your own.
The following Smart Labels are pre-configured in WAS and are enabled by default. You can also create your own Smart Labels.
- PageVuln: VulnDictionary: Adds the vuln dictionary labels to the page vulnerability.
- PageVuln: WebApp Content: Adds the webapp context labels to the page vulnerability.
- WebApp: Asset group name: Adds the webapp asset group name to the webapp on scan completion.
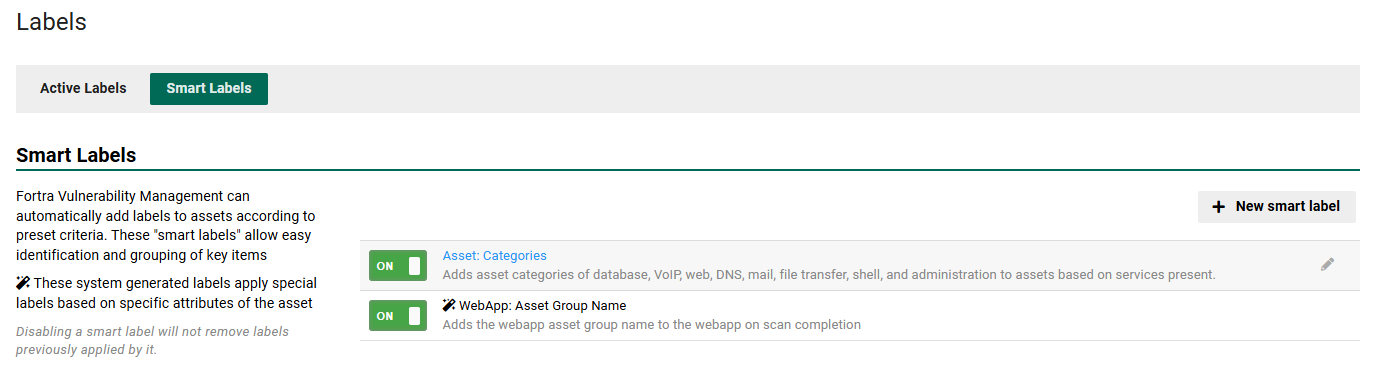
Toggle ON or OFF next to the Smart Label to enable or disable it for future scans.
-
Select + New smart label.
-
On the Create New Smart Label page, enter the following information:
-
Details
- Name: Enter the label name that will be applied
- Description: Required
- Apply label to: Select to apply the label to web apps, pages, or vulnerabilities.
- Color: Identify a color for the label. The default color is blue.
-
Dynamic filters
Filters identify which apps, pages or vulnerabilities the label will be applied to.
-
Select a property, search operator and value for the filter. You can apply more than one filter.
-
-
-
Select Save Changes. The new Smart Label will now be available for future scans and is enabled by default.

- To modify a Smart Label, select the label's name or select the Edit button
 .
. - To delete a Smart Label, select the label's name or select the Edit button , and then select Delete.
User-assigned Labels
Labels can be manually created and assigned directly to web apps and vulnerabilities.
- From the navigation menu, select Active View.
- From the Web Applications list, select an application.
-
Under the Details tab, scroll to the Web App Labels section. Here, you can perform the following:
-
Create a new label: Select Add a label, enter a label name, select a color, and then select Add.
TIP: You can create multiple labels at once by separating label names with commas. Assign a different color to your label by hover over the label and clicking the tab that appears beneath it.
-
Select an existing label: As you begin typing, existing labels appear that you can select.
-
Delete a label:
-
Select the Lock button
 to unlock it
  .
. -
Select the labels you want to delete, and then select Edit selected.
-
Select the Delete the label checkbox, and then select Update.
NOTE: This will only delete the label from this web application. To delete all instances of the label, navigate to the Active Labels page under Scan Settings > Labels.
-
-
-
Navigate to a list of vulnerabilities by performing one of the following:
-
For all vulnerabilities: From the navigation menu, select Active View and then select the Vulnerabilities tab.
-
For web app specific vulnerabilities: From the navigation menu, Active View, select a web app from the Web Applications list, and then select the Vulnerabilities tab.
-
-
Toggle the following views based on how you want to assign labels to vulnerabilities:
-
Group by vulnerability: View vulnerabilities by type. When you add a label in this view, it applies to all instances of the selected vulnerabilities.
-
Show all instances: View each vulnerability instance. When you add a label in this view, it applies only to the selected instances.
-
-
You can add a label for a vulnerability by doing either of the following:
-
Select the checkbox for each vulnerability that requires a label, and then select Add Label. Enter a label name, select a color, and then select Add.
-
Select a vulnerability's name, select the Labels tab, select Add a label, enter a label name, select a color, and then select Add.
-
-
In the Add Labels dialog, you can perform the following actions:
-
Create a new label: Enter a new label name and select ENTER.
-
Select an existing label: When you begin typing, existing labels appear that you can select.
-
-
To delete a label from a vulnerability, do the following:
-
Select the Lock button
to unlock it . -
Select the labels you want to delete, and then select Edit selected.
-
Select the Delete the label checkbox, and then select Update.
NOTE: This will only delete the label from this web application. To delete all instances of the label, navigate to the Active Labels page under Scan Settings > Labels.
-
Active Labels
Active Labels are those that have been applied to web apps, pages and vulnerabilities. This includes labels that have been applied manually by a user or applied automatically as a Smart Label.
- From the navigation menu, select Scan Settings > Labels.
- Select the Active Labels tab to view and delete active labels (you cannot create or assign a label on this page).
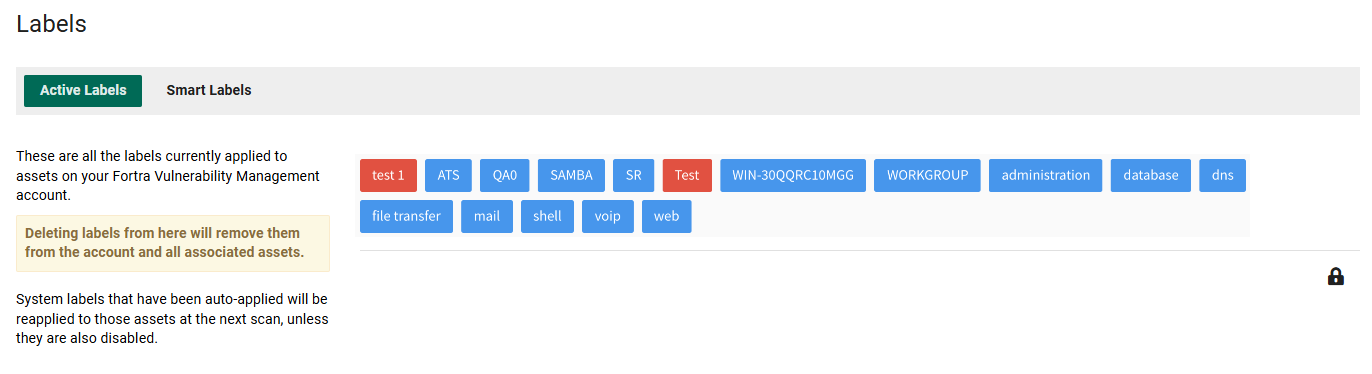
To delete Active Labels from WAS
- From the navigation menu, select Scan Settings > Labels.
- Select the labels you want to remove from your WAS account.
NOTE: WAS-generated Smart Labels are automatically recreated and reassigned during the next scan unless the related Smart Label is disabled.