Web Apps and Groups
WAS web applications are managed and grouped on the System > Web Apps & Groups page. From here, you can create web app scanning target configurations and specify their risk weight and authentication methods. Additionally, web app configurations can be grouped to help you organize the web apps in your scanning environment.
Allotted Web Applications
Your account has an allotted number of web app domains available for scanning, as determined during WAS service activation. Only unique domains are counted towards this total. Therefore, you can have multiple web app configurations for a given domain without each configuration counting against your available web applications. This is useful for creating different configurations to meet different scanning needs for a single domain.
View the Number of Allotted Web Apps on Your Account
From the navigation menu, select System > Service Subscriptions > Web Application Scanning.
You can also view the number of utilized and allotted web apps on the Dashboard when you log in to WAS.
To add additional web applications to your WAS service, contact Fortra Technical Support.
Create or Modify a WAS Configuration
-
From the navigation menu, select System > Web Apps & Groups.
-
Select the Web Apps tab. You are on the web applications page.

-
Perform one of the following:
- To modify an existing web app, select a web application name or click .
- To create a new web app, select New web app.
-
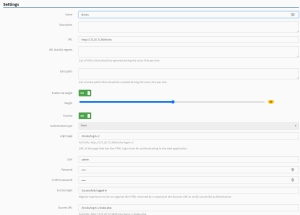
Enter or modify the web application settings (if you are deleting an application, select Delete, then Confirm):
-
Name - Type the web application target’s name.
-
Description (Optional) - Type a description of the web application.
-
URL - Provide the URL of the web application target.
 Web App Scan Scope
Scan scoping is partially controlled by the starting URL domain, port and case sensitive directory. In addition to using the URL blocklist, the scope can be limited to a directory and its sub-directories by altering the starting URL. The URL field in the web application definition determines the scope for the web application scan. Anything that is not in scope is dropped by default and won’t be scanned. This can be used to target specific portions of an application or to target a single application on a FQDN that may host multiple applications at different paths on the same port.
The scanner will look at the protocol (HTTP / HTTPS), the host (IP / FQDN), the port and the path to determine the scope of the scan. For the path aspect of the scope, the scanner always uses the last directory in the path to determine which directory and its sub-directories to include in the scope of the scan.
Example 1:
URL: https://example.com/
Out of scope based on the URL:
http://example.com/
https://www.example.com/
https://example.com:8443/
Example 2:
URL: https://test.example.com/admin
Out of scope based on the URL:
http://example.com/
https://www.example.com/
https://example.com:8443/
NOTE: In this example, the root directory is still in scope even if /admin is a directory. To restrict the scope to only the /admin directory, include a trailing slash like https://test.example.com/admin/Example 3:
URL: https://test.example.com/admin/
Out of scope based on the URL:
http://example.com/
https://www.example.com/
https://example.com:8443/
https://test.example.com/index.html
https://test.example.com/support/login.php
Example 4:
URL: https://10.0.1.5/
For this example, example.com resolves to 10.0.1.5
Out of scope based on the URL:
http://10.0.1.5/
https://example.com/
https://10.0.1.5:8443/
One notable exception to this scoping is JavaScript files. By default, all JavaScript files can be retrieved by the scanner from out of scope locations. This is done because many modern web applications require JavaScript to function, and without them the scanner is not able to crawl the application successfully. They’re also often hosted on external CDNs which are not normally in scope, so the scanner allowlists the JS files for inclusion in crawling the web application.
-
URL blocklist regexes: (Optional) Exclude URLs from scanning by providing a string literal to be substring matched against page content, comma separated. The URL blocklist functionality can be used to prevent one or more URLs from being crawled / audited. This can be used to help prevent potentially negative impact to a scanned application, help prevent the scanner from accidentally logging itself out during an authenticated scan or getting stuck on some calendar-like functionality. These blocklist regexes are only used for the web application definition where they are defined. Multiple web applications in the same scan can all use different blocklist regexes. Additionally, multiple items can be added to the list, one per line.
In addition to regular expressions, plain strings can be used such as "logout", "send_mail", "change_password", etc. (without quotes). This will prevent the scanner from hitting URLs such as http://example.com/admin/logout.php or http://example.com/admin/change_password.jsp.
For more information on Regular Expression Fields, see: What are Regular Expression Fields?
Python compatible regular expressions can also be used.
Scenario: The web application has several directories followed by a number that need to be excluded, but not all directories that start with user need to be excluded.
Example of path to exclude:
/test/user9or/test/user8or/test/user7Example of path that needs to be scanned:
/test/userExample/blocklist regex to use:
/test/user\d+/This will exclude any /test/user directories that end in one or more digits, but still allow directories such as
/test/userExample/to be scanned. -
Extra paths: (Optional)Provide a list of directories that should be included in a scan, comma separated.
-
Enable risk weight: (Optional) Enable to reveal a Weight sliding scale, which lets you weight the web application’s risk to your environment. The higher the weight, the more the web app affects your WASSecurity GPA, and vice-versa.
TIP: Be aware that changing a risk weight can adversely affect your Security GPA. -
Favorite: (Optional) Enable for easy access when creating a new scan.
-
Authentication Type: If applicable, select the authentication type (basic, digest, header or form) and complete the relevant fields. For more information about Authentication Type, please see: Authentication.
-
- Select Save.
Your new web application is created and will be available on the targets list when creating a new scan.

Delete a Web Application
- From the navigation menu, select System > Web Apps & Groups.
- Select the Web Apps tab.
- On the Web Apps page, select next to the app you want to delete.
- Select Delete, then Confirm. Your web application is deleted from WAS.
Create or modify a Web App Group
- From the navigation menu, select System > Web Applications.
- Select the Web App Groups tab. You are on the Web App Groups page.
- Perform one of the following:
- Select a web app group name or click to modify it.
- Select New web app group to create a new group.
- Enter or modify the following sections and associated fields (if you are deleting a web app group, select Delete, then Confirm):
- Select to add web applications to the group.
- Select to remove a web application from the group.
- Select Save.
Delete a Web Application Group
- From the navigation menu, select System > Web Apps and Groups.
- Select the Web App Groups tab.
- On the Web Apps Groups page, select next to the web app group you want to delete.
- Select Delete, then Confirm. Your web app group is deleted from WAS.
Authentication
Only one type of authentication is configurable per web application definition, and only one set of credentials can be used per web application definition. If the same application needs to be scanned using multiple different types of authentication or using different user levels, this can be configured using multiple web application definitions.
If you select Authentication Type - None, the scan will still attempt to find easily guessable credentials, if enabled in Web Apps and Groups.
The most common types of authentication we encounter are Basic or Form based authentication. Additionally, the most reliable forms of authentication to use during scanning are Basic, Digest and Header because they are the simplest.
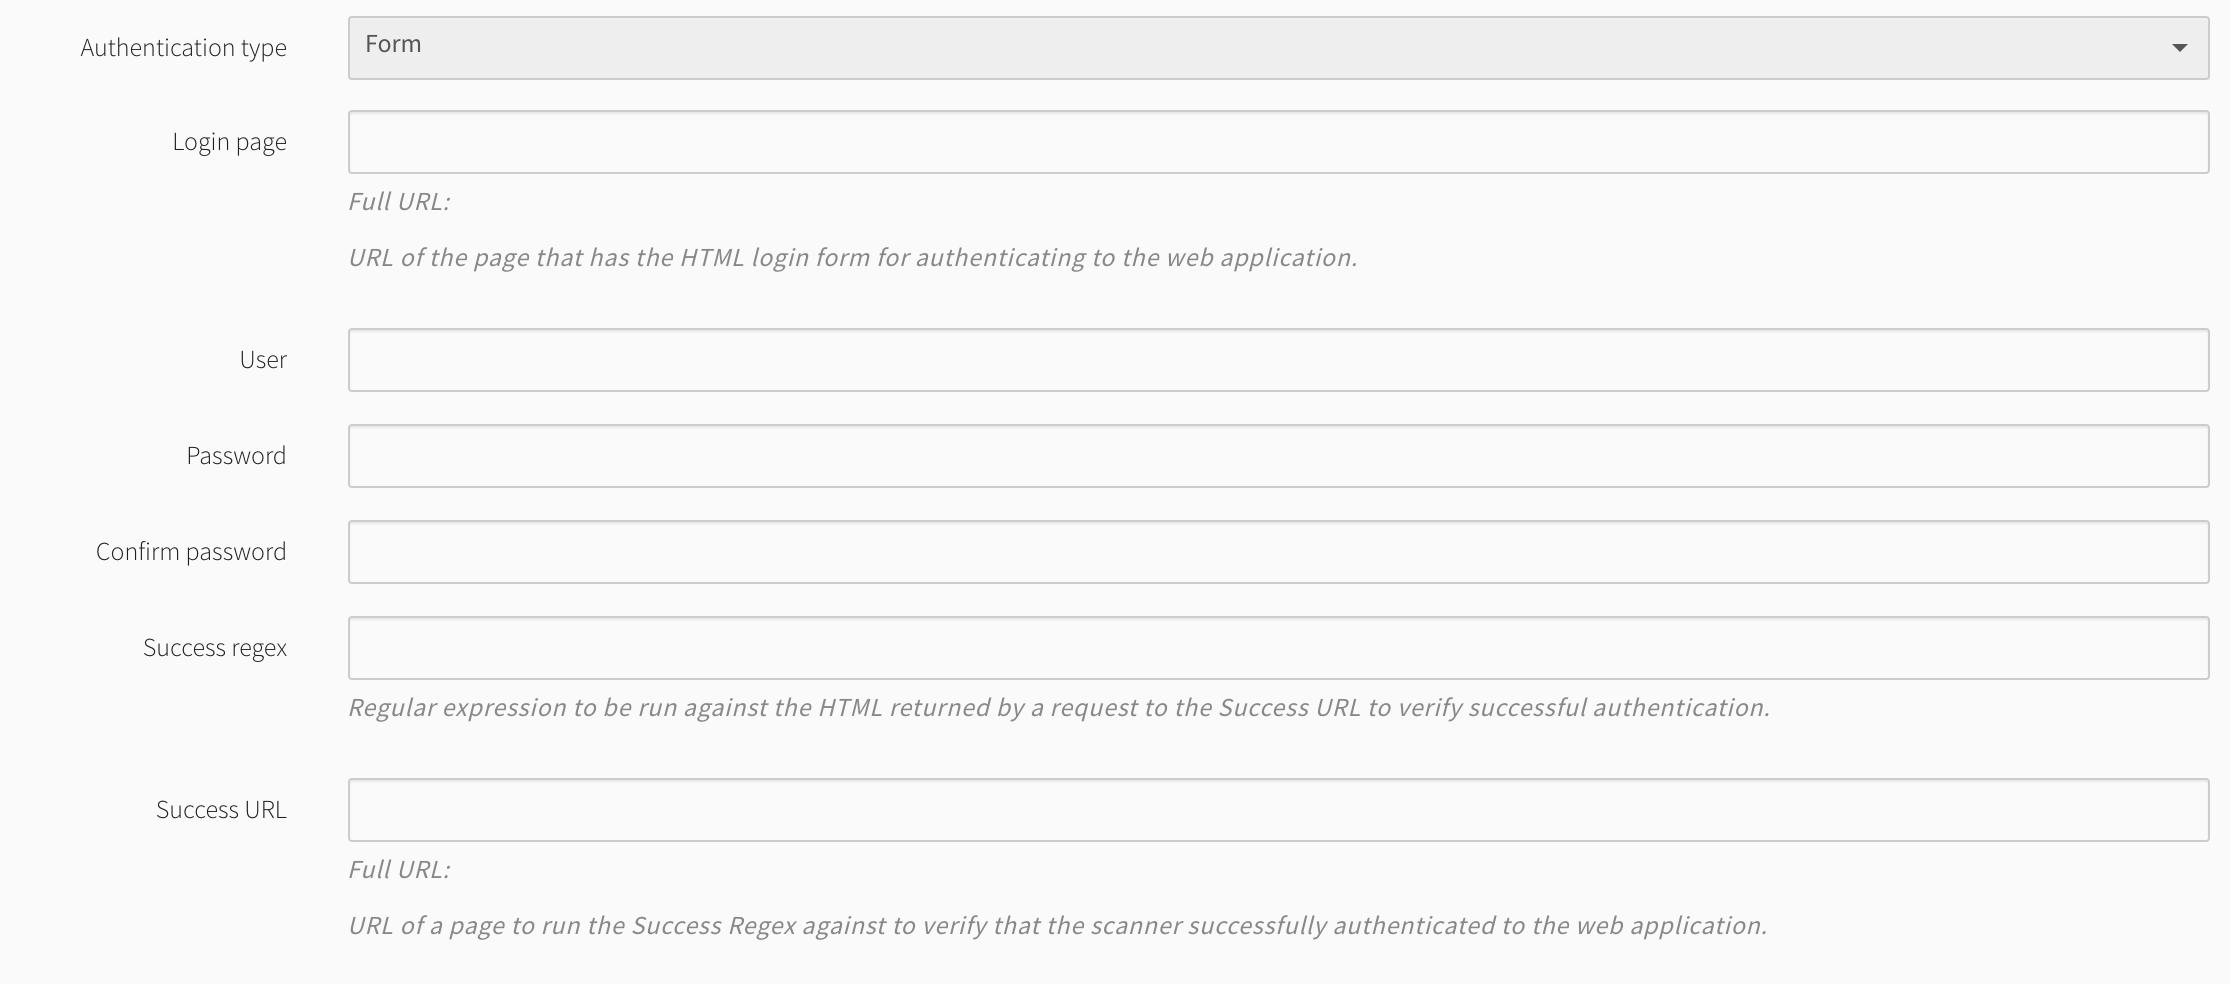
All authentication types will have a field for a "Success regex" and "Success URL". The success URL needs to be within the scope of the starting URL as defined by the web application definition URL. Additionally, this URL should ideally be a page that is only available after successfully authenticating to the web application. In the case of a single page application where the page content changes after authentication, but the URL is unchanged, checking against an API request or similar would also work.
Using the browser’s dev tools on the Network tab, you can view all the API requests that are made by a web application after logging in. This can give you some additional options to select a URL to use for the success URL.
The "Success regex" will be checked against the response body of a request to the specified "Success URL". Depending on the application, much of what you see in the browser may be the result of JavaScript and will not be present when the scanner tries to use it to match against during the scan. To find the raw data returned in the response body from the web application, the browser’s dev tools can be used again.
On the Network tab, you can select a request that the browser made and click on the Response tab, this is the data you should be able to regex against to determine successful authentication. As mentioned earlier, since this is a "regex" field, a regular expression or string literal can be used and should only match against something present on the page when authentication is successful. Using a regex similar to ".*" will match any content returned and should not be used to determine success.
- Navigate to the login page of your web application.
- Log in into your web application, however you normally would.
- Open your browser’s dev tools.
- Go to the Network tab in the dev tools and refresh the page.
- You should now see something similar to the following:
- Click on the entry that matches the URL or URL path.
- For example, if the URL is
http://sample-web-app.com/test, look forsample-web-app.comor/testin the browser.
In this case the URL in the browser ishttp://sample-web-app.comand the entry to click on is at the top of the list,sample-web-app.com. - If the URL in the browser contains a URL fragment, identified by a value that starts with a "
#" (for example,http://sample-web-app.com/admin/#user-profile), then the full path won’t be seen in this list. However, you will likely see one or more API requests that you can click on instead, as long as they are in scope for the scan and only available after authenticating. You may also see a request for the base path ofhttp://sample-web-app.com/admin/(from the URL fragment example above) that you could also potentially use, as long as it returns information that is consistent and only available after authentication.
- For example, if the URL is
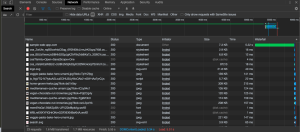
- After selecting the item, you should see something similar to the following:

- Select the Response tab if it is not already open. This is the response body for the request you selected on the left.
- In the Response tab, look for information that looks like it would only be available after authentication and not in any failed log in or access denied style page.
- From the image above, you can use User account menu in the "Success regex" in Fortra VM. Both regular strings and regular expressions are accepted by this field.
- For the "Success URL", use the selected item on the left.
- For Chrome:
Right-click the item, select Copy and then Copy link address. - In Firefox,
Right-click the item, select Copy and then Copy URL. - The full URL is then pasted into the "Success URL" box in Fortra VM
For Firefox: Navigate to Tools > Web Developer > Toggle Tools.Alternatively, click the three horizontal lines in the top right corner for Web Developer > Toggle Tools.

If the web application uses Digest or Basic authentication you should see an authentication prompt similar to the following when accessing the site in your browser. If you do not see this prompt, either you’ve already been there and the credentials are cached, or it does not use Basic or Digest authentication.
If you see no authentication prompt, but believe the site may be using Digest or Basic authentication, simply open a new Incognito or Private browser window and visit the site. If you still see no authentication pop-up, as in the following example, the site isn’t using Basic or Digest authentication.
|
|
|


- Once the dev tools are open, navigate to the Network tab and select the Cancel button on the authentication pop-up. You should now see the domain name of your site in the Name column with a 401 in the Status column. Select this item.
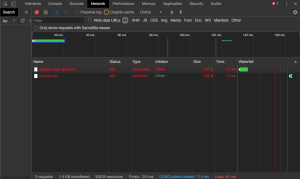
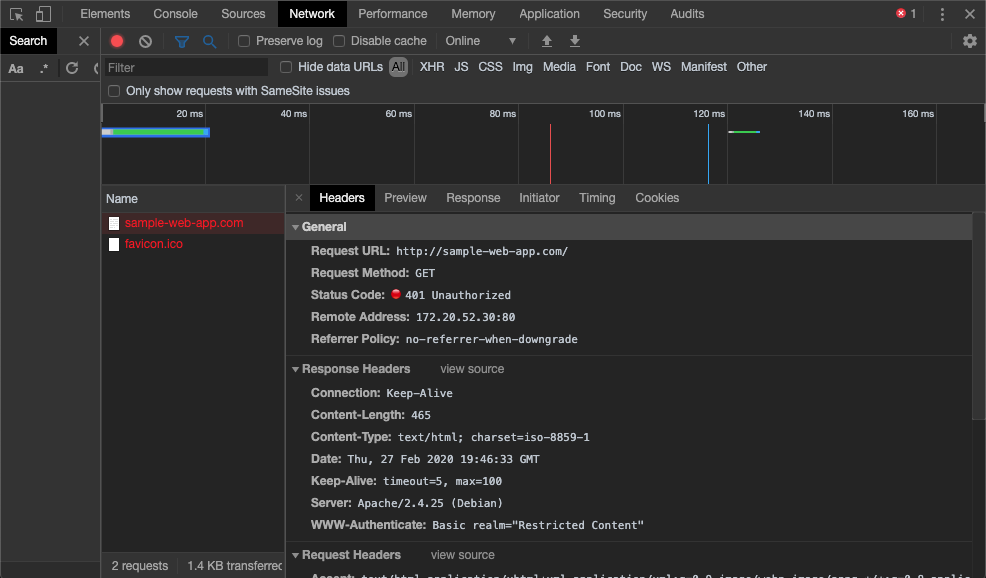
- After selecting this request, a new panel with more information on the request displays.
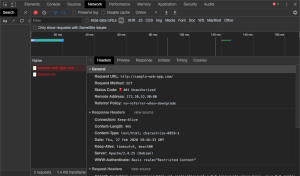
- On the Headers tab of this additional information about the request, under the Response Headers, look for the WWW-Authenticate header. In the above example, this site used Basic authentication. If the site were using Digest authentication, you would see Digest here, instead of Basic.

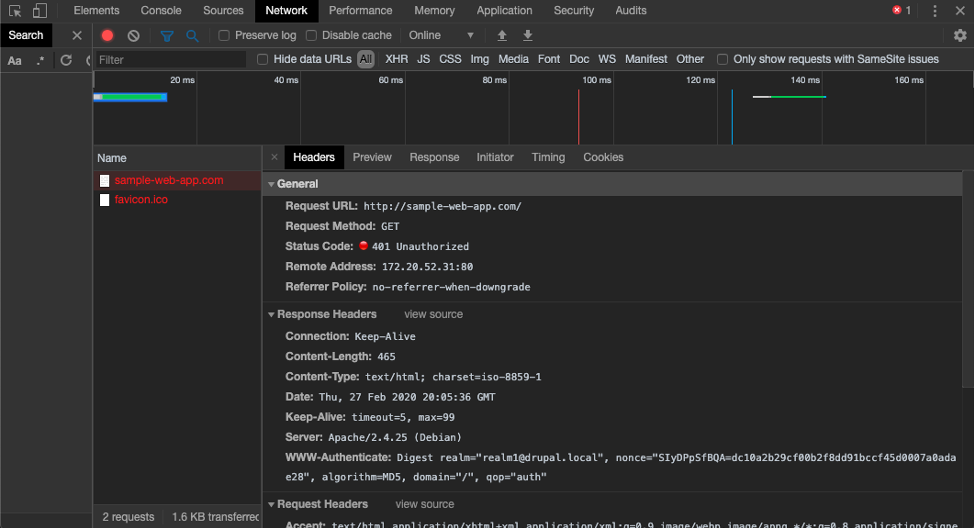
The following is an example of what a response for Digest authentication looks like:
Form authentication can be used to authenticate to many different applications that utilize an HTML based form to login. However, it may not work for all log in forms as this authentication method does not support JavaScript based login forms. If your application utilizes JavaScript for the log in form or requires multiple login steps, proceed to the Prerecorded authentication type.
The Login page in the web application definition is used to point the scanner at the URL that has the login form in it and can be a full URL, an absolute path to the page or a path relative to the starting URL.
Toggling on Show Help will display the URL that should be used scanner-side, based on the information included in the web application definition. The scanner will then try to dynamically determine which is the correct form to use on the page, if there is more than one, and use it to authenticate to the web application.
If the Form authentication type is unsuccessful at logging into the web application, the next best option is to use Prerecorded authentication. However, if Form authentication is successful, Form authentication is recommended over Prerecorded authentication, as it is much faster.
The Header authentication type can be used with applications that support authentication via a specific header name and value. The most common example of this would be applications that can utilize API keys or tokens in addition to some other form of authentication, such as a log in form. However, this only works if the scanned application supports this.
The supplied header will be sent with every request the scanner makes to the scanned application. If you’re not sure if your application supports API keys or another type of authentication header, then this form of authentication is not a good choice for your application.
Fortra VM is an example of an application that supports Header authentication, (using the HTTP Authorization header with an API Token value) and form-based authentication (https://login.us.frontline.cloud).
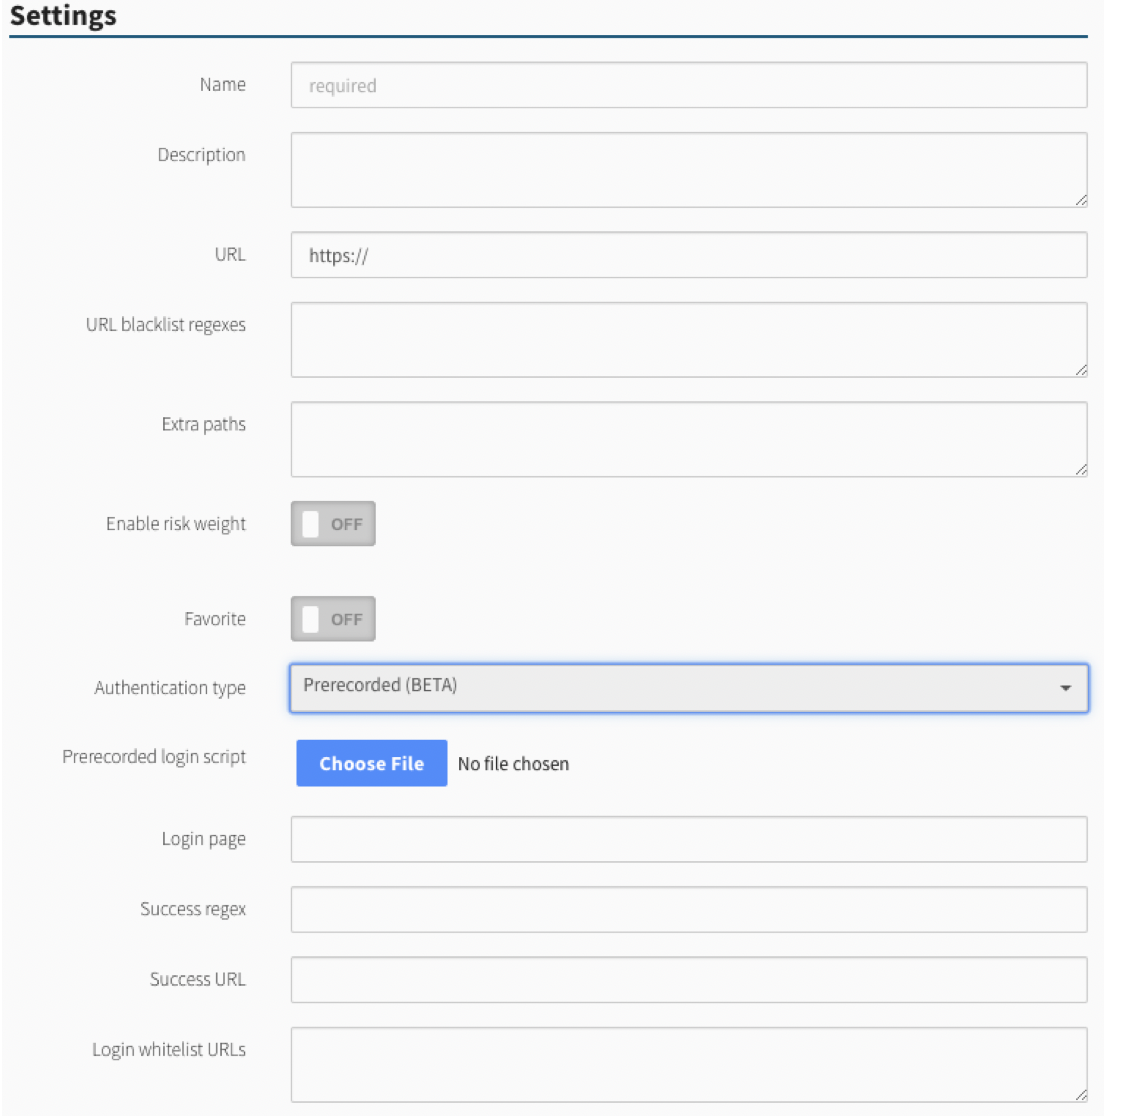
The Prerecorded authentication type uses a pre-recorded sequence of events to authenticate to the web application. This is a good choice if none of the other authentication types will work with your web application.
This authentication type supports authenticating with forms that require JavaScript. It also supports multi-step and more complicated log ins; and allow-listing of domains not in scope, but required for authentication.
This authentication type requires that the user record the log in sequence using the Selenium IDE plugin for Chrome or Firefox.
- Record a log in sequence
- Upload the generated .side file to Fortra VM
The Login page in the web application definition is used to point the scanner at the URL that has the log in form on it. This can be a full URL, an absolute path to the page, or a path relative to the starting URL.
If the Login page is not on the same domain as the URL to be scanned, then this can be the same as the URL to be scanned.
Toggling Show Help will display the URL to be used scanner-side, based on the information included in the web application definition.
The Login whitelist URLs field should be used to supply any additional domains that are required for successful authentication to the web application. The most common example of this is if the web application is utilizes a Single Sign-On (SSO) solution.
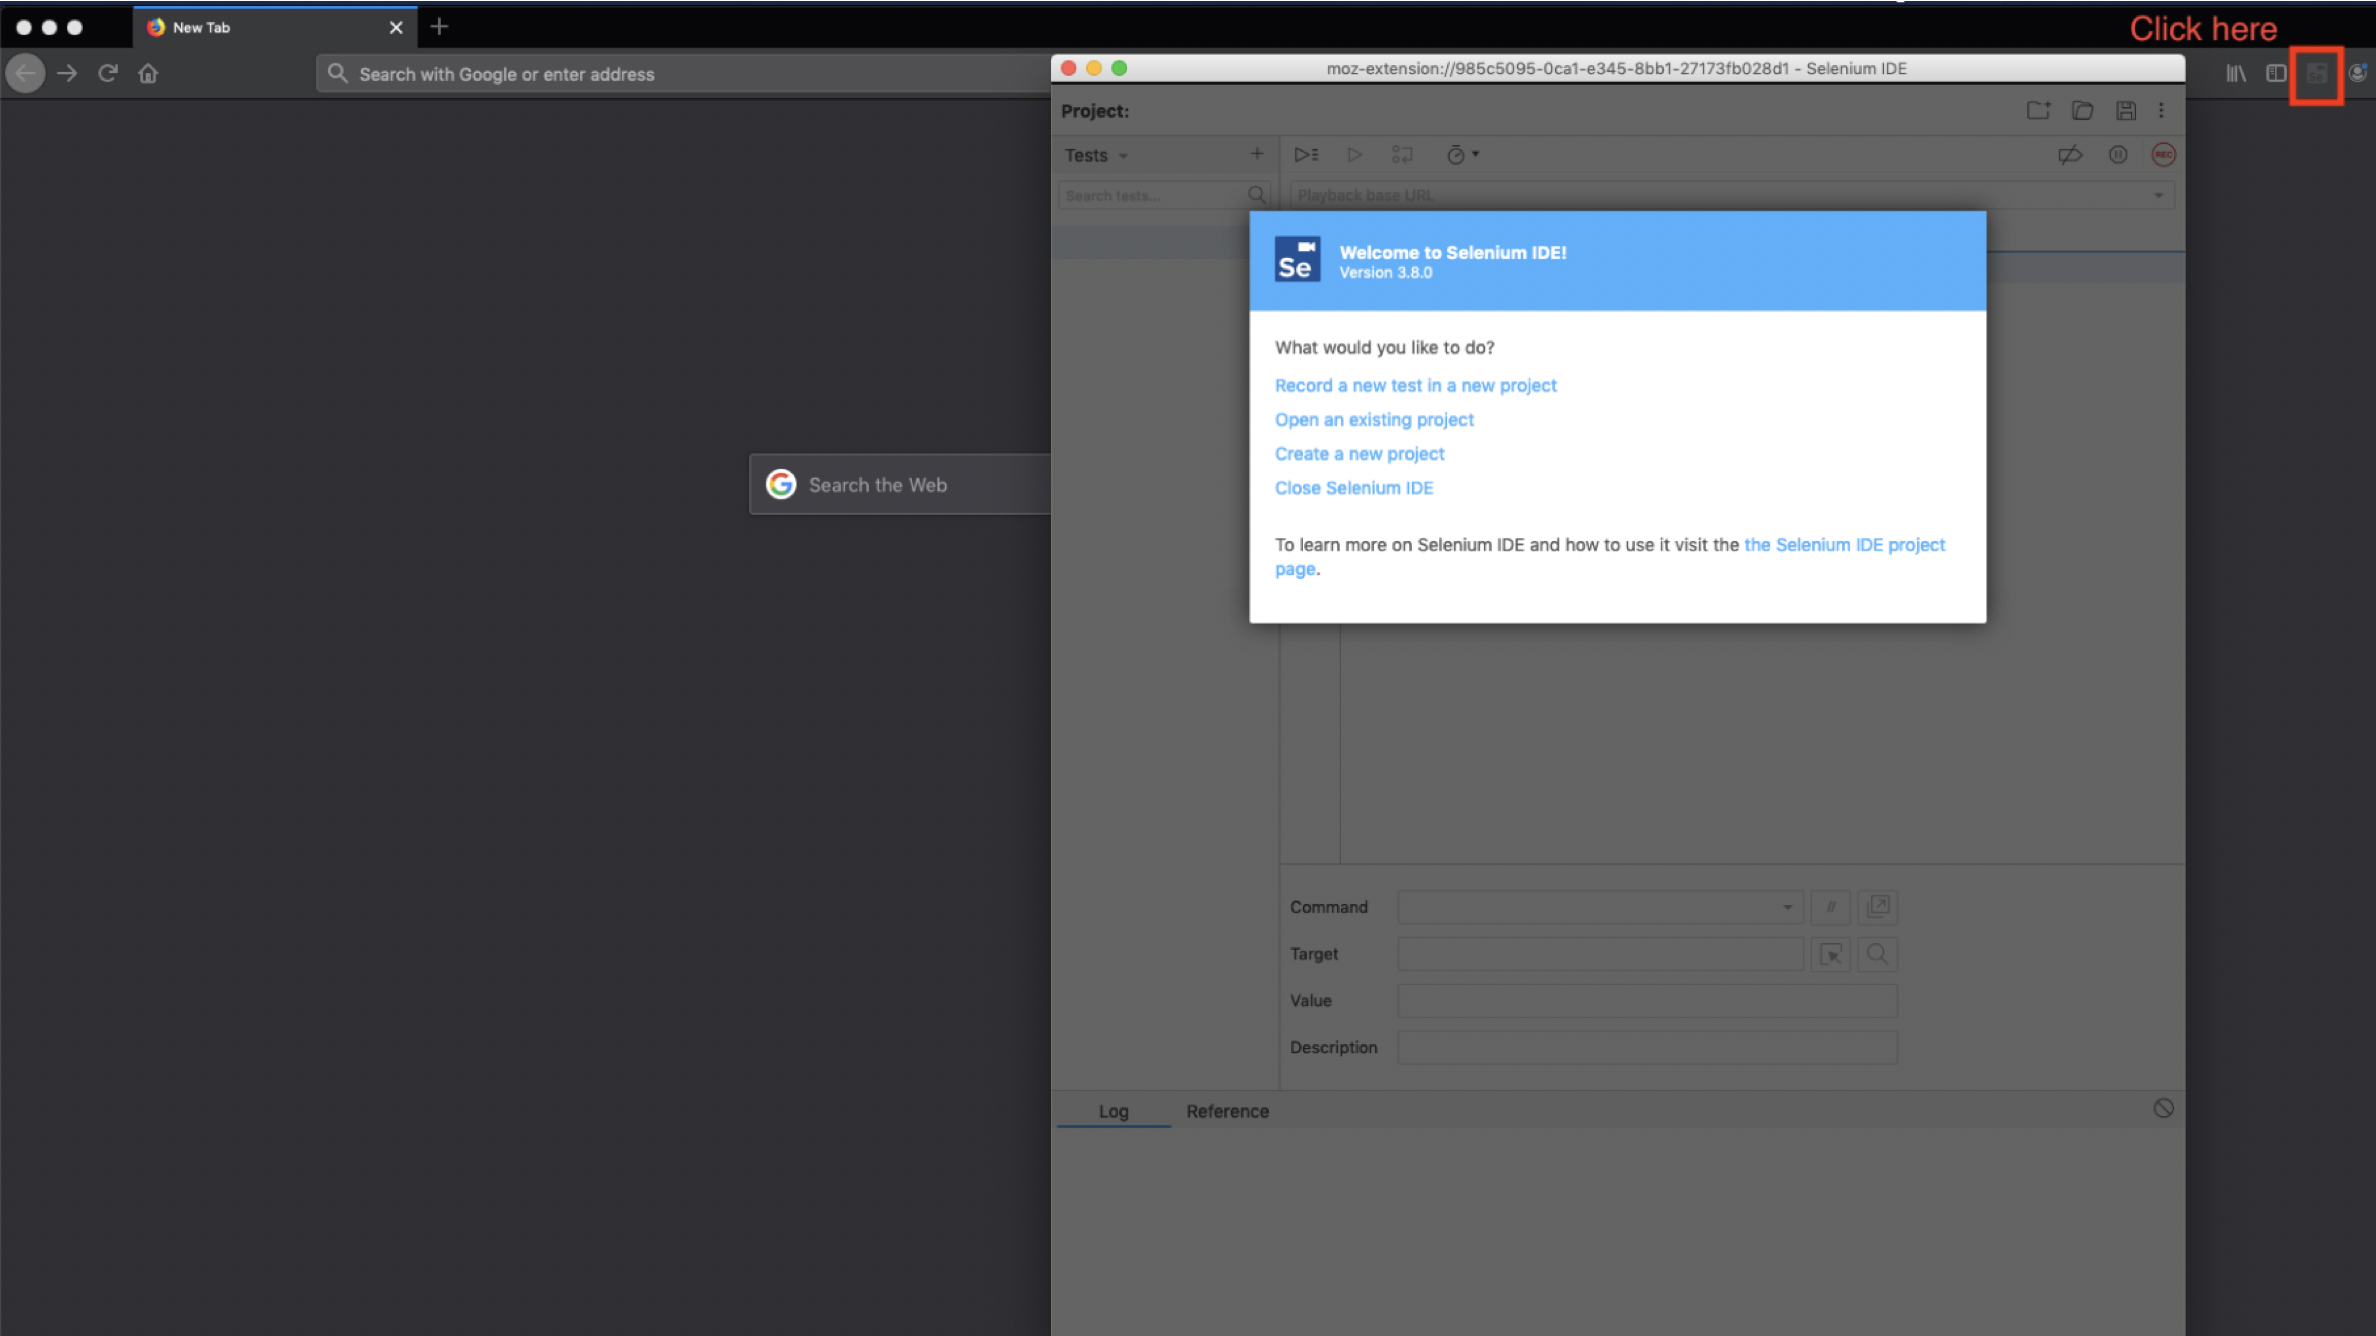
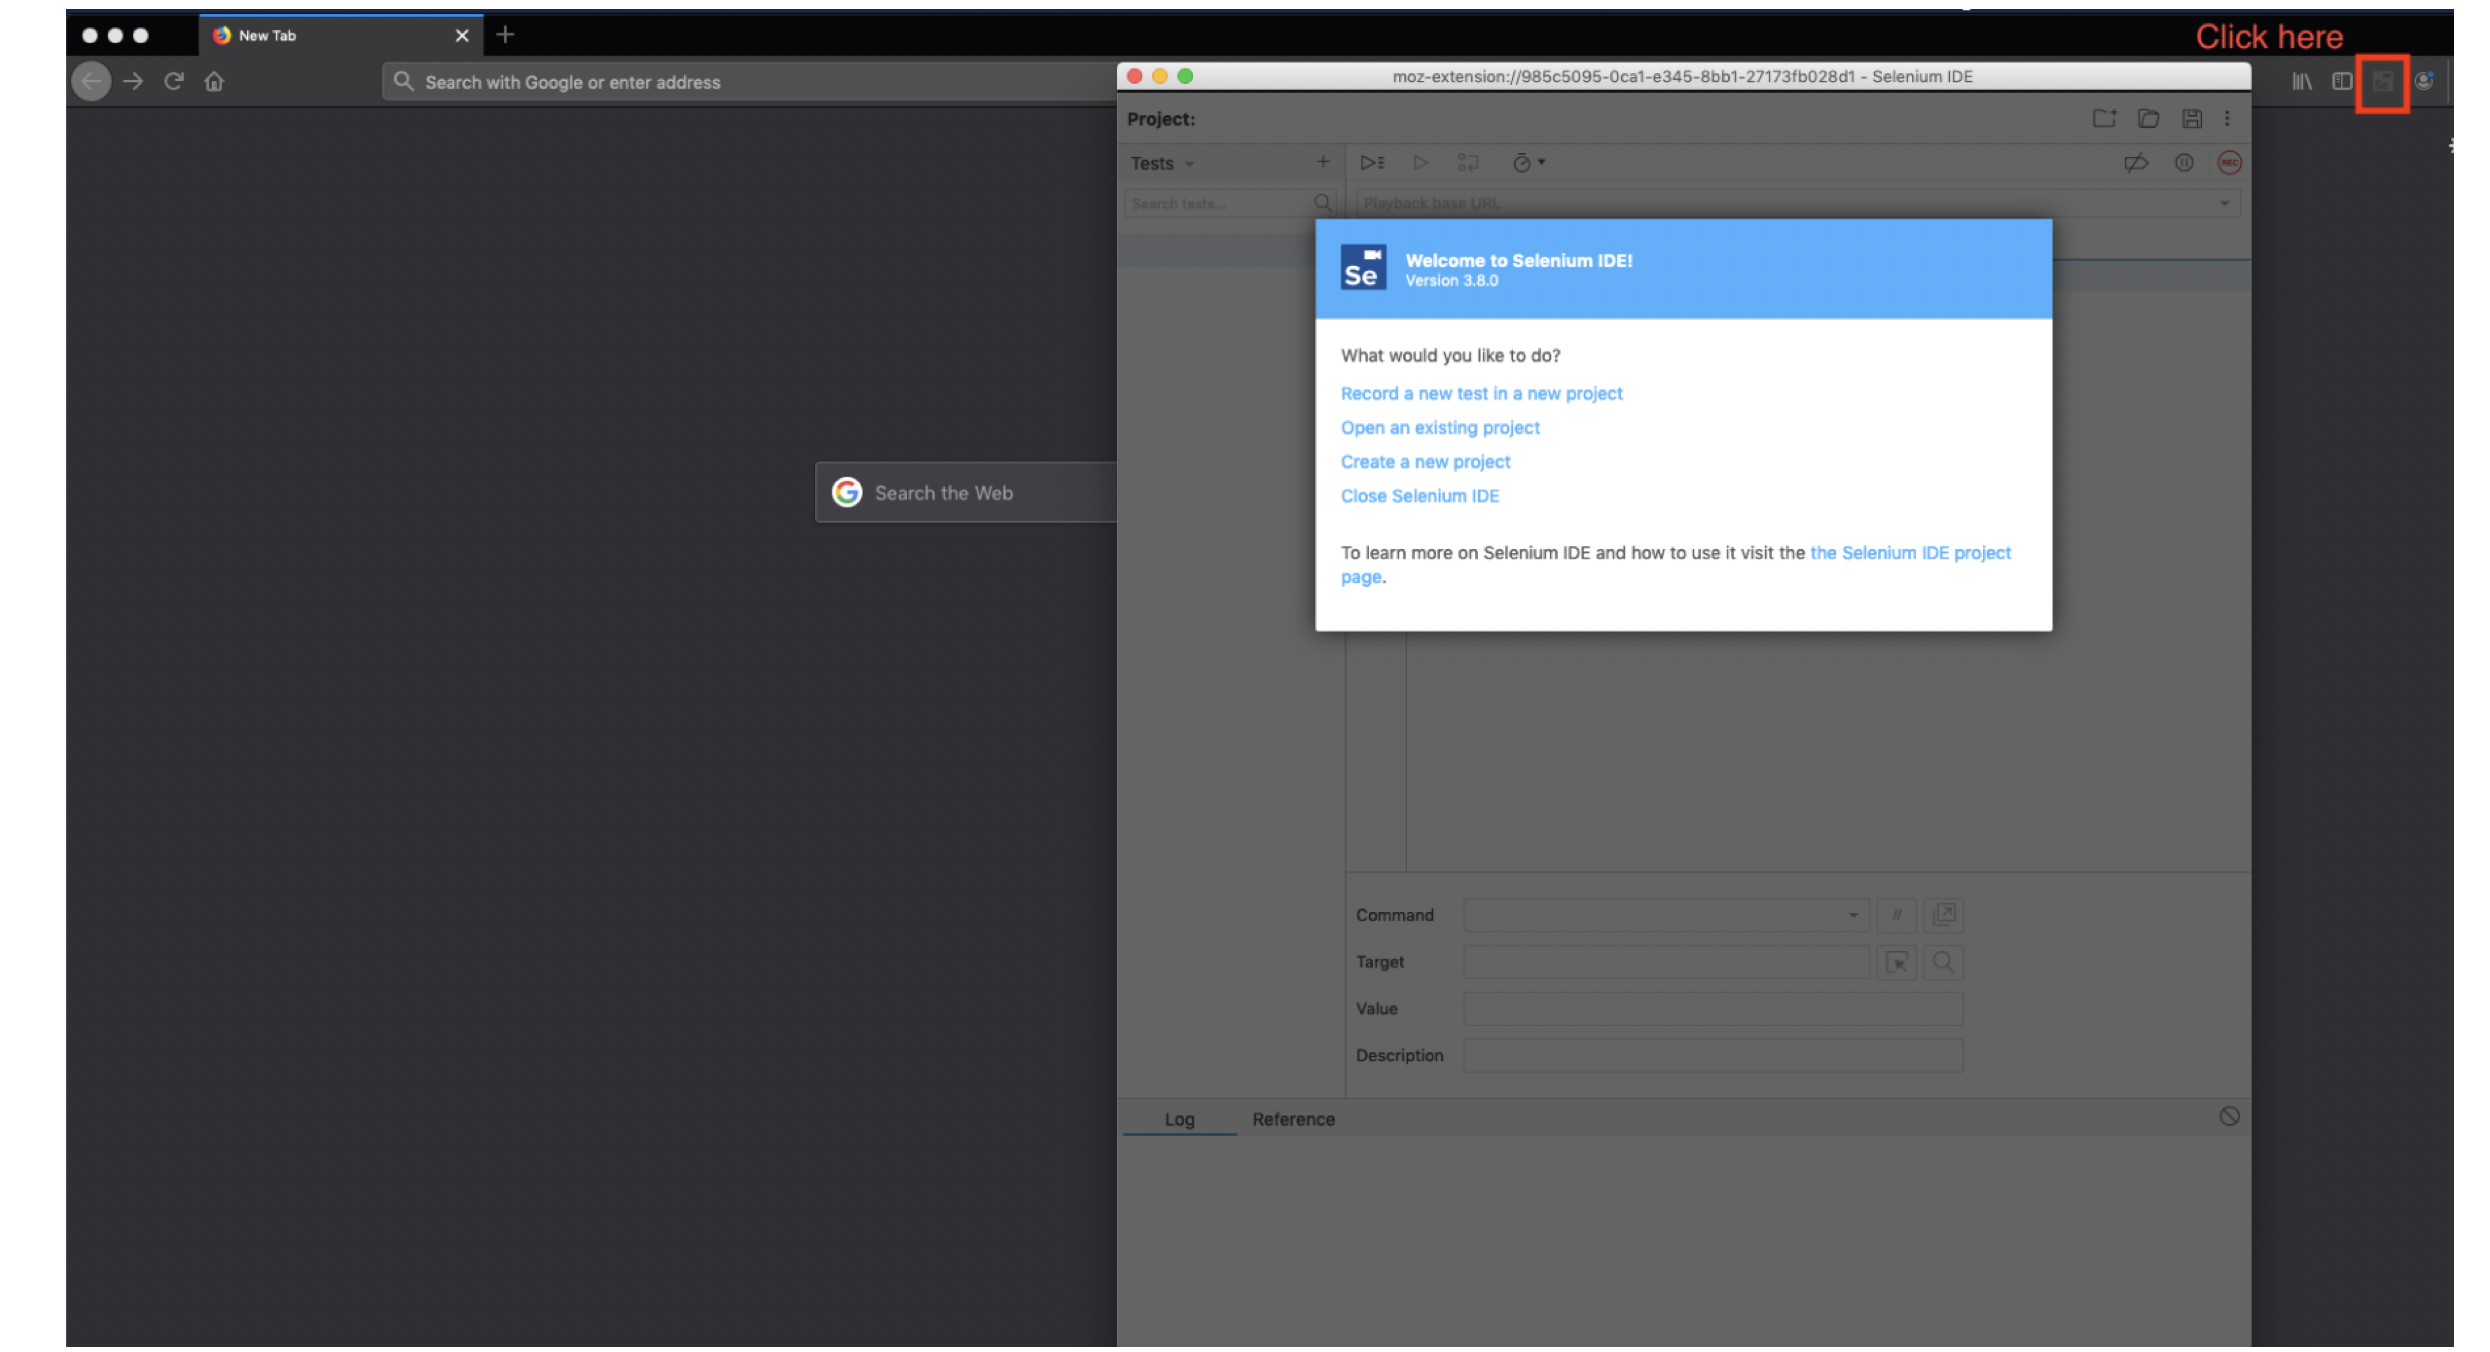
The following walk through covers the basics of using the Selenium browser extension to record a log in sequence to authenticate to a web application. This walk through uses the Firefox version of the extension, and assumes the user already has it installed.
- Select the Selenium extension button to open the IDE
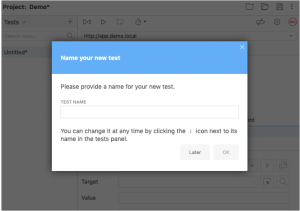
- Select Record a new test in a new project.
- Enter anything for the project name.
- Select OK.
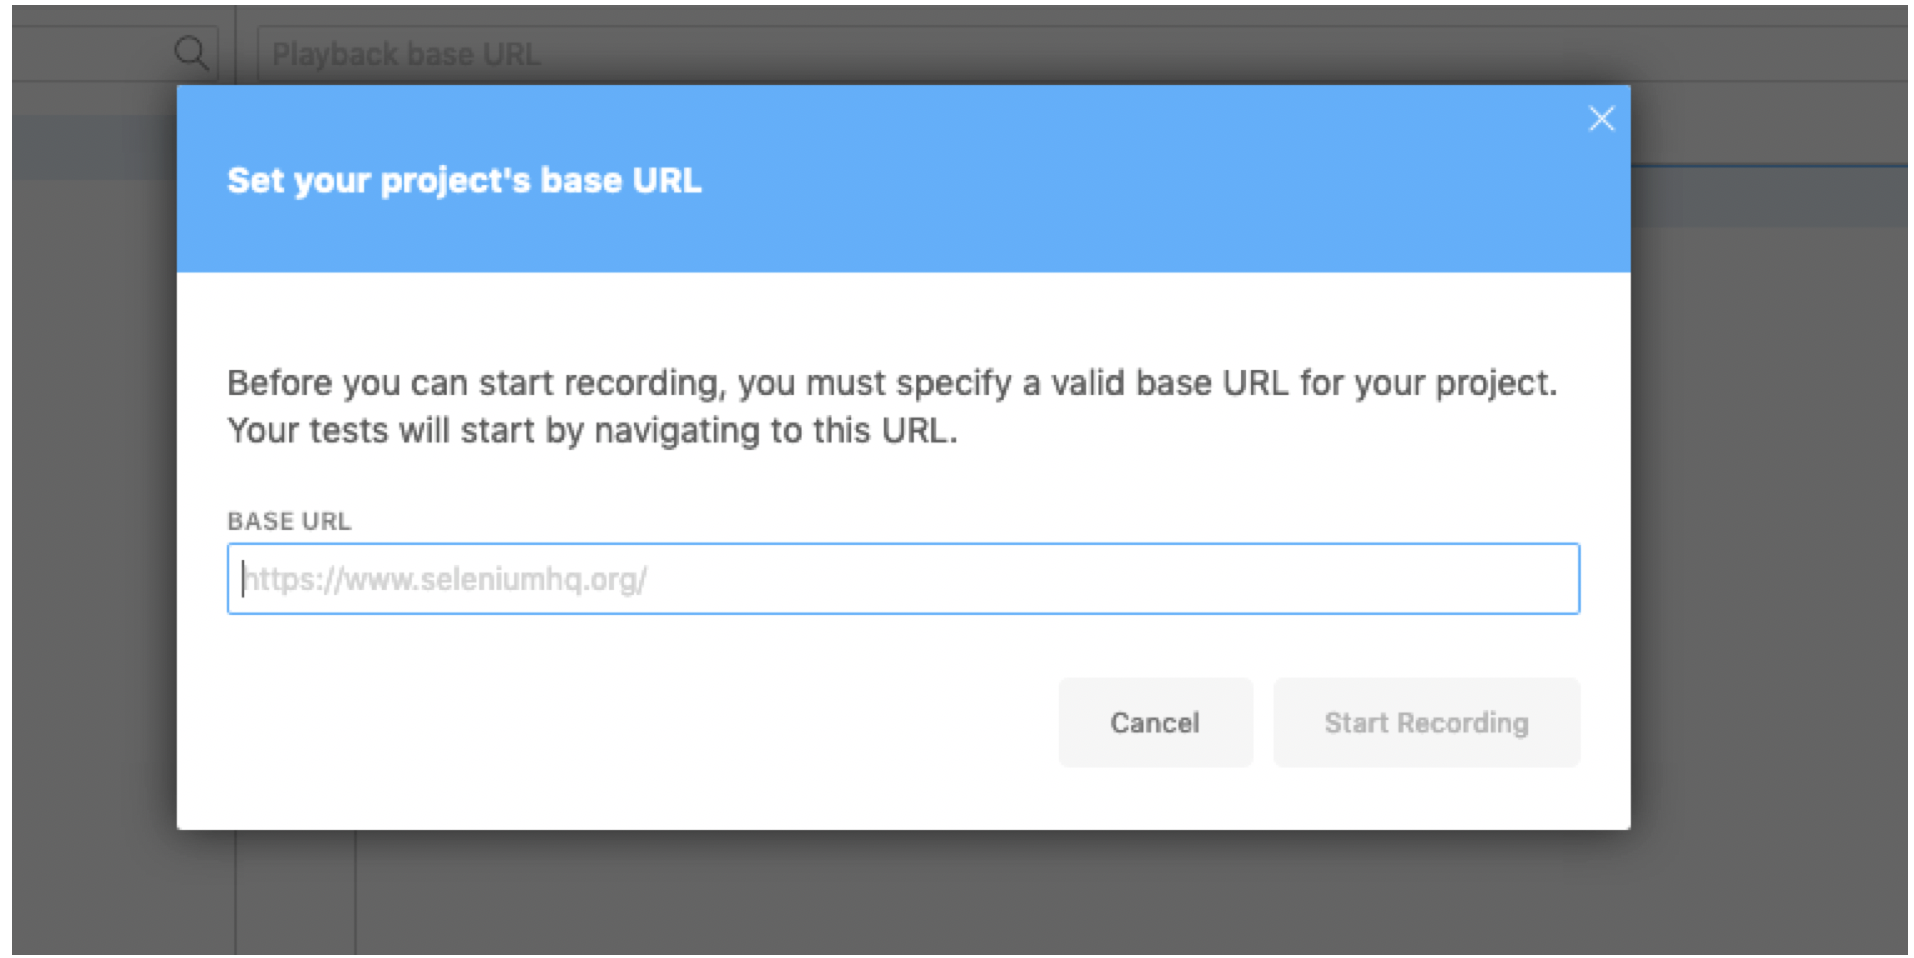
- Enter the URL of the log in page for the web application.
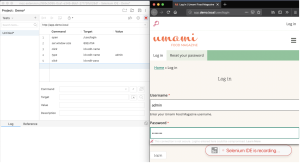
- Select Start Recording.

- Authenticate to the web application.
- The Selenium IDE will track the steps.
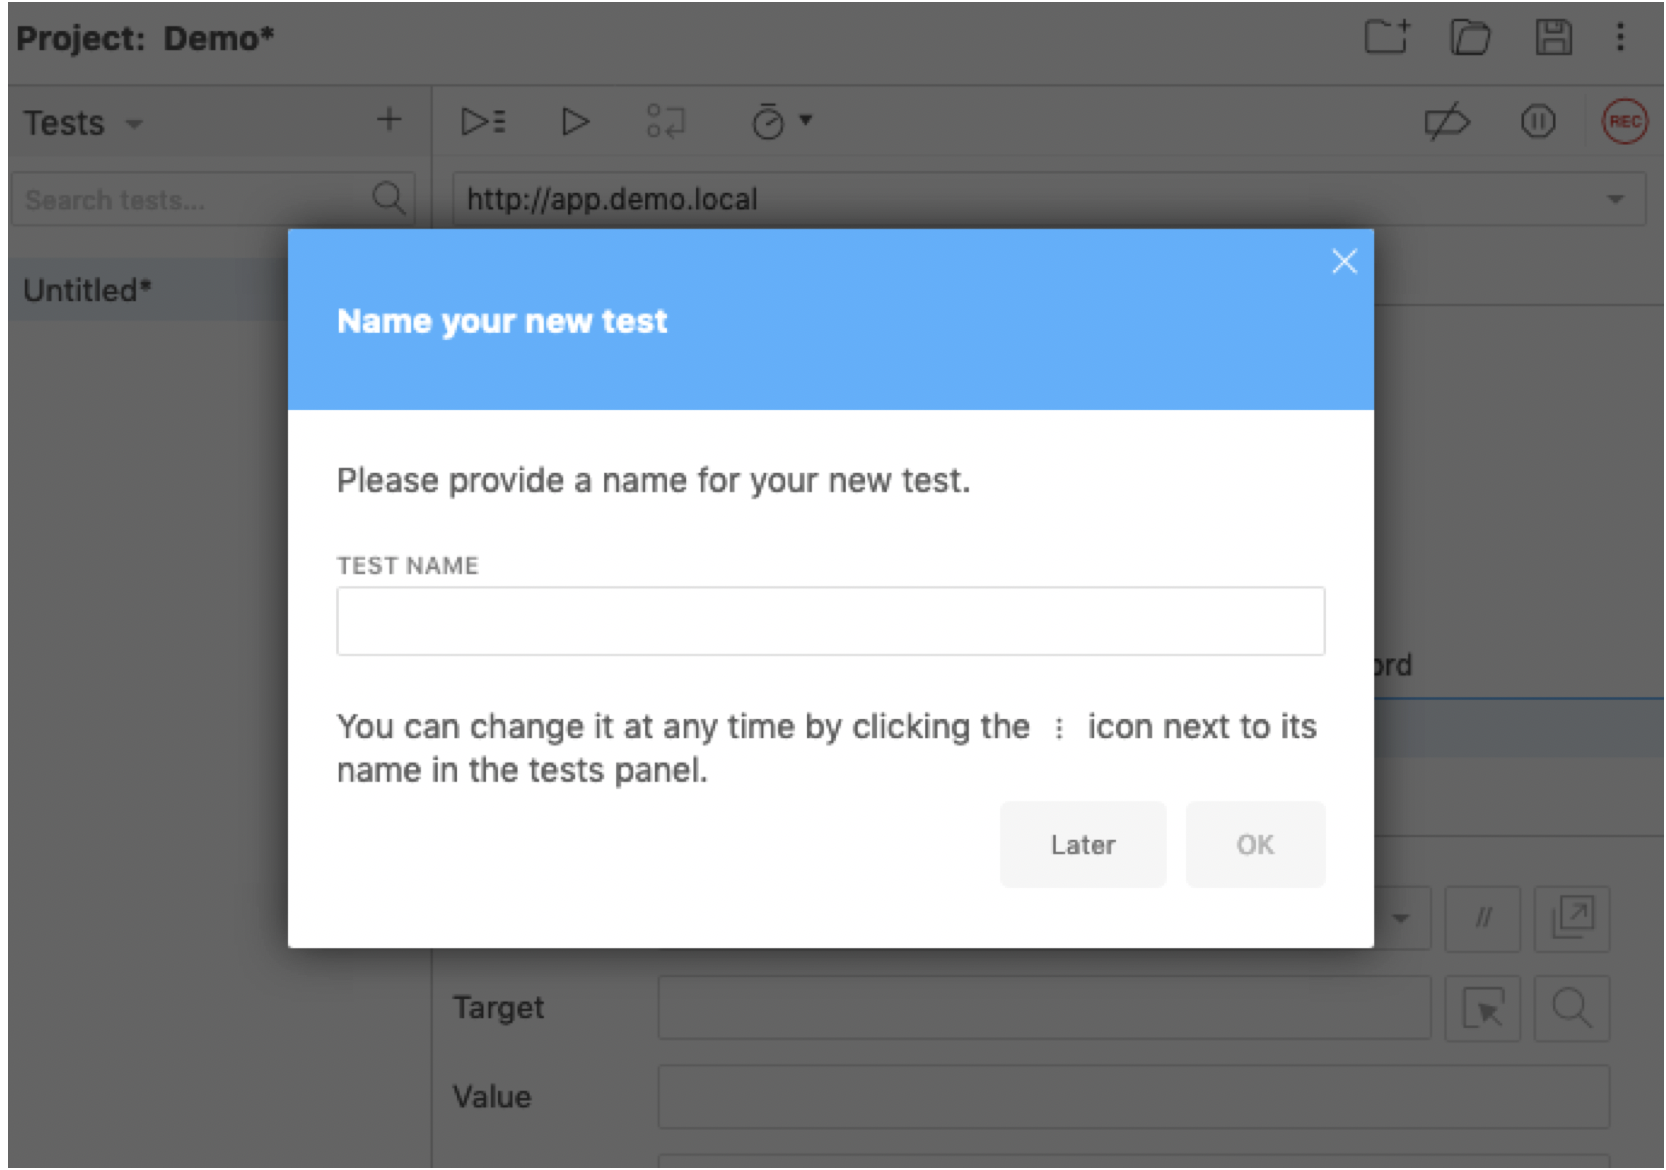
- When successfully logged in, hit the stop button in the top right corner of the IDE.
- Enter any name for the log in sequence.
- Select OK.
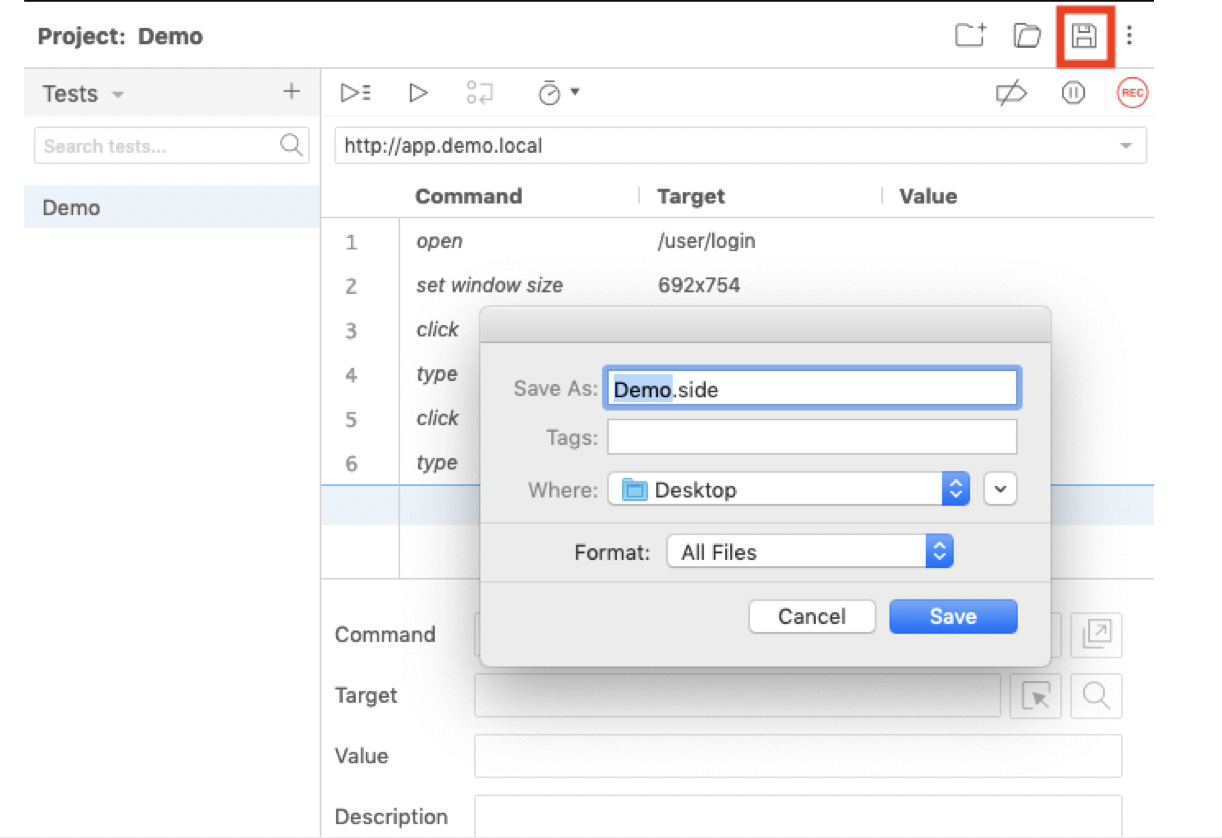
- Select the disk icon to save the log in sequence as a
.sidefile.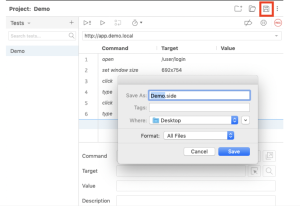
- Upload the saved .side file for the Prerecorded login script in Fortra VM.


These are only fields that include "regex" in the label accept regular expressions. They allow more flexibility than string literals, and can be found in the web app definitions and tuning policy.
The following outlines the most common regex functionality that will be used for in the regex fields in both the Tuning policy and web application definitions.
| Field | Meaning |
|---|---|
| Regex: . | Match any single character |
| Regex: * | Match 0 or more instances of any character. The * can be combined with other characters or metacharacters, such as \d, to match 0 or more digits by entering \d*. The * must always be preceded by another character or metacharacter. |
| Regex: + | Match 1 or more instances of any character. The + can be combined with other metacharacters, such as \d, to match one or more digits by entering \d+. The + must always be preceded by another character or metacharacter. |
| Regex: \d? | The addition of the ? to this regex will match 0 or 1 instance of a digit, instead of always requiring there be a digit present. When the ? is combined with + or * it makes them less greedy to match the minimum number of characters. |
| Regex: \d | Matches any single digit 0-9 |
| Regex: [a-z] | Matches a single alphabetic character a-z |
| Regex: [a-z0-9] | Matches a single alphanumeric character |
| Regex: [a-z]+ | Matches one or more alphabetic character |
| Regex: [a-z]* | Matches 0 or more alphabetic character |
| Regex: https? | Would match on "http" or "https" |