In the administration interface, connect to EFT Server, then do one of the following:
-
On the toolbar, click the click New Reports icon
 .
. -
On the main menu, click Reports > New Report.
-
Click the Reports tab, then click the New Report icon
 on the bottom toolbar.
The Create New Report dialog box appears.
Type a title for the new report, then click Create. The Report Designer appears.
So far, all you have done is opened the VSReport Designer, which allows you to open the New Report Wizard, which we will do next. You will delete this "template" later.
Click File > New Report or click the New Report ![]() icon on the toolbar. The New Report Wizard appears.
icon on the toolbar. The New Report Wizard appears.
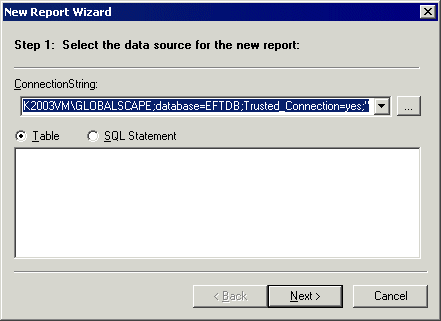
By default, the ConnectionString box displays information for the database that you specified when you installed the Auditing and Reporting module. If necessary, you can type a different string that is used to connect to the data source. Click ![]() to define the connection string. The Data Link Properties dialog box appears.
to define the connection string. The Data Link Properties dialog box appears.
On the Provider tab, click Microsoft OLE DB Provider for SQL Server as the provider to connect to the SQL Server database, then click Next. The Connection tab appears.
In Select or enter a server name, click the arrow to select a name or type the name of EFT Server.
In Enter information to log on to EFT Server, click an authentication option to log on to EFT Server:
-
Use Windows NT Integrated security - Your computer automatically picks up the credentials from your computer and connects you to the database.
-
Use a specific user name and password - Specify the user name and the password to be used to log on to EFT Server. Select the Allow saving password check box to save the password in the connection string.
|
|
Select the Blank password check box if EFT Server requires a blank password to log on the database server. Even if you do not type any password when you create a user account on a database server, you can select the Allow saving password check box. In this case, EFT Server takes a dummy password value and saves that value in the connection string. Selecting the Blank password check box disables the password field. |
Click one of the following:
-
Select the database on EFT Server, and then click a database in the list.
-
Attach a database file as a database name - Click the ellipsis icon
 to browse for the SQL Server database file (*.mdf). The Select SQL Server Database File dialog box appears. Select a file, then click Open. The path to the file appears in the Using the filename box.
Click OK in the Data Link Properties dialog box to return to the New Report Wizard.
Click Table, then click tbl_AdminActions.
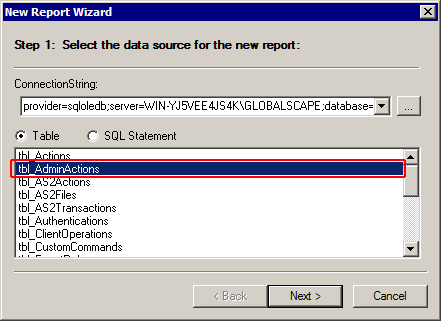
Click Next. The fields that appear in the Available list are from the table you selected in the previous step.
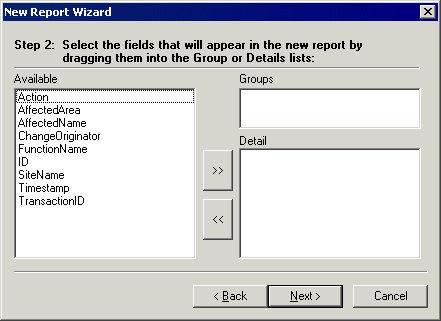
Click and drag SiteName to the Groups field, then click and drag each of the other fields, except ID and Transaction, into the Detail box. (If you click the right-facing arrows, every field will move to the Detail area. Then you can individually move back the fields you do not want.)
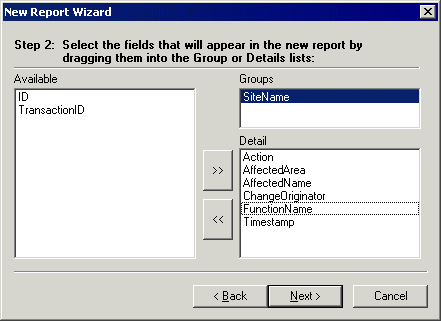
Click Next. The layout options appear.
Keep the default settings and click Next until you get to Step 5. (For details of using the report wizard to define layout options, refer to Creating a Report with the Report Wizard. For this example, we use the default options.)
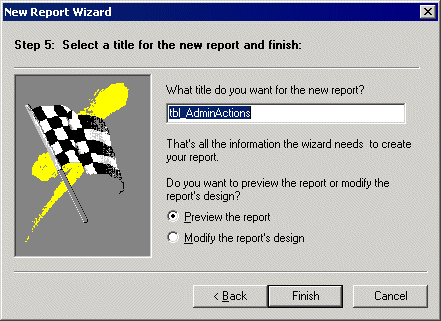
Type a title for the report, then click Finish.
-
The left pane of the Report Designer displays the report's name (and the report template that was created in step 2).
-
The right pane displays a preview of the report.
-
The title bar displays the name of the report and an asterisk, indicating that you have not yet saved the report.
Let's get rid of that "new" template that was created when you opened the VSReport Designer. In the left pane, click the name of the template you want to remove, then click the delete icon ![]() on the toolbar.
on the toolbar.
Click File > Save or click the Save icon on the toolbar.
Click File > Exit to close VSReport Designer. The report appears in the tree on the Reports tab.
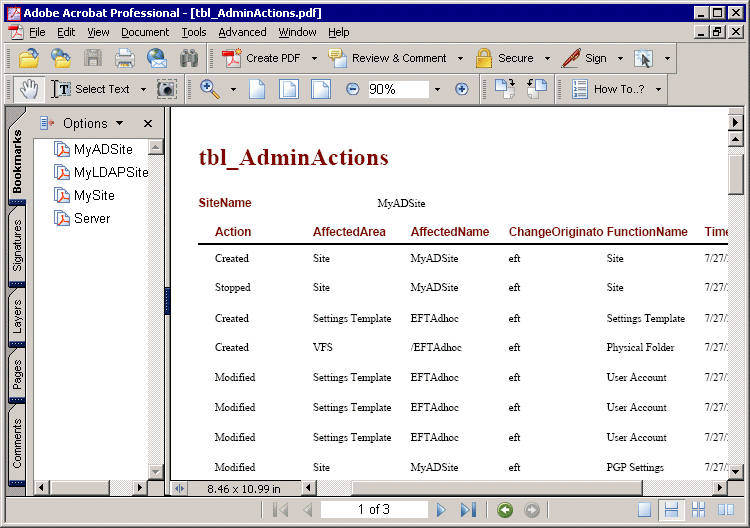
In the right pane, click Show Report. The report appears in the preview pane.
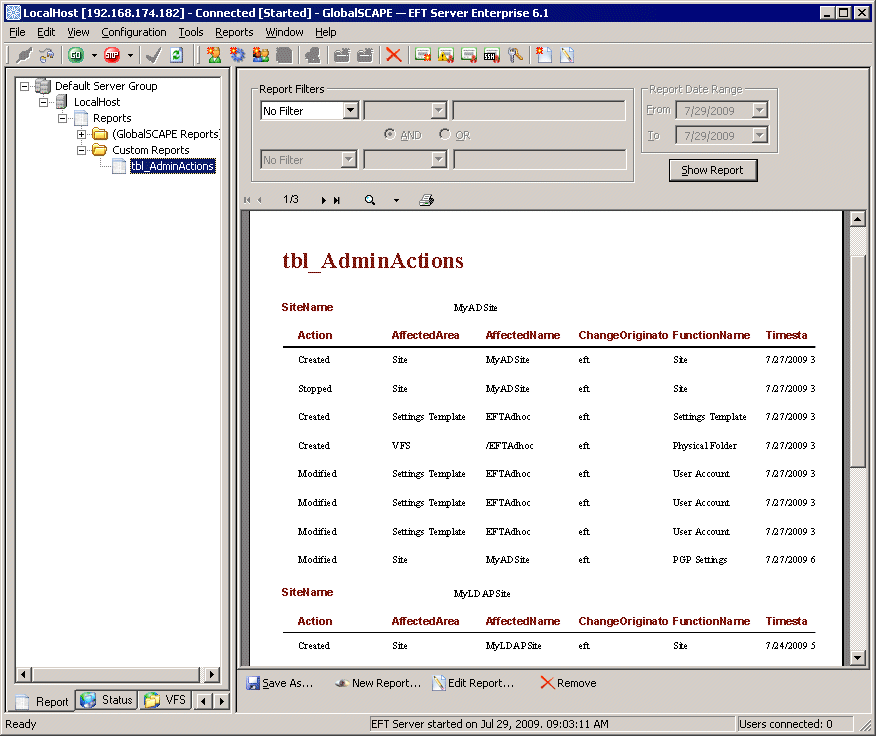
You can filter the results, such as show results only for certain Sites, a specific administrator account, or a certain date.
Click Save As to save the report. The report displays EFT Server administrator actions sorted by Site Name and Server.
