Transferring Files with the Web Transfer Client
With the WTC, you can transfer files between your local computer and a remote file system to which you have the proper permissions.
You can transfer multiple selected folders and files at once by dragging and dropping from one system pane into the other, clicking on the transfer icons between the system panes, or by clicking Upload or Download. The WTC processes up to 5 file transfers at a time (the default configuration for maximum concurrent transfers). Each file is added to the transfer queue and awaits its turn to be transferred. Browsers use JavaScript interaction with the applet to constantly poll the status of all items in the queue, and then update the browser window to reflect current transfer progress in near real-time. The Transfer Queue shows the active transfers, failed transfers, and up to 50 of the last successfully completed transfers.
If you have exceeded your allowed disk quota on the Server, a message appears when you attempt to upload more files. To continue to upload files, you must delete some of your old files off of the Server or ask your EFT Server administrator to increase your allowed disk quota.
To transfer files between your local files and folders and the remote server
-
Open a browser window/tab, and navigate to the WTC address.
-
Log in to EFT Server. The WTC appears.
-
In the local and the remote panes, open the folders into or from which you want to transfer the file(s).
-
Do one of the following:
-
To transfer from your local folders to the remote server, click the Upload arrow.
-
To transfer from the remote server to your local folders, click the Download arrow.
-
Click and drag the file from one pane to the other.
The transfer progress appears in the Transfer Queue.
If the network is lost while the WTC is transferring files, it waits for 30 seconds. After 30 seconds, the Status column in the Transfer Queue indicates that the transfer failed. If you want to attempt to transfer the file again, you must login again when the network is available. After the WTC reconnects, it resumes the transfer from where it stopped.
Connecting to EFT Server via the Web Transfer Client
Before users can log in to EFT Server using the WTC, the EFT Server administrator must configure EFT Server to allow WTC connections. EFT Server allows users concurrent access to the WTC up to the number of available licenses. If you attempt to access the client when the maximum number of licenses is in use, the PTC appears instead.
|

|
Ensure the Windows Firewall on the EFT Server computer is not blocking Web access. In most Windows operating systems, the Windows Firewall is turned on by default.
When using the WTC in Firefox on an IPv6 Site, you cannot add a "Security Exception" for the self-signed certificate. Refer to Mozilla's support article at http://support.mozilla.com/en-US/questions/802248 for more information.
|
You can choose to transfer files with the WTC or the Plain-Text Client (PTC). On the EFT Server web login interface, selecting the Use plain interface check box opens the PTC upon login, instead of the WTC. (If the WTC is not enabled, the PTC appears even if you do not select the Use plain interface check box.)
To log in to EFT Server to transfer files
-
In your web browser, type the URL (web address) provided to you by the EFT Server administrator, then press ENTER.
-
The login page appears. Provide your username and password, then click Log In.
-
If you want to use the PTC instead of the WTC, clear the Use Java™ enabled version check box before you click Log In.
-
If you have forgotten your username or password, click the applicable link, then provide and confirm your email address.
-
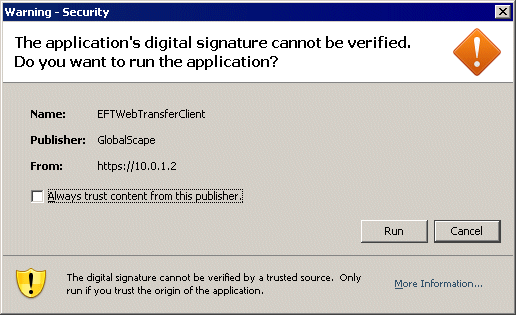
If you receive a message regarding the certificate, accept it (click Run). If there is an Always accept certificates from this publisher check box, select it, and then you will not have to accept the certificate every time you connect to the WTC.

After you are connected to EFT Server, the folders and files in your local file system and remote file system appear in their respective panes and you can drag and drop files between them.
To transfer files
-
To upload a file from your local file system to the remote file system, click the file that you want to upload, then click the blue right-facing arrow or drag the file to the remote pane.
-
To download a file from the remote file system to your local system, click the file that you want to download, then click the blue left-facing arrow or drag the file to the local pane.
|

|
Each refresh of the browser counts as one session, so do not click the browser's Refresh icon or F5. Click Refresh in the WTC instead, which refreshes the display without requesting a new session.
|
To log off of the Web Transfer Client
Directory listings and other screens are often retained in the browser's history. If your directories contain sensitive data, such as customer information, you should delete temporary files/clear the browser's cache.
When the browser is closed, the server ends the session immediately. When a user logs back in, the transfer history from previous sessions is not displayed in the Transfer Queue. The timeout period is not user configurable.
To log back in to the Web Transfer Client
![]()
