![]()
![]()
Suppose every Friday the manager of Engineering uploads a status report named status<date>.doc to EFT Server. You want the manager of Marketing to have access to that file, but not to any other files in the Engineering manager's folder. The example below describes how to create an Event Rule so that when a file with "status" in the name is uploaded to EFT Server, EFT Server makes a copy of it in another user's folder.
To move an uploaded file based on the filename
In the Administrator, connect to EFT Server and click the Server tab.
In the left pane, expand the Site you want to configure, then click Event Rules. In the right pane, click New. The Create New Event Rule dialog box appears:
In the Create New Rule dialog box, click Folder Monitor, then click OK. The new Rule appears in the Rule Builder and includes the If File Change Condition with "added" selected.

In the Rule Builder,
in the Monitor folder Event, click [select].
The Monitor Folder dialog box
appears.
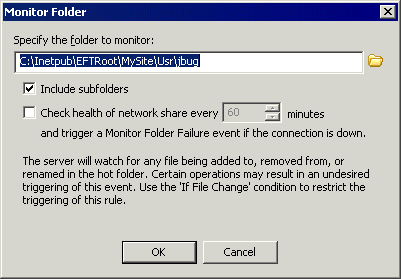
Click the folder icon ![]() to specify a folder to monitor.
to specify a folder to monitor.
(Optional) If you also want to monitor sub folders, select the Include sub-folders check box (selected by default).
(Optional) To monitor the status of the network connection and report failures, select the Check health of network share every <n> minutes check box, and specify an interval (cleared by default). An hour (60 minutes) is specified by default.
Click OK. The folder path appears in the Rule Builder pane.
Click the "If File Change" Condition in the Rule Builder to select it, then in the Conditions list, double-click the "If File Name" Condition. The Condition appears in the list.

In the "If File Name" Condition, click the [path mask] link. The Choose File Names dialog box appears.
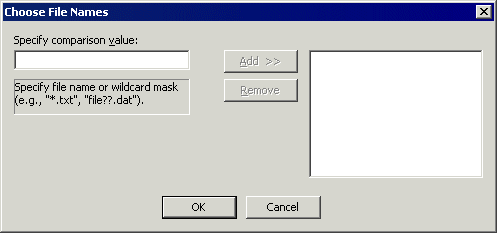
In the Specify comparison value box, specify the file name and/or a wildcard mask, click Add, then click OK. For example, type status*.doc to filter for a Word document whose filename starts with "status."
Next, you must specify the Action to occur when this
Event is triggered. In the right pane, in the Actions
list, click Copy/Move (push) file
to host.
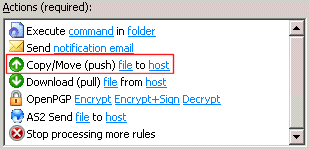
The Action is added to the Rule Builder.

Click one of the undefined parameters (e.g., '%FS.PATH%').

The Offload Action Wizard appears.
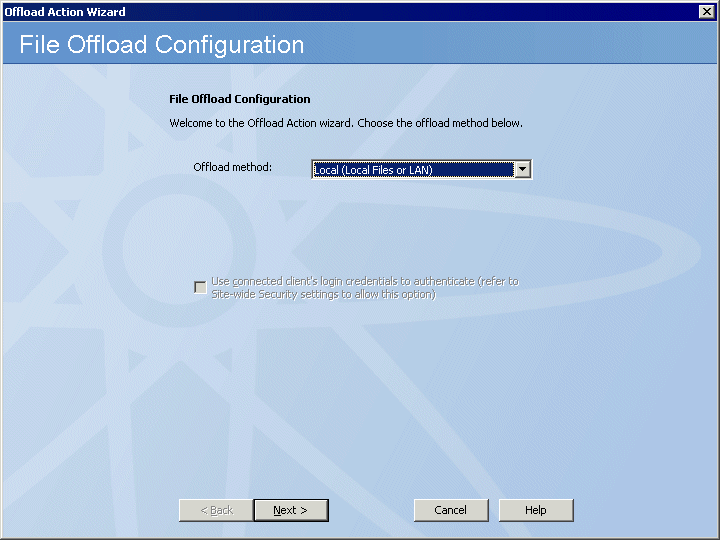
In the Offload method box, specify a protocol type for the connection: Local (Local File or LAN), FTP (standard File Transfer Protocol), FTP SSL/TLS (AUTH TLS), FTP with SSL (Explicit encryption), FTP with SSL (Implicit encryption), SFTP using SSH2 (Secure Shell), HTTP (HyperText Transfer Protocol), HTTPS (Secure HTTP access).
For this example, we will choose Local (Local Files or LAN). (Refer to Copy/Move (push) File to Host Action for other protocol types.)
Click Next. The Source File Path page appears.
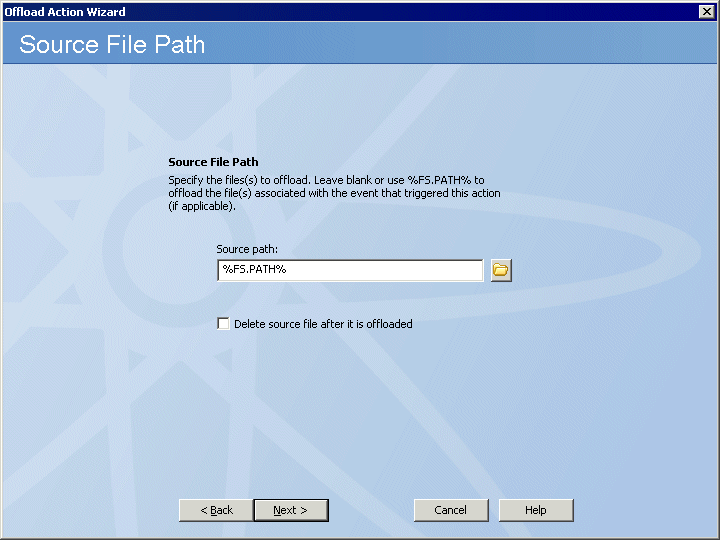
In the Source path box, type %FS.PATH% (or you can leave it blank).
If you want to Delete source file after it has been offloaded, select the check box.
Click Next. The Destination File Path page appears.
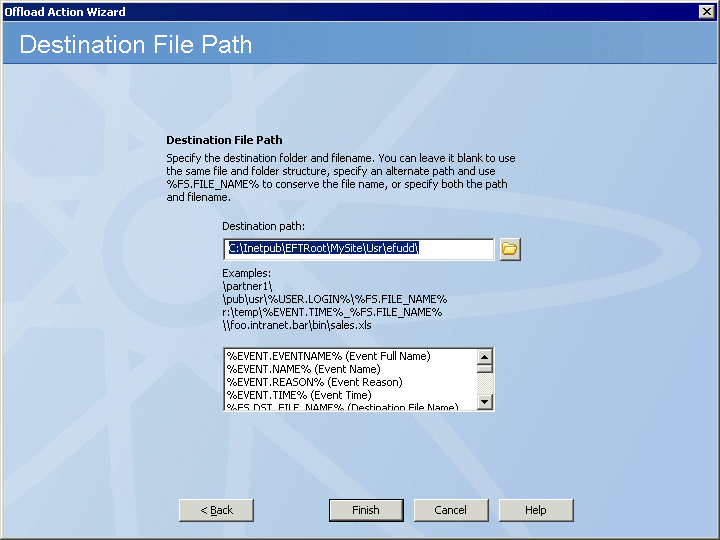
In the Destination
path box, click the folder icon ![]() and specify the location in which to save the
offloaded file. (No validation is performed.) In this example, we specified
a user's folder.
and specify the location in which to save the
offloaded file. (No validation is performed.) In this example, we specified
a user's folder.
Click Finish then click Apply to save the changes on EFT Server. (You could also add other Actions, such as e-mail notifications.)
Now when a user uploads a file called status*.doc, EFT Server will move it to the destination folder specified.
If you are copying or moving the file to another location, and the file upload is a regularly occurring event with a file of the same name, in the Offload Action wizard, you can add the variables %EVENT.DATESTAMP% and/or %EVENT.TIMESTAMP% to the path so that the date (YYYYMMDD) and/or time (HHMMSS) are added to the filename when it is moved/copied.
Do not use %EVENT.TIME%, because the colon (e.g., 28 Aug 07 10:01:56) makes it unsuitable for file naming.
For example, type:
C:\Documents and Settings\Administrator\My Documents\upload\%EVENT.DATESTAMP%_%EVENT.TIMESTAMP%_%FS.FILE_NAME%
With this path and variables, when a file is uploaded to the monitored folder, the file is moved to \My Documents\upload and the date and time are prepended to the filename. For example, 20080422_101212_mydailyprogress.doc.