(Available in EFT Server Enterprise) You can configure a Server Event Rule to copy or download from a specific location to a specified local folder using a particular protocol when an event occurs. You must provide EFT Server with connection information (protocol and login details) and file information (source path and destination path). (Also refer to Upload (Copy/Move) Action.)
|
|
The Download Action is available with all Events except Site Stopped and Service Stopped. |
To set up EFT Server to download files
Follow the procedure in Creating Event Rules or select the rule to which you want to add the Action.
In the Actions list, click Download (pull) file from host. The rule parameters are added to the rule in the Rule pane.
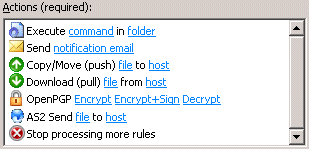
Click one of the undefined parameters where the parameters are listed in the Rule pane. The Download Action wizard appears.
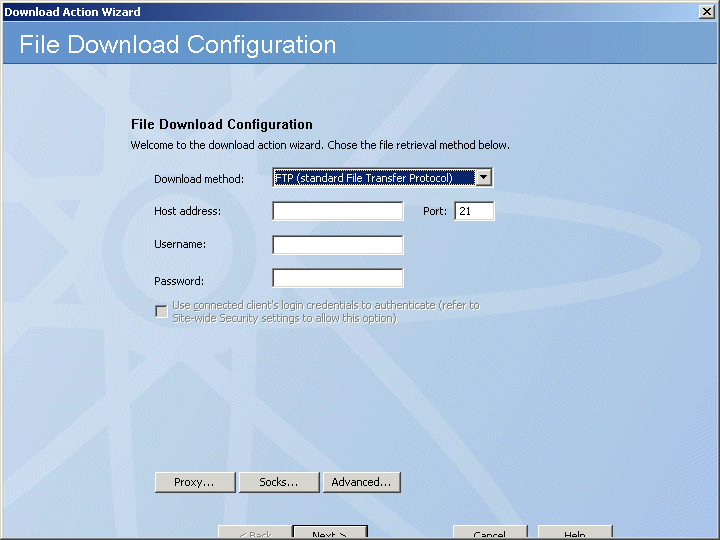
Click the list to specify a Download method for the connection: Local (Local File or LAN), FTP (standard File Transfer Protocol), FTP SSL/TLS (AUTH TLS), FTP with SSL (Explicit encryption), FTP with SSL (Implicit encryption), SFTP using SSH2 (Secure Shell), HTTP (HyperText Transfer Protocol), HTTPS (Secure HTTP access).
If you chose anything but Local do the following; otherwise, skip to step 11.
In the Host address box, type the IP or host address of the EFT Server to which you want to connect.
The Port number for the selected protocol changes automatically based on the offload method. Provide a different port number, if necessary.
In the Username and Password boxes, type the username and password used to authenticate.
Select the Use connected client's login credentials to authenticate check box if you want to use the local system account to authenticate.
If you chose SFTP:
In the SFTP Public Key File Path box, type the path or click the folder icon to browse to and select the path.
In the SFTP Private Key File Path box, type the path or click the folder icon to browse to and select the path.
In the SFTP Key Passphrase box, provide the key's passphrase.
If you connect to EFT Server through a Proxy server, click Proxy.
If you connect to EFT Server through a Socks server, click Socks.
To configure advanced transfer options, click Advanced. The Advanced Options dialog box appears.
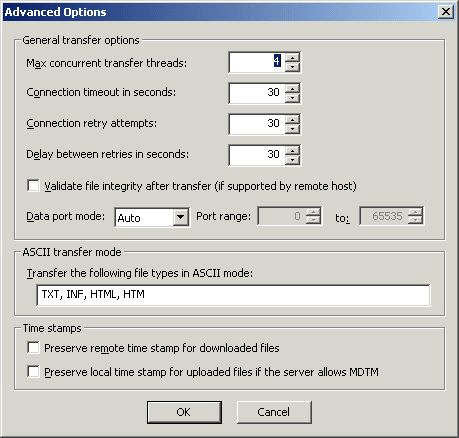
In the General transfer options area, you can provide more control over Max concurrent transfer threads, Connection timeout, Connection retry attempts, and Delay between retries. When files are being transferred with Event Rules (copy/move), if there are connection problems (e.g., the network is unavailable), the Server will attempt to establish a connection the number of times specified in Connection retry attempts. When EFT Server is able to re-establish the connection, it continues to transfer the file even if there are multiple interruptions.
Select the Validate file integrity after transfer check box to specify that EFT Server should double check binary files to ensure the files downloaded completely and correctly. (Not applicable to SFTP.)
In the Data port mode box, click the drop-down list and select one of the following (not applicable to SFTP):
Auto - (selected by default) EFT Server initially makes connections in PASV mode. If the PASV connection fails, EFT Server attempts to connect in PORT mode automatically.
PASV - Helps avoid conflicts with security systems. PASV support is necessary for some firewalls and routers, because with PASV, the client opens the connection to an IP Address and port that EFT Server supplies.
PORT - Use PORT when connections or transfer attempts fail in PASV mode, or when you receive data socket errors. When a client connects using PORT, EFT Server opens a connection to an IP address and port that the client supplies. If you select Port, specify the Port range.
In the ASCII transfer mode area, specify the file types that can be transferred. TXT, INF, HTML, and HTM are specified by default.
In the Time stamps area, select one of the following:
Select the Preserve remote time stamp for downloaded files check box to keep a downloaded file's time stamp the same on the local computer as it is on EFT Server.
Select the Preserve the local time stamp for uploaded files if EFT Server allows MDTM check box to keep an uploaded file's time stamp the same on EFT Server as it is on the local computer. (Not applicable to SFTP.)
Click OK.
Click Next. The Source File Path page appears.
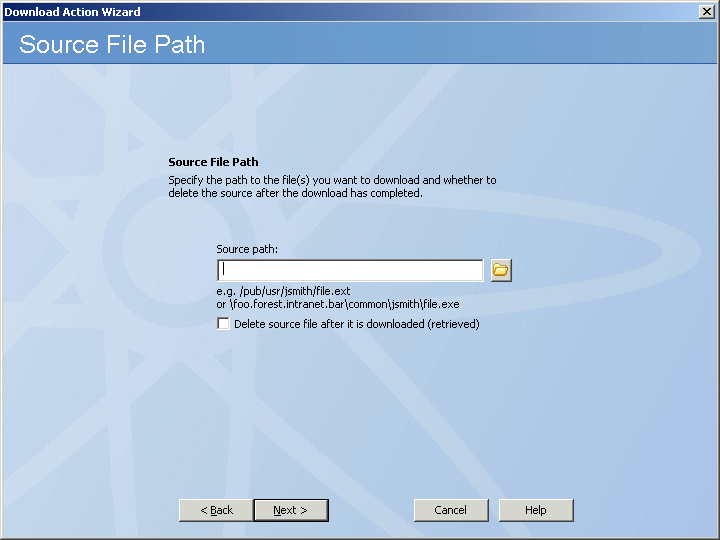
In the Source path
box, provide the path to the file(s) that you want to download. For example,
type:
/pub/usr/jsmith/file.txt or \\mydomain\common\jsmith\file.txt
If you want to Delete source file after it has been downloaded, select the check box.
Click Next. The Destination File Folder page appears.
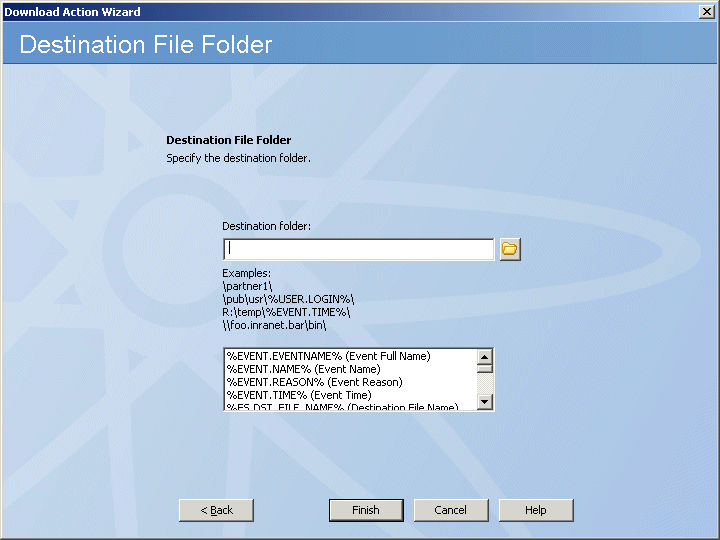
In the Destination
folder box, click the folder icon ![]() and specify the location in which to save the
downloaded file. You can insert variables by double-clicking them in the
box below the Destination folder box.
and specify the location in which to save the
downloaded file. You can insert variables by double-clicking them in the
box below the Destination folder box.
Click Finish, then click Apply to save the changes on EFT Server and/or add other Actions and Conditions to the Rule.