CRM Browser |
The CRM Browser is a convenient development tool that comes packaged with the Dynamics CRM action. It enables connection to the target Dynamics CRM server in order to browse and select entities during task construction. You can create and configure multiple connections which are automatically stored so you can conveniently re-connect to the CRM server of your choice by simply picking from a list of pre-configured connections. The CRM Browser uses its own session, therefore, you can always browse the server even while CRM operations are being performed.
The CRM Browser is accessible from the properties of any Dynamics CRM activity that performs actions on entities. These activities contain a folder icon found on the right-hand side of any parameter that specifies selection of entities.
The CRM Browser is a tool used during task development to provide a way for you to view items that reside in the CRM server or select an item that a specific Dynamics CRM activity should perform operations on during task execution. In order to view CRM items, you must first establish a connection to the CRM server.
To create a new connection:
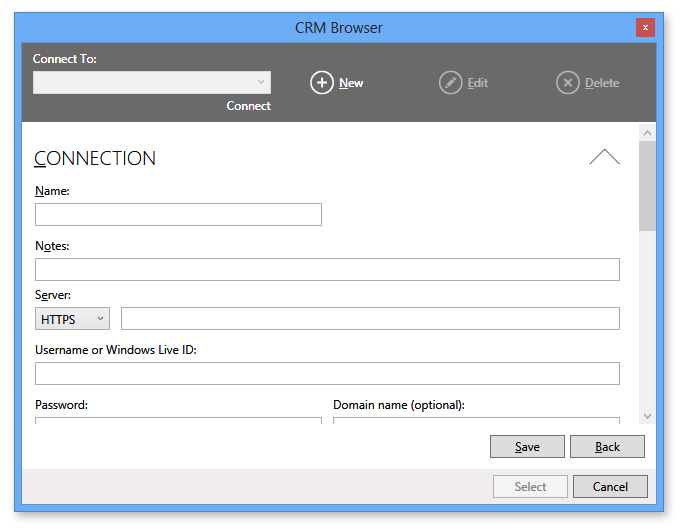
Click the New button. A connection editor appears where you can configure your new connection (as shown below).
In the Connection properties, enter a unique name for the connection in the Name field.
In the Notes field, enter any notes you wish to convey about the connection.
In the Server field, enter the URL of the Dynamics CRM server you wish to establish a connection with.
Enter the username/Windows Live ID, password and optional domain name for the logon credentials.
In the Organization name field, enter the name of the organization associated with the account.
Enter any advanced properties (if needed).
Click Save to save the connection. The name you entered for this connection will appear in the Connect To drop-down.

To edit or remove an existing connection:
Click the down arrow under the Connect To parameter to display a list of existing connections.
Select the connection you wish to edit or delete.
Click the Edit button to edit the properties of the connection or click the Delete button to permanently delete the connection.
To BROWSE/select Entities:
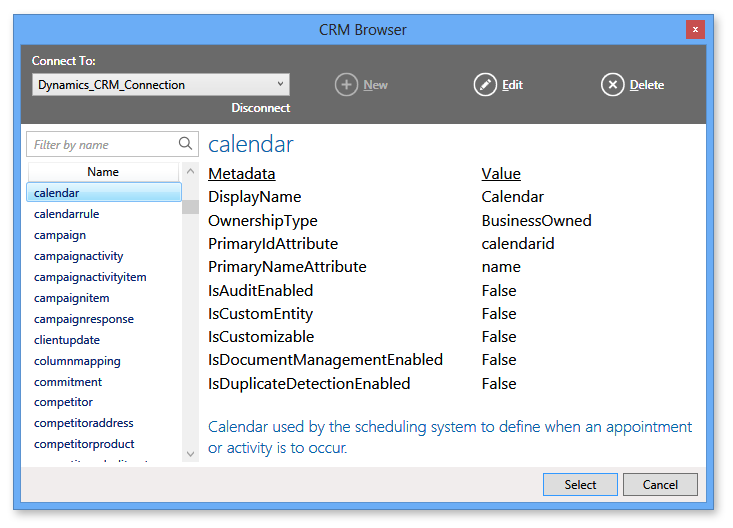
Select the desired connection from the Connect To drop-down list and click Connect.
Upon a successful connection, a list of entities appear on the left panel.
Selecting an entity on the left panel populates the right panel the metadata, values and brief description of the entity.
To select an entity, simply double-click it or select it and press the Select button.
