Creating SSL Certificates
SSL servers use certificates to determine whether they will allow you to connect. With CuteFTP, you can create and sign digital certificates.
To create an SSL certificate
-
On the main menu, click Tools > Global Options.
-
Expand the Securitynode.
-
Click SSL Security.
-
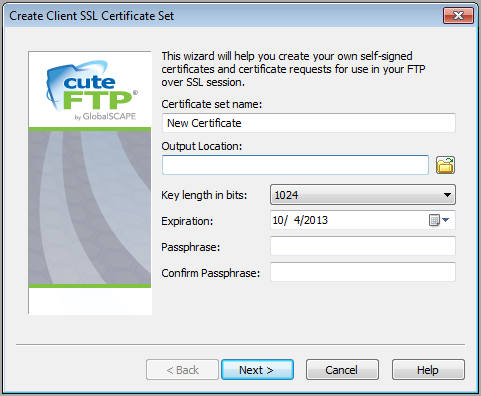
Click Create Certificate. The Create Client SSL Certificate Set wizard appears.
-
In the Certificate set name box, type the name of the certificate that will be generated by the Certificate Wizard.
-
In the Output Location box, click the folder icon to select a folder in which to save the certificate.
-
In the Key length in bits box, click a bit length for the certificate private key. CuteFTP supports keys up to 4,096 bits.
-
In the Expiration box, specify how long the certificate is to remain valid.
-
Create and confirm the Passphrase. The passphrase, which is used to encrypt the private key, can be any combination of characters or spaces. Do not lose the passphrase, as the certificate is useless without it.
-
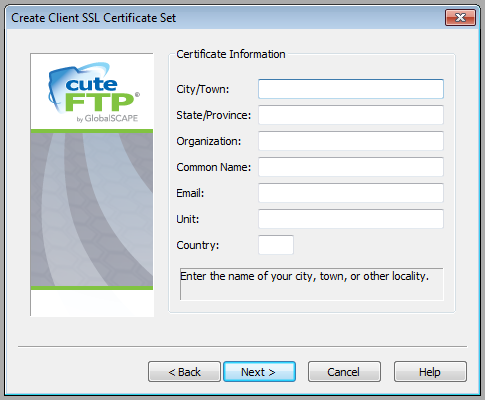
Click Next. The Certificate Information page appears.
-
Provide the following required information:
-
City/Town - the city/town where your organization is located.
-
State/Province - the state/province where your organization is located.
-
Organization - the name of your organization.
-
Common Name- the common name or fully qualified domain name of your Site (e.g., www.globalscape.com)
-
Email -email address in the format x@x.com.
-
Unit - name of your department, such as Information Systems.
-
Country - the two-letter country code for the country where your organization is located.
-
-
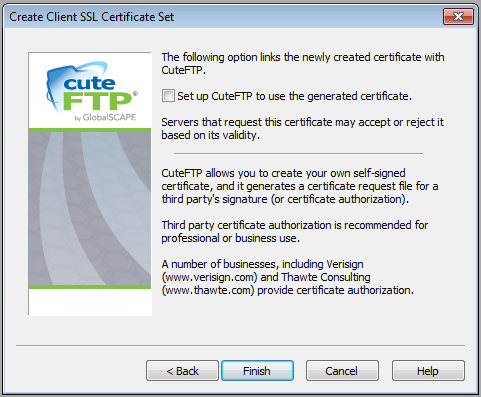
Click Next. The final page appears.
-
Click the Set up CuteFTP to use the generated certificate check box - the wizard automatically associates the certificate to CuteFTP.
-
The certificate can be unassociated by clearing the Use SSL Certificate check box in Global Options (Tools > Global Options > Security > SSL Security). If the check box is cleared, the wizard only saves the certificate files in the folder originally specified.
-
-
Click Finish.
CuteFTP displays the paths to all the files generated for your certificate. If you want a third party to sign your certificate, you must send the Certificate Signing Request (.csr) file to the third party. The CSR is saved in the location you specified on the first page of the wizard, e.g., C:\Users\Administrator\AppData\Roaming\Globalscape\CuteFTP\9.0\Security.
Configuration Notes
-
Not all SSL Sites require certificates.
-
When you create a certificate, CuteFTP generates the following files:
-
Private key file (.key) - The private key should never be distributed to anyone. It is used to decrypt sessions encrypted by a public key.
-
Certificate request file (.csr) - This file can be signed by Globalscape EFT Server's Certificate Signing Utility or sent to an intermediate Certificate Authority such as Verisign or Thawte for signing.
-
Certificate file (.crt) - This is a signed certificate, whether self-signed or signed by an intermediate certificate authority.
-
If the server accepts self-signed certificates, you can connect with the .crt file and .key file you created and associated to CuteFTP, provided the server has added your certificate to its trusted list.
-
You can export certificates (.crt files) from CuteFTP's Trusted certificate store, located in Global Options > Security > SSL Security.