OpenPGP keys
CuteFTP allows you to create, import, export, and delete OpenPGP keys. To create an OpenPGP Key on fly to transfer files, refer to Uploading and Downloading Files Using OpenPGP Keys.
To specify an OpenPGP key to use (if you have created a key)
-
On the toolbar, click the OpenPGP Mode icon
 . The
OpenPGP Mode Settings dialog
box appears.
. The
OpenPGP Mode Settings dialog
box appears. -
In the Select key list, click a key.
To view, create, import, export, or delete keys
-
On the main menu, click Tools > Global Options (or press ALT+F7).
-
Expand the Security node, then click OpenPGP Security. The OpenPGP Security options appear.
To create OpenPGP keys
-
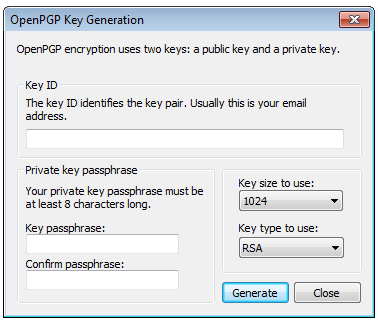
Click Create. The OpenPGP Key Generation dialog box appears.
-
In the Key ID box, type your email address. The key identifies the key pair.
-
In the Key Passphrase and the Confirm Passphrase boxes, type your private key passphrase.
-
In the Key sizeto use list, click a key size. A key is a value that works with a cryptographic algorithm to produce a specific ciphertext (encrypted message) from a specific plaintext (original document). Key size is measured in bits. In cryptography, a bigger the key ensures more secure ciphertext.
-
In the Key type to use list, click a key type. Key types are the cryptosystems named after their inventors.
-
To generate the keys, click Generate.
-
The generated key is added to the OpenPGP Key list. The OpenPGP Key list displays the user id, key id, and key type.
-
Click a key in the list, then click Delete.
-
In the OpenPGP list, click a key, then click Import. The Open dialog box appears.
-
Navigate to the OpenPGP key file, then click Open.
-
Click OK.
-
In the OpenPGP list, click a key, then click Export. A confirmation message appears.
-
Click Yes to export the private key along with the public key, otherwise click No. The Save As dialog box appears.
-
In the File name box, type a name for the key, then click Save.
-
Click OK.