Configuring Outbound SSL in CuteFTP
CuteFTP has preconfigured all ciphers for TLS v1.3 and v1.2 by default. CuteFTP users can now set the outbound settings via the TLS Settings under the SSL security settings UI. Specify SSL versions and ciphers before enabling SSL connections.
To configure SSL
-
In the CuteFTP interface click the Tools menu.
-
Click the Global Options option.
-
Select the SSL Security option under Security.
-
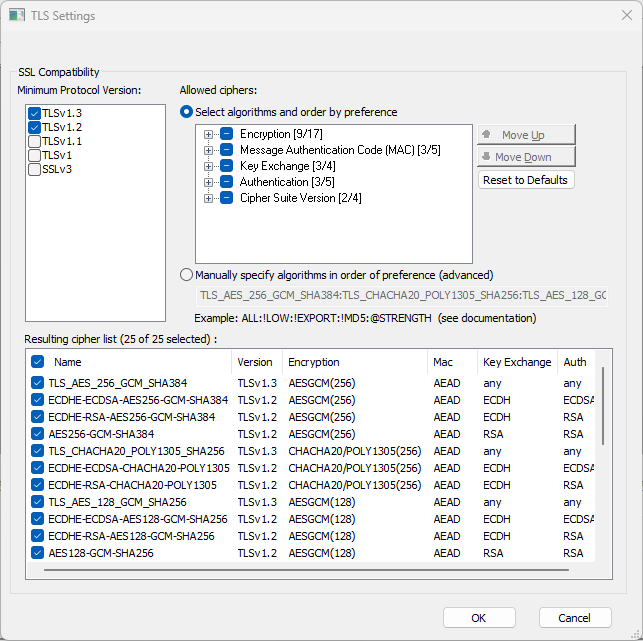
Next to SSL security settings, click Configure. The TLS Settings dialog box appears.
-
Select the check box of one or more ciphers/algorithms to use, or manually specify the ciphers. At least one cipher must be specified.
-
Only advanced users should manually specify ciphers.
-
SSL Cipher and Version-allowed settings affect all outbound connections on CuteFTP.
-
A Certificate Authority (CA)-signed certificate establishes your validity better than a self-signed certificate.
-
CuteFTP is FIPS 140-3 compliant and is able to establish connections with remote servers using SSL in FIPS mode.
-
-
Click the arrows to arrange the ciphers in top-down priority. If more than one approved cipher is specified, and the remote system has in its list one or more ciphers that are also on CuteFTP’s approved list, CuteFTP will select and use the cipher based on ordering (priority) shown in the list box.
-
Click Apply to save the changes to CuteFTP.