Tools for Debugging SAML Communications
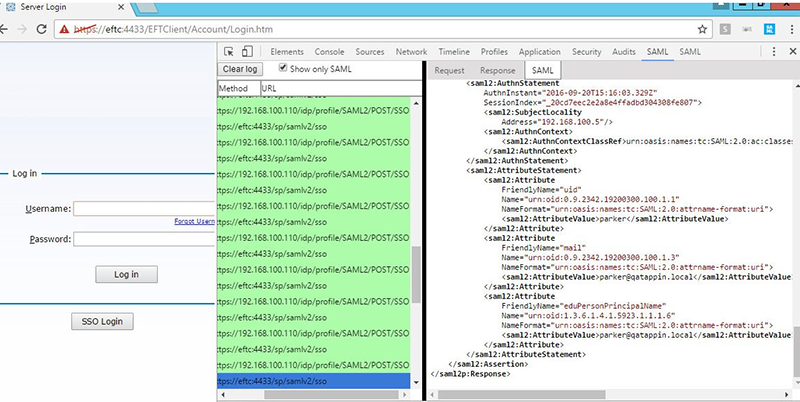
When setting up and testing SAML communications between the SP (EFT) and your IdP, you may need to review assertions, especially if authentication is failing for some reason. There are two ways you can do this:
-
In EFT’s logging.cfg file, uncomment Trace logging for log4cplus.logger.SAMLSSO.
-
Perform any test communications (attempt to establish a session), then open EFT.log and review the trace log output.
-
In Google Chrome, there is a developer tool add-in called SAML Message Decoder that will permit you to easily sniff SAML requests and responses made to the IdP, that occur when the user clicks the SSO Login button on WTC’s home page, or if navigating to the SSO reserved path.

Validate Username Regex
EFT must be configured so that it can extract the username from the assertion, so it can attempt a match of the pre-defined user accounts in EFT you pulled down from LDAP or other authentication manager. If EFT cannot find a match, it will be because the user does not exist in its username store, or you’ve misconfigured the username regex matching and EFT is failing or improperly parsing the username from within the assertion. You can attempt to do the following to ensure proper regex mapping:
-
Configure your IdP (such as Shibboleth) to return the user attribute mail in the format of username@domain.com
-
Configure your IdP and EFT to match on the username attribute value of “mail”.
-
Under the “Parse the username using the regular expression” field to grab everything to the left of the @ field: ^(.*)@.*
-
Ensure there is an EFT user that matches on the username, without the email address, e.g. “username”.
-
Attempt to login with that user. If it fails, refer to the debugging section above.
-
There are several online tools that can aid you in creating and testing out your regex expressions: https://regex101.com/
Generate SP Metadata File
Identity Providers (IdPs) needs a way to know which Service Providers (SPs) they can trust. IdPs are informed of trusted SPs either via manual configuration or by importing the SP’s information using a metadata file, which is an XML formatted file that contains all of the relevant SP information (public key, Entity ID, etc.). At this time, EFT does not produce the metadata automatically, nor can it import the IdP’s metadata (thus requiring that you manually configure EFT’s SAML settings in EFT); however there are tools, including an online tool and one provided by ADFS that you can use to generate a metadata file from EFT’s SAML configuration that you can then import into your IdP of choice.
Prerequisites:
-
Ensure that SAML / Web SSO is enabled in EFT.
-
Ensure that you have enabled HTTPS in EFT
-
Ensure that you have already created an SSL certificate in EFT
Generate Metadata Using SAML Tool’s Metadata Generator
-
Run the tool from https://www.samltool.com/sp_metadata.php and use the settings described below.
-
EntityId—Enter the value in EFT’s Entity ID field under Web SSO config.
-
Attribute Consume Service Endpoint (HTTP-POST)—Enter the combined values from under Entity ID and Reserved Path, e.g. https://[domain]/sp/samlv2/sso
-
Single Logout Service Endpoint (HTTP-REDIRECT)—Leave blank.
-
SP X.509 cert block—Browse to EFT’s configuration path (the default is C:\ProgramData\Globalscape\EFT Enterprise\ ), open the SSL certificate public key that you created for HTTPS, and copy the key blob into that field. This should look like a long string of numbers and characters.
-
NameID Format—Leave as is or change to desired value.
-
AuthnRequestSigned—Change to True if desired, as EFT always signs its request.
-
WantAssertionsSigned—Set to true, for greater security. EFT supports both.
-
All the other fields are optional.
-
Click BUILD SP METADATA.
-
Copy the metadata into a text file and name it appropriately, e.g. eft_saml_metadata.xml.
-
Import your metadata into your IdP.
Related Topics
-
SAML-Related Knowledgebase Articles (Including tips for configuring IDPs)