DMZ Gateway Tab
If you have installed the DMZ Gateway module, you must configure EFT's connection to DMZ Gateway. You can enable DMZ Gateway when you create the Site or enable it later in the EFT administration interface. In the Site Setup wizard for both standard and high security-enabled Sites, EFT displays the Perimeter Security configuration page that asks whether you will be using DMZ Gateway, and allows you to enter the DMZ Gateway IP address and port number. If Connect this site to EFT's DMZ Gateway is selected when you are creating a Site in the Site Setup wizard, EFT attempts to establish a socket connection to DMZ Gateway when you click Next.
-
If the socket connection fails, a message appears in which you are allowed to provide the DMZ Gateway information again or disable DMZ Gateway and continue without it. (You can attempt to configure it again later.)
-
If the socket connection is successful, EFT applies the settings and continues with Site setup.
To enable DMZ Gateway in EFT
-
In the EFT administration interface, connect to EFT and click the Server tab.
-
Click the node of the Site you want to connect with the DMZ Gateway, and then click the Gateway node.
-
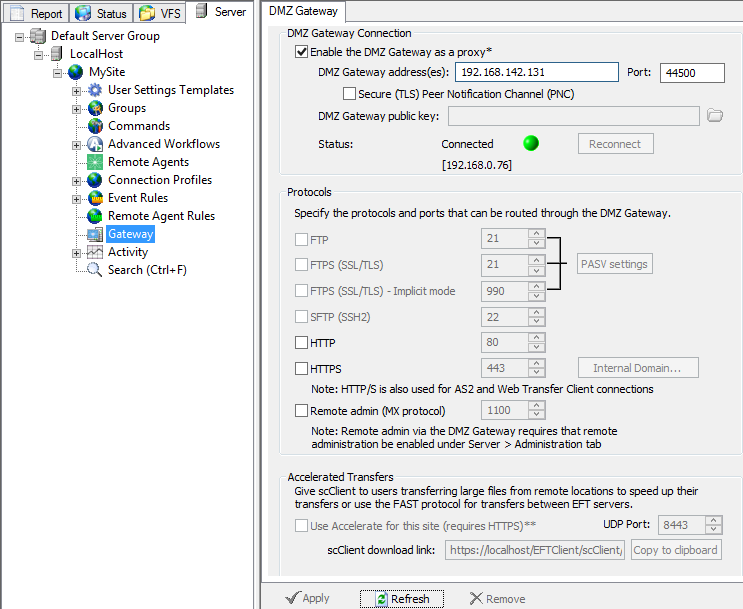
In the right pane, the DMZ Gateway tab appears.
-
Select the Enable the DMZ Gateway as a proxy check box.
-
Specify the IP address and the port number of the DMZ Gateway to which you are connecting. The default port is 44500. The connection will be refused if the port is being used by another DMZ Gateway/Site or if the IP address is on the IP address ban list.)
-
Select the Secure (TLS) Peer Notification Channel (PNC) check box. (Refer to DMZ Gateway Secure PNC for more information.)
-
In the Protocols area, select the check boxes for the protocols and the external listening ports that DMZ Gateway will use. This is a separate configuration from the ports that EFT uses. For example, you could use port 21 for FTP traffic for EFT, but port 14421 for FTP traffic through the DMZ Gateway.
-
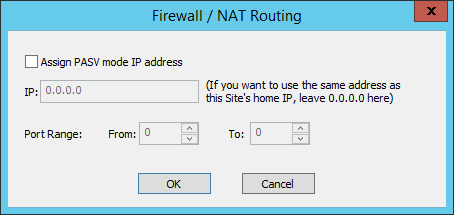
If you are using DMZ Gateway with a PASV mode IP address, click PASV settings. The Firewall/NAT Routing dialog box appears.
-
Select the Assign PASV mode IP address check box, then specify the IP address and port range.
-
Click OK.
-
-
Click Apply to save the changes on EFT.
-
Establish a new connection with EFT by stopping and restarting connected Sites.
-
On the Server tab, click the Site node.
-
In the right pane, click the General tab.
-
Click Stop. The Site Status area displays "Stopped" with a red ball icon.
-
Click Start. The Site Status area displays "Running" with a green ball icon.
-
Acceleration
Refer to the knowledgebase article "EFT Accelerate Module" for information about configuring the Accelerated transfers on the DMZ Gateway tab.