Creating Workflows for Use in Event Rules
(The Advanced Workflow Engine is available as an add-on module in EFT Enterprise. Refer to for more information.) Similar to Commands, Workflows are used in Event Rules as Actions or triggers. When you create a Workflow, the Advanced Workflow Engine creates a file with an extension of .aml and saves it in EFT's AWE folder (by default, C:\ProgramData\Globalscape\EFT Enterprise\AWE). The filename is the name of the workflow, prepended with an underscore and the name of the Site. For example, if you create a Workflow called FTP on a Site called Boston, the Workflow's filename is Boston_FTP.aml.
During the AWE trial, when a new Workflow is created, a message appears (prior to the Create a Workflow dialog box) informing you that the Advanced Workflow module is an optional module and that the trial begins when the first Workflow is created.
To create a Workflow
-
In the administration interface, connect to EFT and click the Server tab.
-
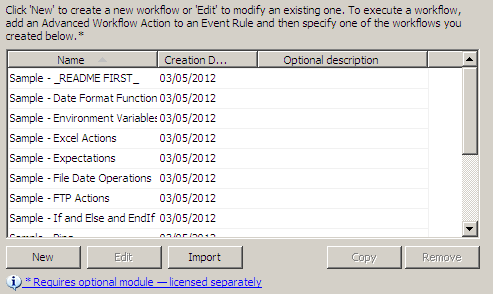
On the Server tab, click the AdvancedWorkflows node.
-
In the right pane, the Advanced Workflows tab appears.

-
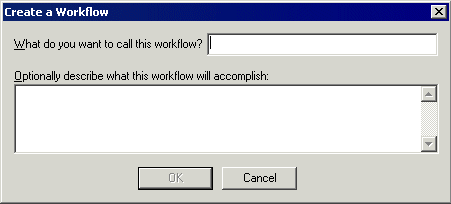
In the right pane, click New. The Create a Workflow dialog box appears.

-
In the What do you want to call this workflow box, specify a name for the Workflow. When you add the workflow to Event Rules, the name you specify here appears in the Rule.
-
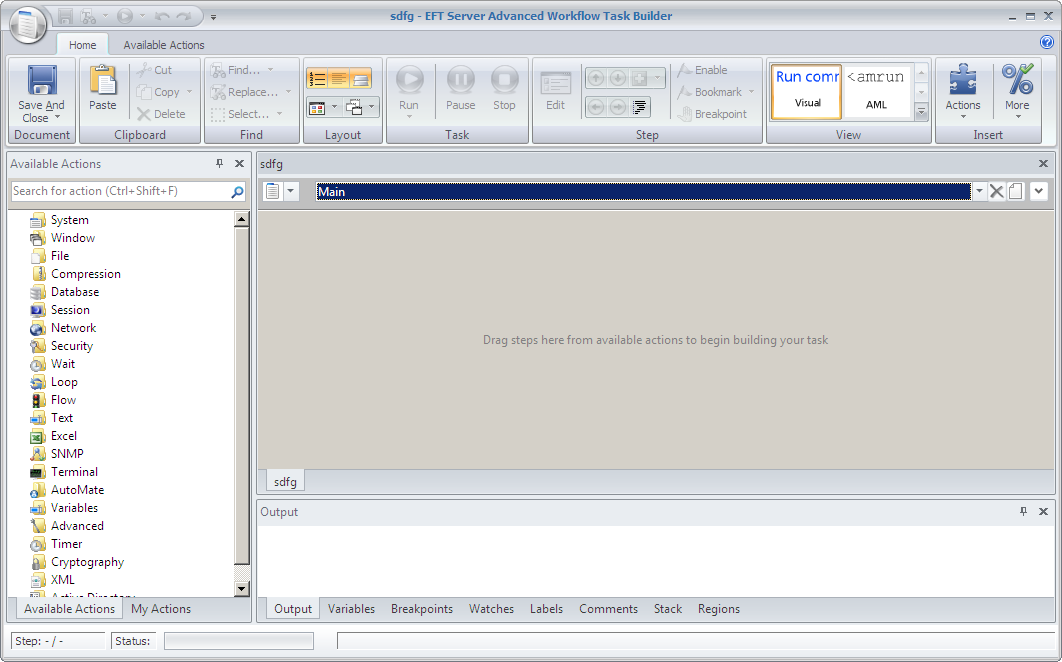
(Optional) Provide a description of the Workflow, and then click OK. The Workflow Task Builder appears.

-
The tree in the left pane lists the steps that you can add to the Workflow. The right pane displays the steps in the Workflow.
-
Drag items from the Available Actions list to the Steps pane to create your Workflow.
-
Use the Run icon on the Debug toolbar to test the steps. You can run it all at once, run only a selected step, or the whole Workflow starting with a step other than the first step.
-
After you have created your Workflow, click Save and Close. The Workflow appears in the Advanced Workflows node of the Site tree and is ready to be used in Event Rules.

-
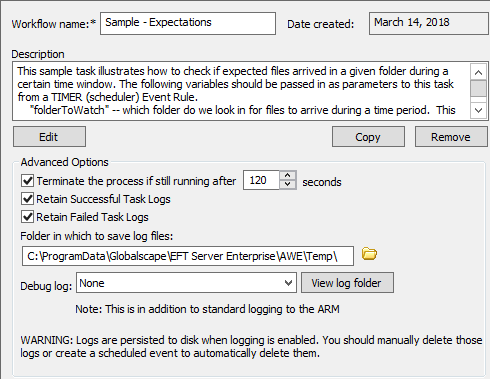
(Optional) In the Advanced Options area:
-
Select the Terminate the process check box and specify the number of seconds after which to terminate the Workflow if it fails to execute.
-
Select the Retain successful task logs check box if you want to keep all successful attempts for this Workflow
-
Select the Retain failed task logs check box if you want to keep all failed attempts for this workflow
-
Specify the location in which to save logs, if different than the default of C:\ProgramData\Globalscape\EFT Server Enterprise\AWE\Temp\ (for example, in a shared location)
-
Specify the level of debug logging in the Debug log level box, None, Minimal, Normal, or Verbose (None is the default). Click View log folder to view the CSV logs created by this workflow, saved in <installation_folder>\AWE\Temp. If you enable the logging, you should manually delete the files after you're done with them or create a Scheduled event in EFT to delete them automatically.
-

The Output pane displays the result of each step. For example:
Executing line 5
Starting Input Box with message "What is your name?"...
Creating message box "What is your name?"...  >
Populating variable "theUserName"...
Finished Input Box "What is your name?".
The step was okay.
Your Workflow is now ready to insert into an Event Rule. The Auditing and Reporting module Event Rule reports will show the AWE Workflow task name.