Changing a Site's IP Address or Port
A Site's IP address and port are specified when the Site is created. You can change the IP address and ports using the procedure below.
To change the listening (incoming) IP address and/or port
-
In the administration interface, connect to EFT and click the Server tab.
-
On the Server tab, click the Site you want to configure.
-
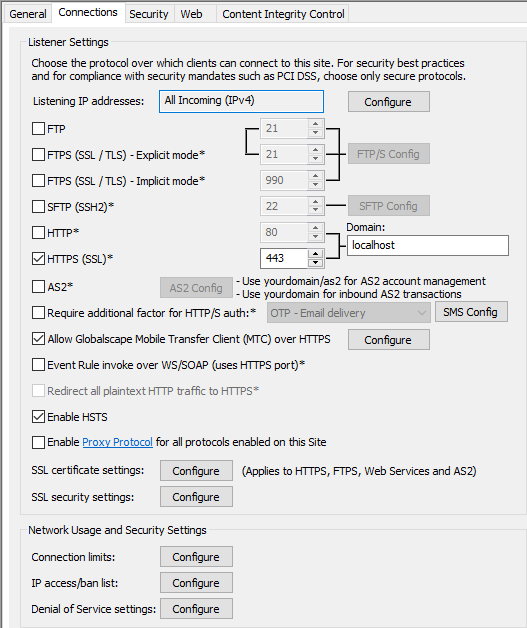
In the right pane, click the Connections tab.
-
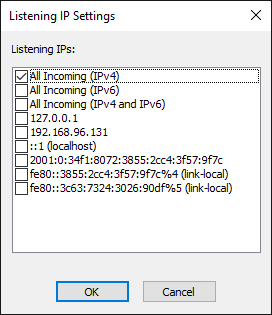
Next to the Listening IP addresses box, click Configure. The Listening IP Settings dialog box appears.
-
The dialog box displays the IP addresses that are available on the computer, in addition to All Incoming (IPv4) and All Incoming (IPv6).
-
You cannot type in an address.
-
IPv6 not enabled by default for security reasons; IPv4 enabled by default.
-
The "All" options are exclusive. That is, you can't select All Incoming (IPv4) and then one or more specific IP addresses. However, you can select multiple individual addresses if none of the All options are selected.
-
"Link local" appears next to certain IPv6 addresses. Routers do not forward packets with link-local addresses. In IPv6, link-local addresses are always assigned, automatically or by configuration, and are required for the internal functioning of various protocol components. IPv6 requires operating systems to assign link-local addresses to network interfaces even when routable addresses are also assigned. A link-local unicast address has the prefix fe80::/10 in standard IPv6 CIDR notation.
-
-
Select one or more check boxes for the IP addresses on which the Site is to listen for connections, and then click OK. The selected addresses appear in the Listening IP addresses box.
-
You can copy the addresses in the Listening IP addresses box: Right-click in the box, click Select All, then right-click again and click Copy or use CTRL+V. (Unicode-related items on the right-click menu are a Windows feature and do not apply to EFT.)
-
-
Specify the port number for each of the enabled protocols.
-
Click Apply to save the changes.
-
A confirmation prompt appears. Click Yes to apply the changes and restart the Site or click No if you do not want to restart the Site. (Changes will be applied at the next restart.) Cancel returns you to the tab where you can click Refresh to remove your changes.