Disabling or Locking Out an Account
EFT can automatically disable or lockout user accounts after a specified number of bad password login attempts over a specified time. This feature can be enabled for a Site, Settings Template, and/or per user. Once an account is disabled, you can re-enable the account on the General tab of the user.
-
The PCI DSS requires that you should limit repeated access attempts by locking out a user after not more than six attempts and that you should set the lockout duration to thirty minutes or until administrator enables the user account. On a high security-enabled Site, if you clear the Disable/Lockout check box or set the maximum login attempts to a value greater than 6, a warning appears.
-
EFT Login Security options do not apply to SAML (Web SSO) failed logins. Login security controls, such as password complexity and failed logins, are within the responsibility of the IdP and are not controlled by EFT.
-
See also Banning an IP Address that Uses an Invalid Account.
Site Login Security Options:

User Login Security Options:

To disable or lockout an account after a defined number of incorrect login attempts
-
In the administration interface, connect to EFT and click the Server tab.
-
On the Server tab, click the Site, Settings Template, or user that you want to configure.
-
In the right pane, click the Security tab.
-
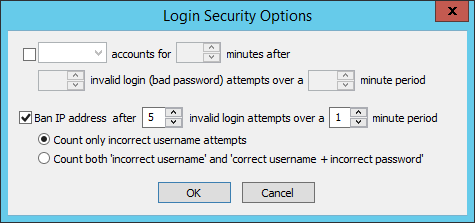
In the Password Security area, next to Invalid login options, click Configure. The Login Security Options dialog box appears.
-
Select the check box next to Lockout, then specify the following:
-
Whether to Disable or Lockout the account
-
Number of minutes to lock out the account (30 minutes is the default)
-
Number of invalid login (bad password) attempts after which to disable or lock out the account (6 attempts is the default)
-
Number of minutes during which to count the invalid login attempts (5 minutes is the default)
-
-
Click OK to save the changes and close the dialog box.
-
Click Apply to save the changes on EFT.
Related Topic