Creating a DMZ Gateway Profile
Creating a DMZ Gateway Profile includes specifying the listening IP address for incoming clients, specifying the listening IP addresses and port for the connecting application, and specifying the IP addresses that are allowed or denied access.
-
Do one of the following:
-
Right-click in the Profiles tree, then click New Profile.
-
On the toolbar, click New Profile.
-
On the main menu, click Profile > New.
-
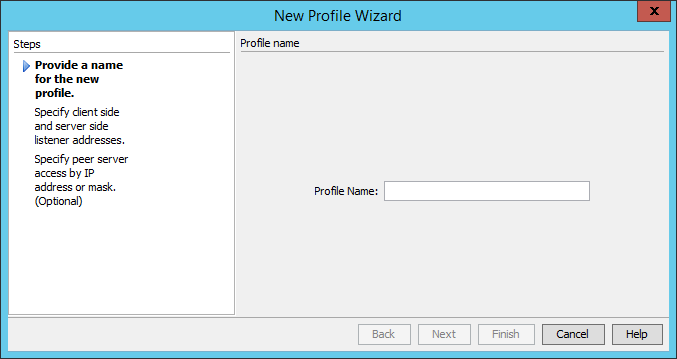
In the Profile Name box, provide a unique name for this Profile. The name will appear in the interface, logs, error messages, and reports.
-
Click Next. The Configuration page of the wizard appears.
-
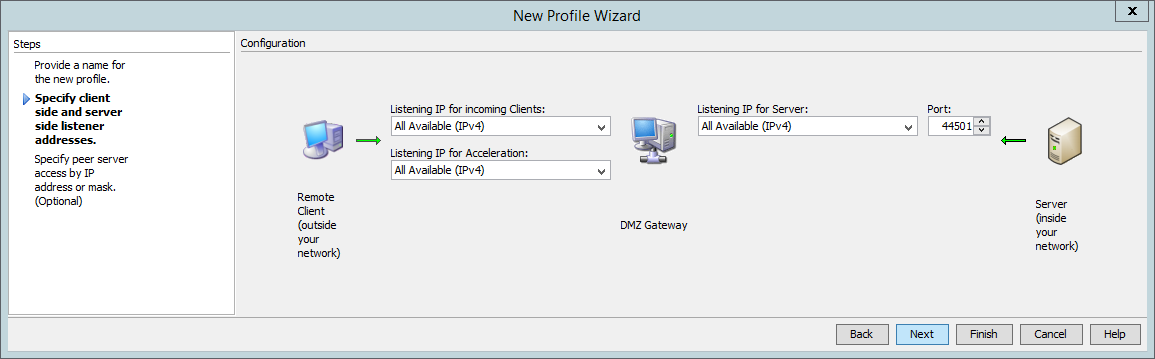
In the Listening IP for incoming Clients box, click the down arrow to select one or more IP addresses for incoming clients. Refer to Specifying the Listening IP Addresses for details.
-
In the Listening IP for Server box, click the down arrow to select one or more listening IP addresses for the server. Refer to Specifying the Listening IP Addresses for details.
-
In the Port box, provide the port number over which connections are allowed.
-
If you are using the Accelerate module in EFT, specify the Listening IP for Acceleration.
-
Click Next. The Peer Server Access page appears.
-
All IP addresses are granted access by default. To grant or deny access to specific IP addresses (optional):
-
Click Granted access or Denied access.
-
If most IP addresses are allowed access, click Granted access, then add the exceptions.
-
If most IP addresses are denied access, click Denied access, then add the exceptions.
-
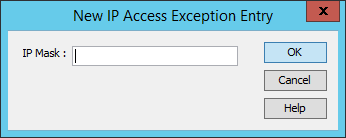
Click New. The New IP Access Exception Entry dialog box appears.
-
Specify the IP address or range of IP addresses to which you are denying or granting access. You can use wildcards to select ranges of IP addresses.
-
Click OK to close the New IP Access Exception Entry dialog box.
-
Click Finish. The IP Mask appears in the exception list.
The New Profile Wizard appears.
The connection will be refused if the IP address is on the IP address ban list.
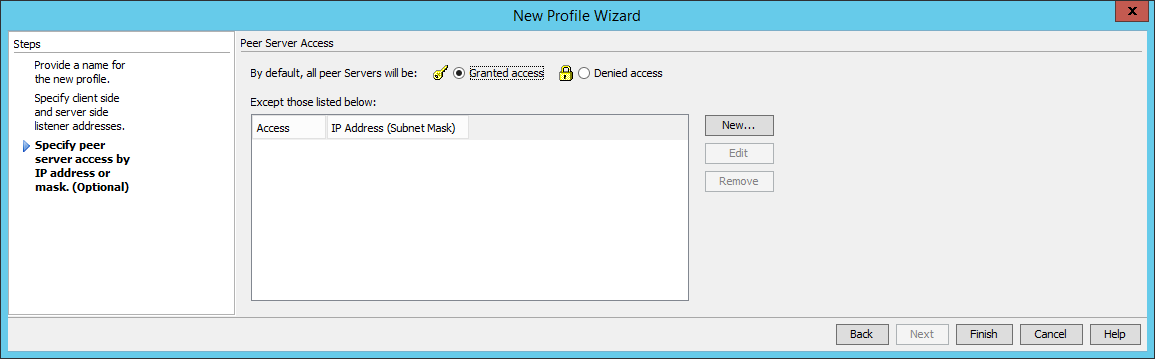
For example, if you want to allow only 192.168.174.159 and block every other IP address, click Denied access, click Add, then type 192.168.174.159 in the IP Mask box. This will deny access to all IP addresses except 192.168.174.159.