High Availability Tab of a Server
The High Availability tab of the Server is a read-only tab that displays the configuration for high availability (active-active) clustering of EFT. The tab contains the multicast address, port, and listening queues, as well as the default paths for load balancing.
Stand-Alone Server:
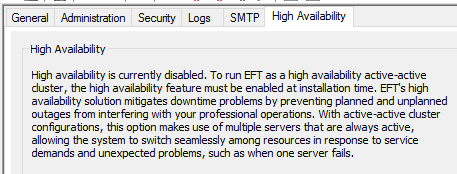
If HA is disabled, a message appears explaining that HA is disabled.
HA Server:
If EFT is installed as an active-active or active-passive cluster, the fields below will be displayed.
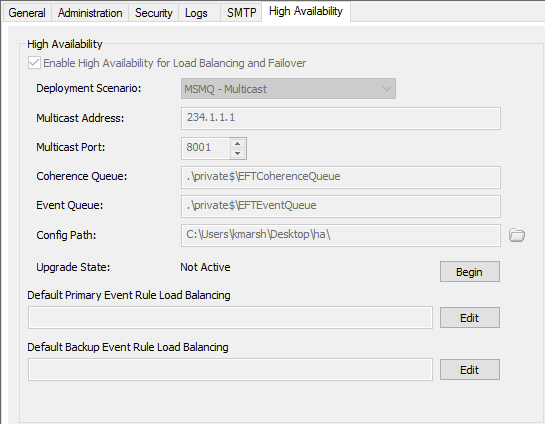
Deployment Scenario—Displays either MSMQ or Unicast
Multicast Address—The address for the group of nodes in the cluster.
Multicast Port—The port used by the multicast address.
Coherence Queue—Repository for the message queuing (MSMQ) cache that broadcasts messages across the HA cluster to keep all nodes in sync.
Event Queue—Repository where events are held prior to processing.
Config Path—Path at which the cluster's shared configuration is stored.
Upgrade State—If you are upgrading the cluster, click Begin to put EFT in read-only mode to begin the upgrade process. The button will display End when the upgrade has completed. During upgrade, Upgrade State will display “Active; Outdated; x.x.x.x”, where x.x.x.x is the current EFT version.
Default Primary Event Rule Load Balancing—Here you can click Edit to specify the primary node(s) to run load balanced Event Rules.
Default Backup Event Rule Load Balancing—Here you can click Edit to specify the backup node(s) to run load balanced Event Rules.
-
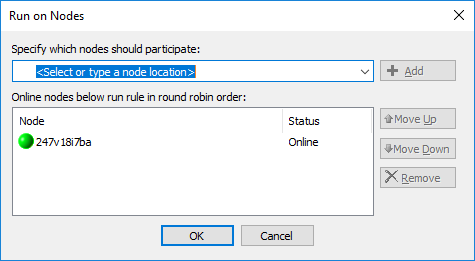
Event Rules will use these default node lists. If the default node list is empty, the Event Rule will execute on ALL nodes of the cluster unless you explicitly specify which node is to run the Event Rule when you define the Event Rule.
To define the default Event Rule load balancing nodes
-
In the administration interface, connect to EFT and click the Server tab.
-
Click the High Availability tab.
Next to the Default Primary Event Rule Load Balancing and Default Backup Event Rule Load Balancing, click Edit. The Run on Nodes dialog box appears.
-
Click the down arrow to select a node, click Add, then click OK.
Related Topics