Upload Forms
(Requires SFM) Upload forms are custom web forms you can create to capture metadata during file uploads when using the web client. Metadata gathered by the upload form can be used in downstream event rules (that is, subsequent Actions) for conditional post processing.
How does it work? Upon initiating an upload of a file or batch of files, and if configured to do so, EFT will prompt the end user to complete one or more forms that you created. Upon completing and submitting the form, the web client will complete the upload. EFT administrators can now access and use the form data within EFT event rules as you would any other context variables. If required fields aren't completed or the user declines the form, the upload is aborted.
When would I use upload forms? Suppose you have an electronic drop box that collects files from employees that need to be routed to the correct department: Accounting, Payroll, and Benefits. With Upload forms, you could create a form that includes a drop-down list with values for Accounting, Payroll, and Benefits, as shown in the illustration below.
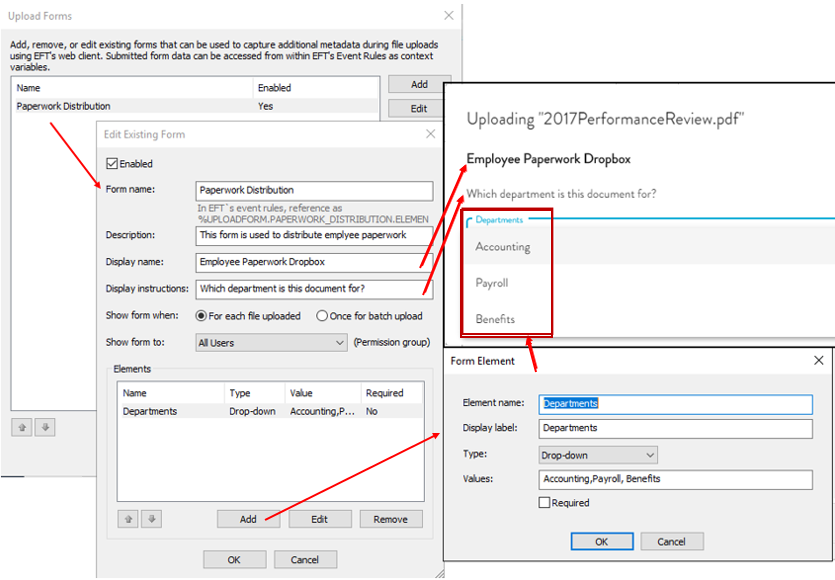
In EFT's File Upload event rule, you would conditionally disposition uploaded documents to the appropriate department (or perform other, department-specific operations) by adding the "If %Context_Variable% does equal to string" conditional statement. The name of the upload form context variable is a combination of "uploadform" followed by the form name and element name, in the following format: %Uploadform.Form_name.Element_name%.
In the example above, the context variable that references the Departments
values would be:
%uploadform.Paperwork_Distribution.Departments%.
(If you have spaces in the Form name or Element name, replace the spaces
with underscores.)
How do I create upload forms?
To create a form
-
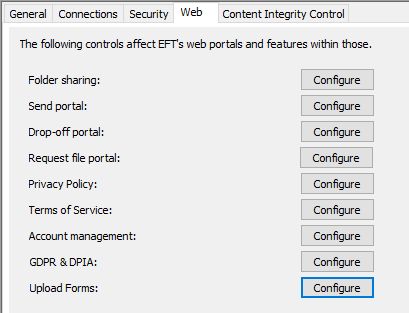
In the administration interface, connect to EFT and in the left pan, click the Site.
-
In the right pane, click the Web tab.
-
Next to Upload Forms, click Configure. The Upload Forms dialog box appears.
-
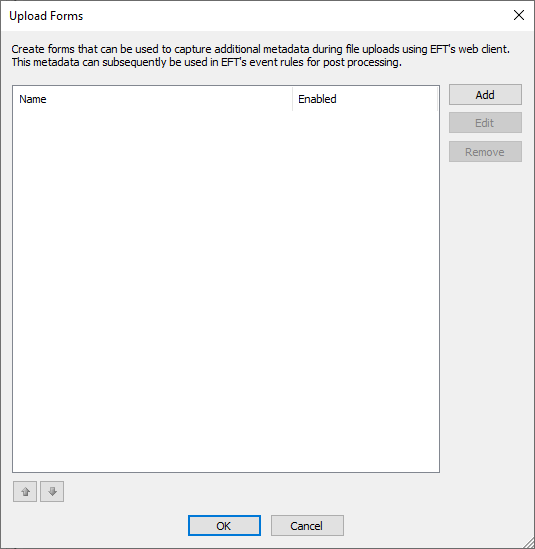
In the Upload Forms dialog box, you can Add, Edit, or Remove a form. You can also sort them using the arrow icons in the lower left.
-
To add a form, click Add. The Add Upload Form dialog box appears.
-
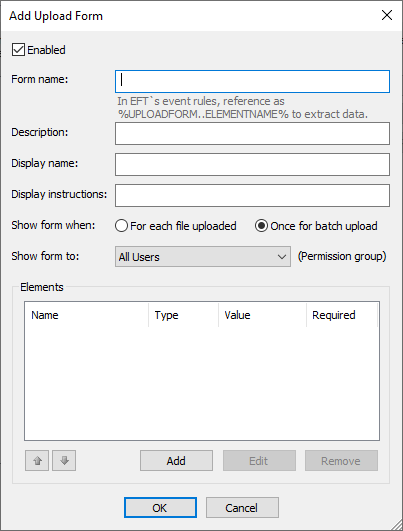
In the Form name box, provide a unique name for the Upload Form.
-
(Optional) In the Description box, provide a description/purpose for this Upload Form.
-
In the Display name box, provide a name for the Upload Form that will appear in the WTC.
-
(Optional) In the Display instructions box, provide instructions for completing the form that will appear in the WTC.
-
Next to Show form when, specify whether to display the form For each file uploaded, or Once for a batch upload. The latter is useful if the metadata being provided will apply to all the files being uploaded as part of the batch.
-
Next to Show form to, specify the Permission Group that will see the form. If you need to show the form to a single user or small handful of users, you will need to create a Permission Group for those. If your Site is using Active Directory authentication (and authorization) then everyone will see the form, as currently there are no controls for only displaying the form to individual users.
-
The Elements section lists any added elements in the order they will be shown in the web form. You can change the order of the elements using the arrows, Add or Remove elements, or Edit existing elements. When editing or adding elements, the Form Element dialog box appears.
-
In the Element name box, provide an element name (unique to this form) to be used as context variable name (defaults to field label). This value will be used by EFT’s event rules as the “Element_Name” portion of the %UploadForm.Form_Name.Element_Name% variable.
-
In the Display label box, provide a label associated with the element. This is displayed in the web form. (Form Elements must have labels to be in compliance with Section 508 standards for people with disabilities.)
-
In the Type box, specify what type of value is used for the element: Drop-down list, Multistring, Radio buttons, String, or check box (Toggle).
-
In the Values box, specify any values to appear for the drop-down list, radio buttons, or toggle names. Use commas to delimit multiple values.
-
Select the Required check box, if this form is mandatory.
-
Click OK to save the Element. If one or more mandatory fields is missing or invalid, a prompt appears: "One or more errors were encountered. Please enter all valid, required information and try again."
-
Create other Elements as needed.
-
Click OK to close the Add New Form dialog box.
-
Click OK to close the Upload Forms dialog box.
-
Click Apply to save the changes.
The Enabled check box is selected by default. If the check box is cleared, the form will not appear in the WTC.
![]()