OpenID Configuration
Instead of asking users to create yet another account and password, you can use OpenID to integrate with an identity provider such as Google or Microsoft that would then redirect the user to EFT. OpenID is an open standard and decentralized authentication protocol promoted by the non-profit OpenID Foundation. It allows users to be authenticated by co-operating sites (known as relying parties, or RP) using a third-party identity provider (IDP) service, eliminating the need for webmasters to provide their own ad hoc login systems, and allowing users to log in to multiple unrelated websites without having to have a separate identity and password for each. Users create accounts on an OpenID identity provider (such as Google or Microsoft), and then use those accounts to sign on to any website that accepts OpenID authentication (such as EFT).
OpenID Connect protocol is supported on ODBC and Globalscape EFT-authenticated Sites. It is configured on the General tab of a Site. OpenID works only on HTTPS.
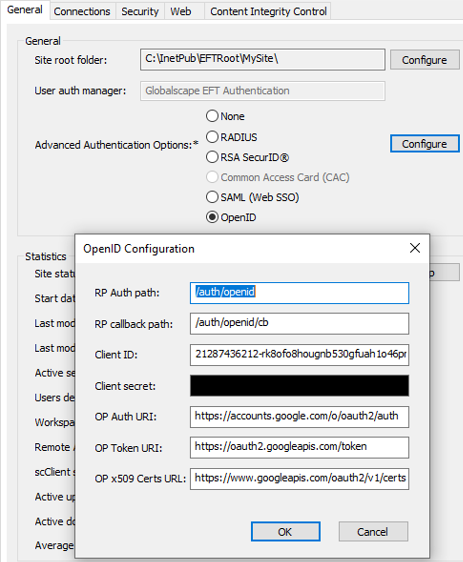
The following OpenID parameters are required to be configured in the OpenID Configuration dialog box:
-
RP Auth path - Relying Party path to start authentication (client to OpenID Provider)
-
RP callback path - Relying Party callback to path (client to OpenID Provider)
-
Client ID - Client Identifier valid at the OpenID Server
-
Client secret - Client secret which corresponds the "Client ID" at the OpenID Server
-
OP Auth URI - OpenID provider authentication URI (for Google, it's https://accounts.google.com/o/oauth2/auth)
-
OP Token URI - OpenID provider token URI (for Google it's https://oauth2.googleapis.com/token)
-
OP x509 Certs URL - OpenID provider certificate endpoint (for Google it's https://www.googleapis.com/oauth2/v1/certs)
OpenID support requires that the following options be enabled on the Site Connections tab:
-
HTTPS should be enabled (OpenID does not work on plaintext HTTP)
-
HTTPS Domain field should be configured with a valid domain that will be used to access the authentication URL (e.g., eftserver.com)
Example of configuring a Google account for OpenID:
-
Set up Google account fo OpenID. Refer to https://developers.google.com/identity/protocols/oauth2/openid-connect for details, including setting up OpenID, obtaining OpenID credentials, setting a redirect URI, and so on.
-
Ensure that all is OK with your Google account using https://openidconnect.net (OpenID Connect Playground).
-
Add to the hosts file (C:\Windows\System32\drivers\etc\hosts) on the EFT computer the line below:
127.0.0.1 eftserver.com -
Restart Windows.
-
In the EFT administration interface on the Site > Connections tab, select the HTTPS check box and set the Domain field to eftserver.com.
-
On the Site > General tab, next to Advanced Authentication Options, click OpenID, then click Configure. The OpenID Configuration dialog box appears.
-
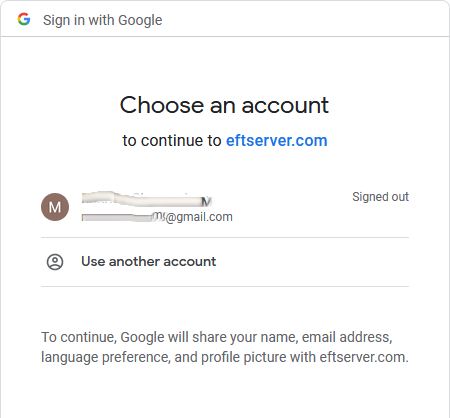
Open a browser window and in the browser's address box, type
https://eftserver.com/auth/openidthen press ENTER. -
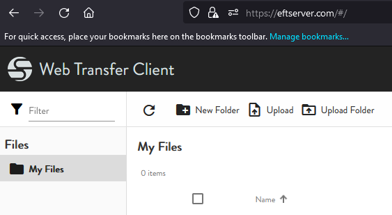
Select your account and login. The WebTransfer Client appears.
-
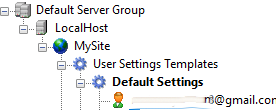
In the EFT administration interface, a new user with your email address appears.

OpenID login< > EFT workflow goes like this:
-
Set up Google account (for example).
(Refer to https://developers.google.com/identity/protocols/oauth2/openid-connect) -
The browser redirects by EFT to <OP Auth URI> with necessary parameters.
(For Google, it's https://accounts.google.com/o/oauth2/auth.) -
The client logs in to the OpenID Provider.
-
The OpenID Provider redirects back to EFT.
The client is added to EFT as a new user and is logged in.