Send/Email Files in Workspaces
EFT users who want to add files that are either located in their local machine or are in Workspaces can do so securely. Recipients of those files can pick up the files in their default browser.
-
The browser will timeout after a period of inactivity. Files that are being uploaded are considered "activity." Idle timeout occurs if you leave the browser open and stop composing your message with no activity. Upon timeout, the draft is lost. An "about to timeout" warning prompt is displayed when timeout is imminent, giving you the opportunity to keep the session alive.
-
When you send a file using Workspaces, a "WorkspacesSendMessage" folder is created in the Virtual File System (VFS).
-
You can send a secure message in Workspaces without an attachment, however, you cannot expire the message immediately without an attachment.
To email files
-
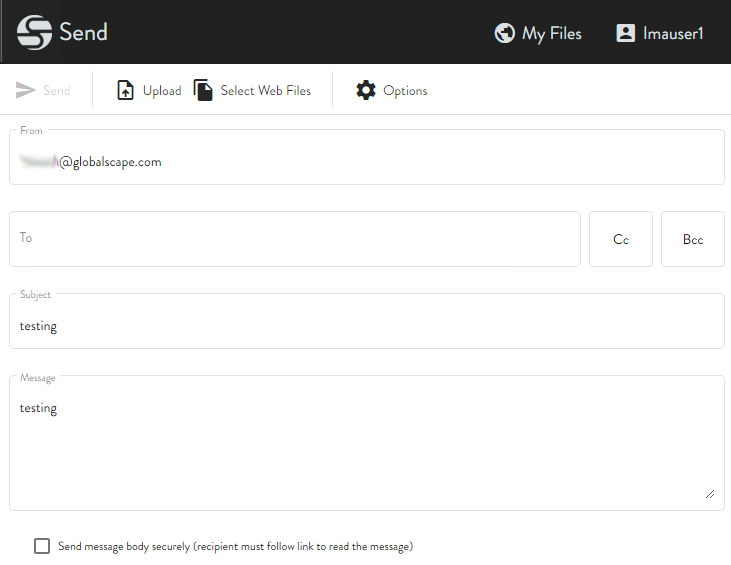
Log in then click the Send icon on the toolbar. The Send files securely form appears.
-
To attach files, drag and drop them on to the page, or click Upload or Select Web Files.
-
If you click Upload, the Windows Open dialog box appears for you to select your files, and then click Open.
-
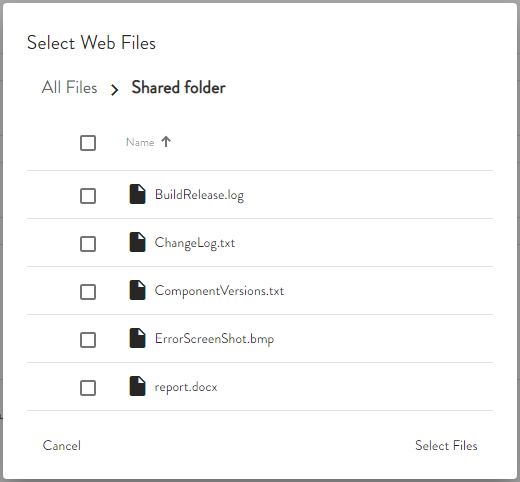
If you click Select Web Files, the Select Web Files dialog box appears.
-
Specify the folder that contains the file(s) you want to send, then select the files, and click Select Files.
-
Select the Send message body securely check box to send a secure message. In this case, the recipient will have to click a link to read the message, rather than the message being displayed on the Pickup page.
-
Select the Passcode required check box if you want the recipient to provide a passcode to download the file.
-
When this check box is selected, after you click Send, an automatically generated passcode appears.
-
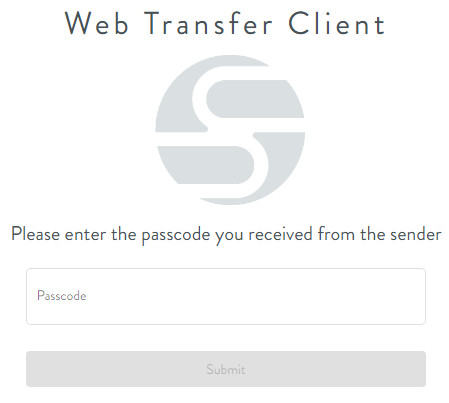
Send the passcode to the recipient in a separate email, text message, or phone call. When they click the link to download the file, a passcode message appears.
-
The recipient must enter that passcode to be able to download the file.
-
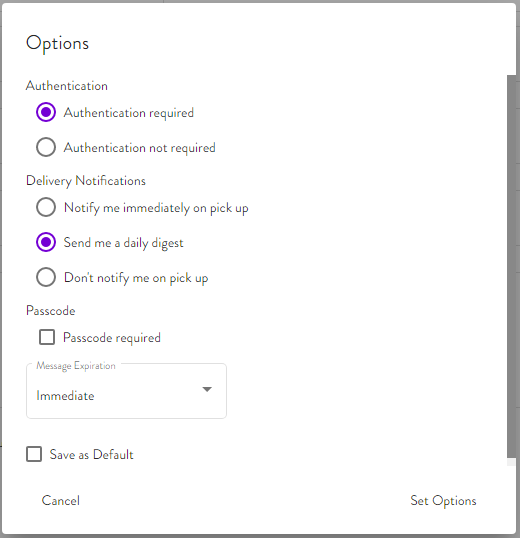
To specify message options, click Options.
-
Under Authentication, specify whether you want the recipient to log in to download the file. If you click Authentication not required, you also have the option to select Unauthenticated users can respond to the email. When the check box is not selected, an unauthenticated user can download the file, but cannot respond in the portal.
-
Under Delivery Notifications, specify If and when you want to be notified when a file you have sent is downloaded.
-
Under Passcode, select the Passcode required check box if a passcode is required to download the file.
-
Under Message Expiration, specify how soon the message is to expire: 1 day, 1 week, 1 month, or immediately. In v8.0.2 and later, you can send a secure message without an attachment, however, you cannot expire the message immediately without an attachment. (The dialog box does not display the date it will expire.)
-
Select the Save as Default check box if you want to save these options for future file sends.
-
Click Set Options to save your settings.
-
Click Send. A message appears indicating whether the message was sent successfully or not.
-
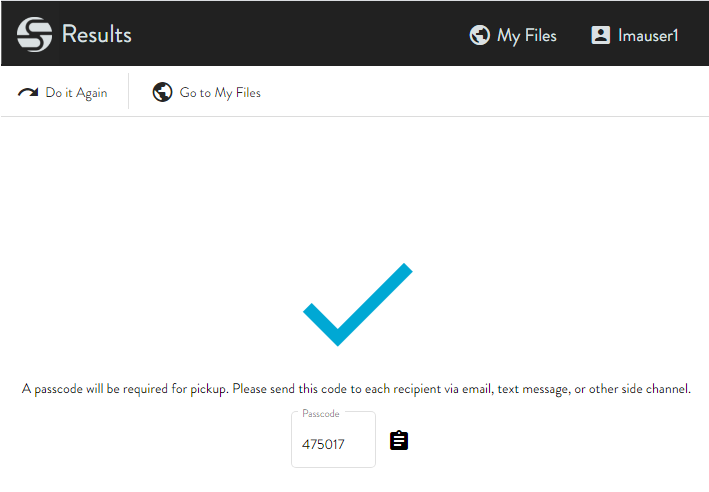
If you selected the Passcode required check box, after you click Send, a Results page appears and displays the passcode that your recipient will need to pickup the file.
-
Click the clipboard icon to copy the passcode to your clipboard, then paste the code into an email or text message or other side channel.
-
If sending the message was successful, the recipient(s) receive an email with a link to pick up the files.
-
The items that you send will appear in the Sent Messages view. This includes messages sent to request files.

The Not Sent message appears if you have EFT configured to send only to EFT users (most restrictive) and you try to send to non-EFT users. If you need to send to user accounts that are not defined in EFT, your EFT administrator will need to either change the setting on the Web tab of the EFT Site, or add the account as an EFT user.
Related Topics