Uploading Files and Folders
In the Web Transfer Client, you can upload files and folders from your local computer to a remote server on which you have upload permission.
To upload files between your local system and the server
-
Do one of the following:
-
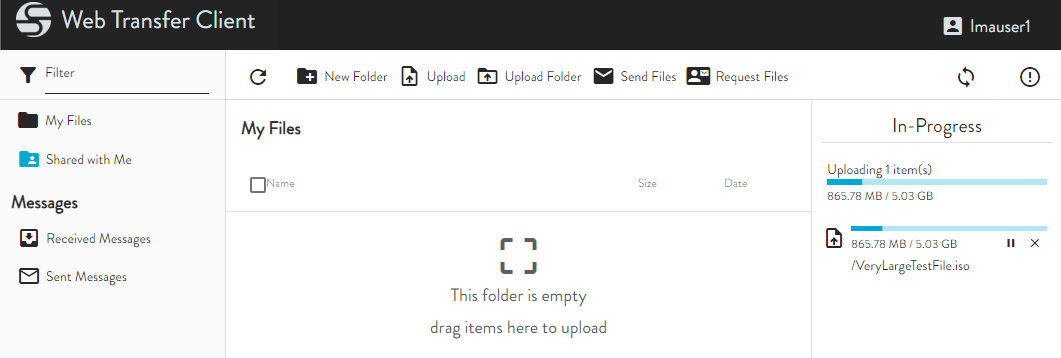
To transfer files and folders to the server, click Upload.
-
Click and drag one or more files or folders from your local file system to the file list. (Empty folders will be ignored and not transferred.)
-
The PAUSE icon allows you to pause an in-progress transfer. If you want to clear the pane, you can click the CANCEL icon for each transfer
-
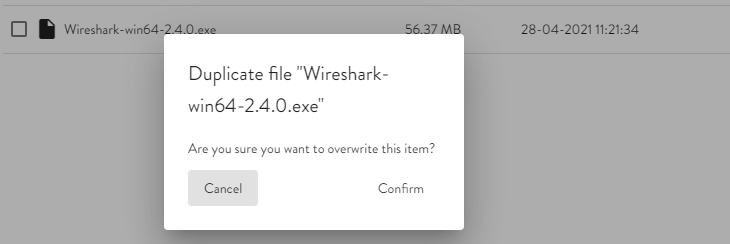
When the file is transferred, if there is a file with a duplicate name already in your folder on the server, you are presented with a prompt asking if you want to overwrite the existing.
-
You can upload multiple selected files at once by dragging and dropping from your local system to the WTC, or by clicking Upload and then selecting multiple files. The In-Progress pane displays the number of files selected to be uploaded until they are all uploaded. That is, if you are uploading 5 files and 3 of them have completed uploading, the display still says "Uploading 5 item(s)."
-
If you have exceeded your allowed disk quota on the server, a message appears when you attempt to upload more files. To continue to upload files, you must delete some of your old files from the server or ask your administrator to increase your allowed disk quota.
-
Before you can access the server using the WTC, the administrator must configure the server to allow WTC connections with your account.
-
If network connectivity is lost while the WTC is transferring files, you can retry transfers that previously failed or were incomplete. If a file partially transferred before the connection went down, the transfer will be resumed from the point that it left off.

