Creating a Report with the Report Wizard
The easiest way to start a new report is to use the Report Wizard. The Report Wizard will help you create a basic report, specify the data source, fields to include in the report, layout of the report, and styles or labels to use in the report.
To use the Report Wizard
- In the administration interface, connect to EFT, then do one of the following:
- On the toolbar, click the click New Report icon
 .
. - On the main menu, click Reports >New Report.
- Click the Reports tab, and then click the New Reports icon on the bottom toolbar.
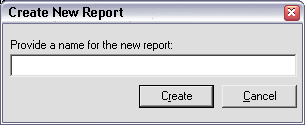
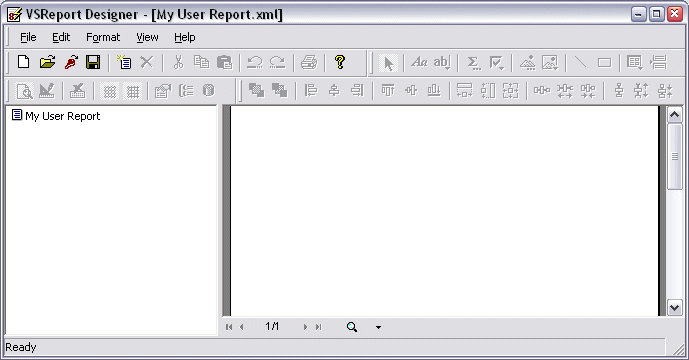
- Type a title for the new report, and then click Create. The Report Designer appears.
- Click File >New Report or click the New Report
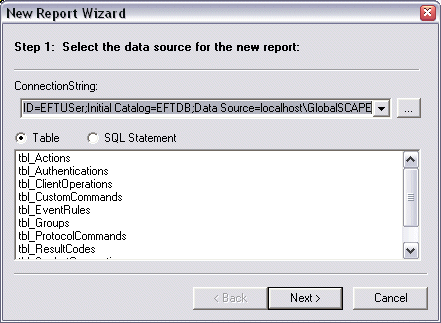
 icon on the toolbar. The New Report Wizard appears.
 - By default, the ConnectionString box displays information for the database that you specified when you installed the Auditing and Reporting module. Click Next and go to step 5 or, if necessary, you can type a different string that is used to connect to the data source.
- Click the ellipsis to define the connection string. The Data Link Properties dialog box appears.
- On the Provider tab, click Microsoft OLE DB Provider for SQL Server as the provider to connect to the SQL Server database, and then click Next. The Connection tab appears.
- In Select or enter a server name, click the arrow to select a name or type the name of EFT.
- In Enter information to log on to EFT, click an authentication option to log on to EFT:
- Use Windows NT Integrated security - Your computer automatically picks up the credentials from your computer and connects you to the database.
- Use a specific user name and password - Specify the user name and the password to be used to log on to EFT. Select the Allow saving password check box to save the password in the connection string.
- Click one of the following:
- Select the database on EFT, and then click a database in the list.
- Attach a database file as a database name - Click the ellipsis icon to browse for the SQL Server database file (*.mdf). The Select SQL Server Database File dialog box appears. Select a file, then click Open. The path to the file appears in the Using the filename box.
- Click OK in the Data Link Properties dialog box to return to the New Report Wizard.
- Click one of the following:
- Table to select a database table, such as tbl_EventRules.
- SQL Statement to type a SQL query in the bottom box, such as SELECT * FROM tbl_EventRules.
- Click Next. The fields that appear in the Available list depend on your selection in the previous step. For example, if you selected tbl_EventRules, the fields for Event Rules appear.
- Double-click a field, click it and use the arrows, or drag and drop one or more field to the Groups list. Group fields define how the data is sorted and summarized. The information in the Detail list is grouped according to the group name. The Detail list displays the details for each group. Detail fields define the information you want to appear in the report. For example, if you move SiteName to the Groups list and Time_stamp, EventName, and so on to the Detail list, then the report displays the time stamp and events under the respective Sites, considering different Sites as different groups.
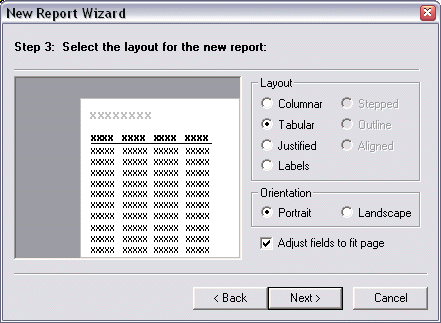
- Click Next. The layout options appear.
- Click a layout for the report. When you select a layout, a thumbnail preview appears on the left to give you an idea of how the layout will appear on the page. There are two groups of layouts. The first is for the reports with no groups defined and other is for the reports with group fields defined.
- If you did not define the Group field, the following options are available:
- Columnar
- Tabular
- Justified
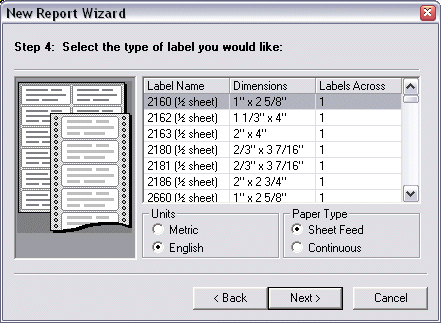
- Labels. The Labels layout option is used to print Avery-style labels, available in a variety of sizes, blank or preprinted. If you select this option, the next page offers options for the type of label for your report.
- If you defined the Group field, the following options are available:
- Stepped
- Outline
- Aligned
- If you selected any option other than Labels, click the report orientation from the following options. If you select the Labels option, the Orientation options are disabled.
- Portrait
- Landscape
- Select the Adjust fields to fit page check box to adjust fields in a way that they fit the page.
- Click Next.
- Do one of the following:
- If you specified Labels, click a type of label in the Labels list, then specify the Units, Metric or English, and the paper type, Sheet Feed (single sheet) or Continuous (continuous paper).
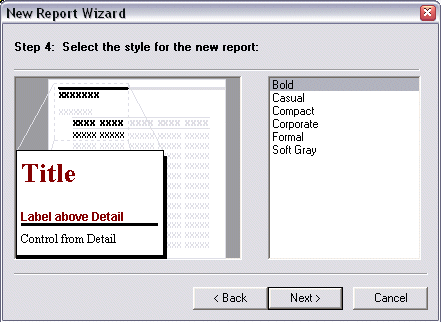
- If you specified anything other than Labels, specify a style for the report title.
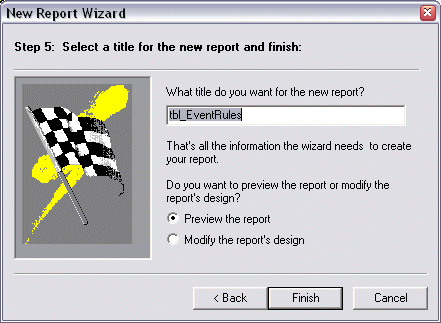
- Click Next. The title page of the wizard appears.
- Type a title for the report.
- Do one of the following:
- To view the report, click the Preview the report.
- To modify the report in Design view, click the Modify the report's design.
- Click Finish. Your new report name appears in the left pane of the Report Designer. The right pane displays a preview of the report or the design view, depending on your selection in the previous step.
- Click Save to save the report.
- Click File >Close to close VSReport Designer. The report appears on the Reports tab.
- Use Design mode to add/remove fields, resize fields, add graphics, and so on.
The New Report dialog box appears.
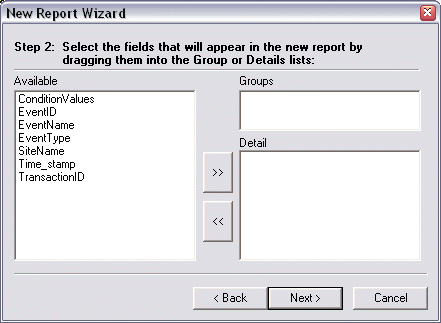
You can also drag and drop the available fields into the Groups or Detail section.
