User Management
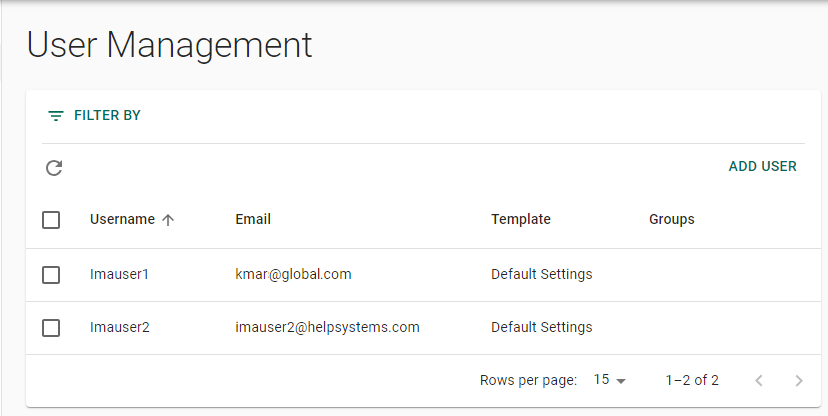
The User Management page displays information about defined user accounts, and allows you to add, edit, and delete users.
-
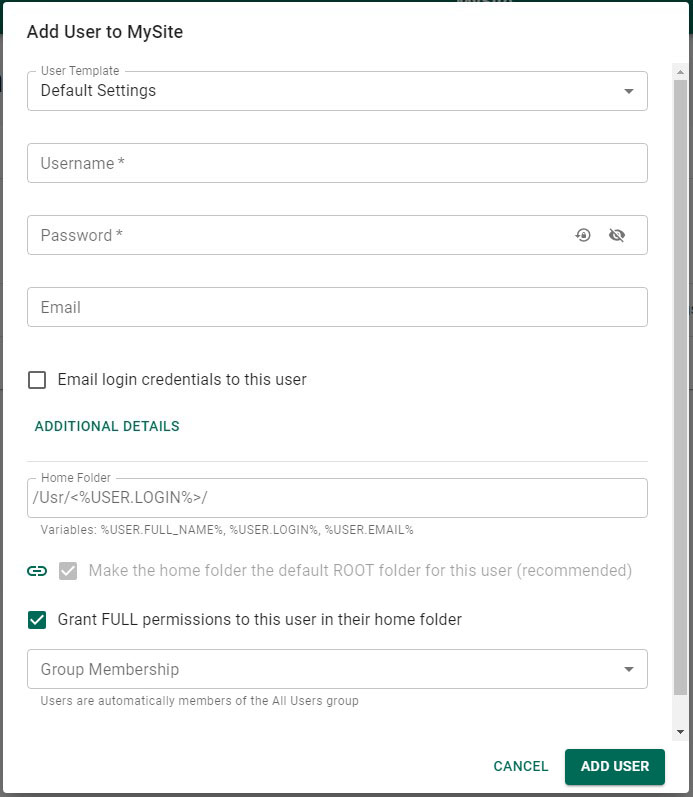
Click Add User. The Add User to [MySite] dialog box appears. ("MySite" is replaced with name of your site.)
-
Specify the User Template to which you will assign this new user. Templates are defined in EFT. (Default Settings and Guest Users are created at installation of EFT.)
-
Provide a Username, Password, and Email address for the account.
-
Select the Email login credentials to this user check box to send the user their credentials.
-
Grant FULL permission to this user in their home folder is selected by default. (If you do not grant users full permissions to their home folders, they will inherit their Group's permissions.)
-
New users are automatically members of the All Users group. In the Group Membership drop-down list, you can (optionally) add them to the Administrators group and /or the Guests group. (This setting is separate from the Guests User Settings Template.)
-
-
The new user will appear on the User Management page.
-
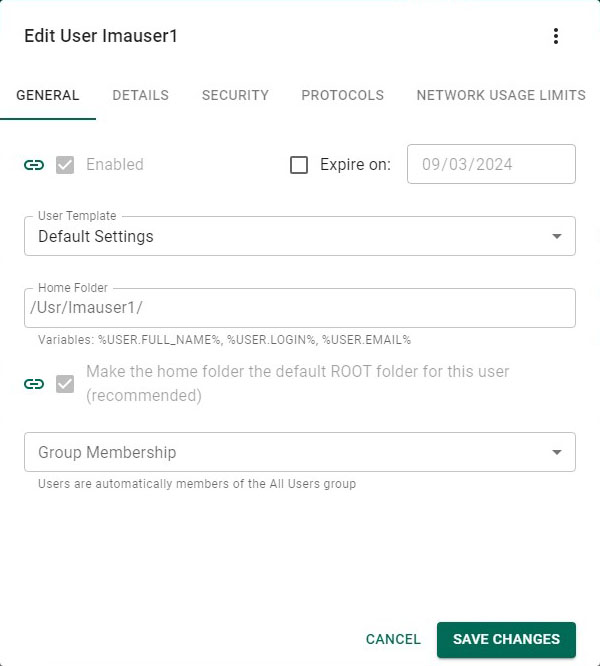
Select the check box on the user's row, then click Edit or click the Edit icon
 . The Edit User <username> dialog box appears.
 -
On the General tab, edit the properties of this user, as needed, then click Edit User to apply.
-
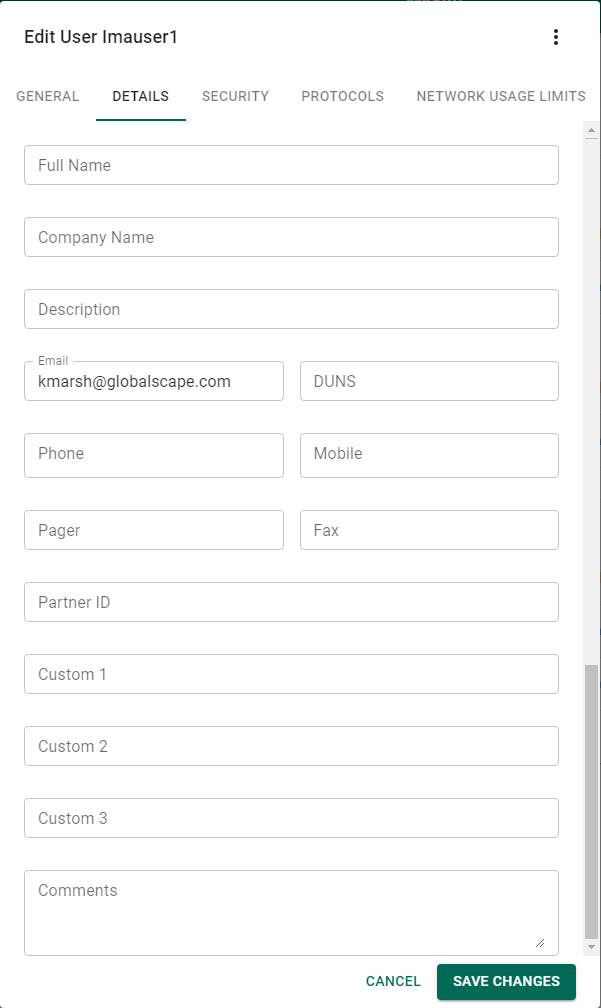
Click the Details tab.
-
On the Details tab, you can add or edit information about the user, such as full name, and phone number. (Similar to User Account Details in the EFT administration interface.)
-
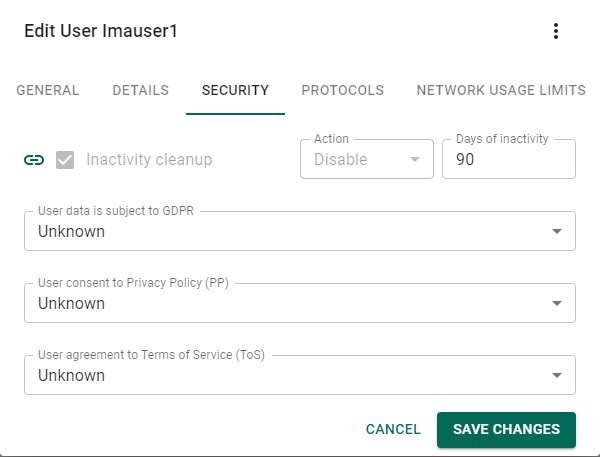
On the Security tab, you can specify if the user is subject to GDPR rules, and whether they consented to the Privacy Policy or Terms of Service. The Inactivity cleanup option allows you to Disable or Remove a user account if they have had a certain number of days of inactivity.
-
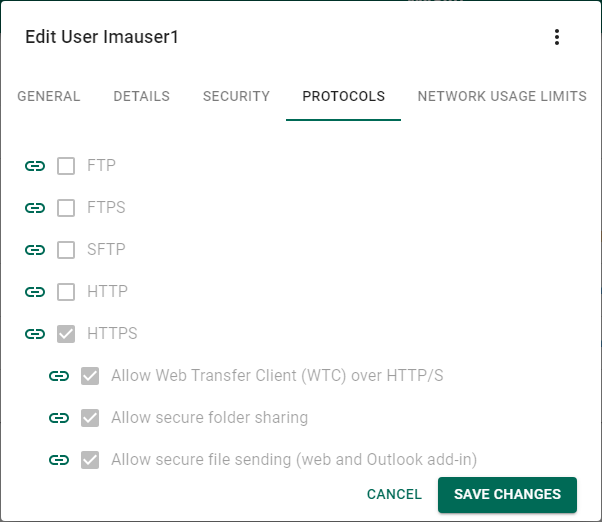
The Protocols tab displays which protocols and HTTPS features are enabled for the user. The link to the left of each protocol indicates whether it was inherited from the Settings Template or Site.
-
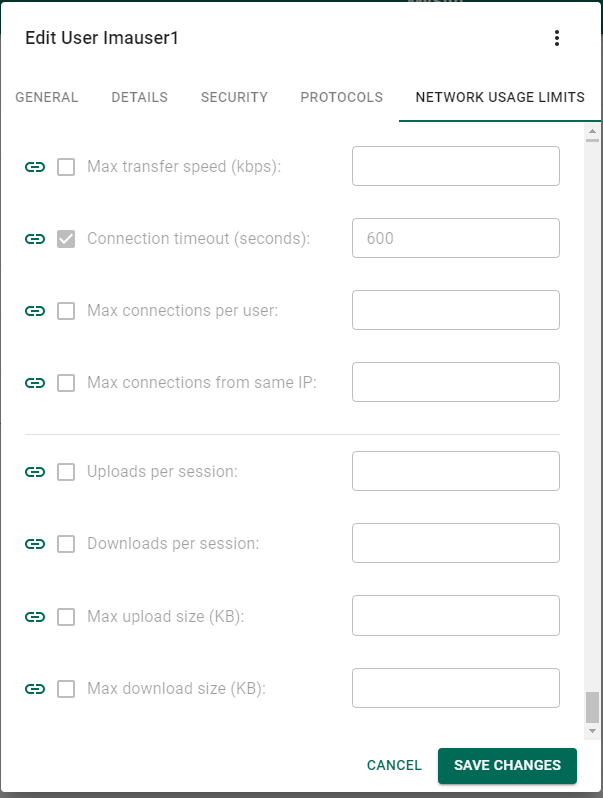
The Network Usage Limits tab enables you to configure specific limits for this user, or keep the setting from EFT from their User Settings Template. The crossed-out link icon represents whether the limit is inherited or not. If you want to keep the setting in EFT, do not select the icon (The slash will go away and the link will change color.)
-
After making changes to any tab, click Edit User to save the settings.
-
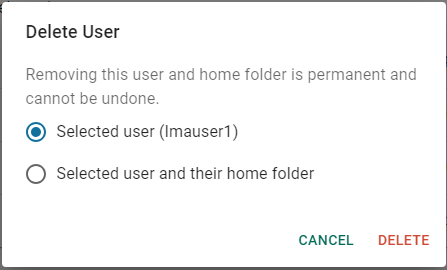
Select the check box on the user's row, then click Delete. The Delete User dialog box appears.
-
Specify whether to delete only the selected user, or the user and their home folder.
-
Click Delete to apply.
Other User Management Options
Select a username check box, then click the three vertical dots to view other options.
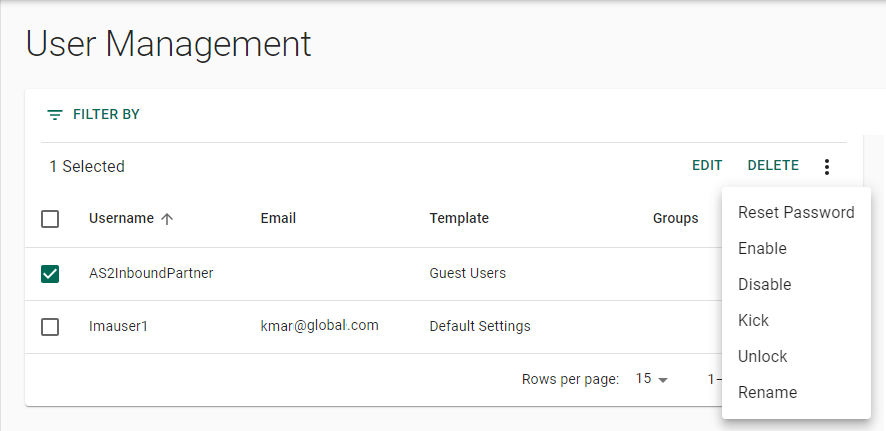
Using this drop-down menu, you can reset the user account password, enable the account, disable the account, kick the user off of EFT, unlock the account, or rename the account.
Reset Password
To reset a user password:
-
Select the user for whom you want to reset the password.
-
Click the three vertical dots, then click Reset Password.
Rename
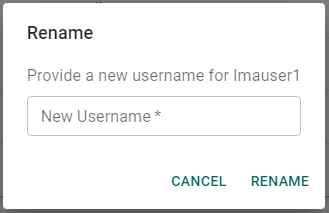
In the Rename dialog box, provide a new username, then click RENAME.
Enable
If an account has become disabled because of expired Workspaces links (for example), click Enable.
Disable
If an account needs to be disabled (such as an inactive account), you can disable it here.
Kick
Use Kick if you want to manually disconnect a user from EFT.
Unlock
A user account can be locked out from too many invalid password attempts. Click Unlock to unlock their account.
Viewing User Statistics in Web Admin
In EFT Web Admin, administrators can now view detailed statistics for individual user accounts and perform common account management actions directly from the user details dialog.
Who Can View User Statistics?
The Statistics tab is available to the following administrative roles:
-
Server Admin
-
Site Admin
-
User Admin
If you do not see the Statistics tab, verify that you are logged in with one of the above roles.
Opening the Statistics Tab
-
Sign in to EFT Web Admin.
-
Navigate to the User Management list for the desired Site.
-
Select the user you want to review.
-
Open the Edit user dialog (for example, via the context menu or an Edit button).
-
Click the Statistics tab.
If there are many tabs across the top of the dialog, use the tab scroll arrows to bring the Statistics tab into view.
Information shown on the Statistics tab
The Statistics tab provides the following read‑only user details:
-
Connection / Lock status
-
Shows whether the user is:
-
Connected or Not connected
-
Locked or Not locked
-
-
-
Last time connected
-
Displays the date and time the user last successfully connected.
-
Format: MM DD, YYYY HH:MM:SS AM/PM
-
Example: Jun 21, 2025 03:45:12 PM
-
-
-
Account created
-
Displays when the user account was created.
-
Format: MM DD, YYYY HH:MM:SS AM/PM
-
-
Last modified by
-
Shows the EFT administrator account that last modified the user (for example, a configuration or property change).
-
-
Last modified time
-
Displays when the user account was last modified.
-
Format: MM DD, YYYY HH:MM:SS AM/PM
-
-
Last password change
-
Shows the date and time when the user’s password was last changed.
-
Format: MM DD, YYYY HH:MM:SS AM/PM
-