Launch the Mail Express Server administration interface. (e.g., click Start > Programs > Globalscape > Mail Express > Mail Express Admin or double-click the desktop shortcut).
Log in using the Mail Express Server administrator username and password that you specified during installation of the server.
In the navigation pane, click Configuration > Mail Server. The Mail Server Configuration page appears.
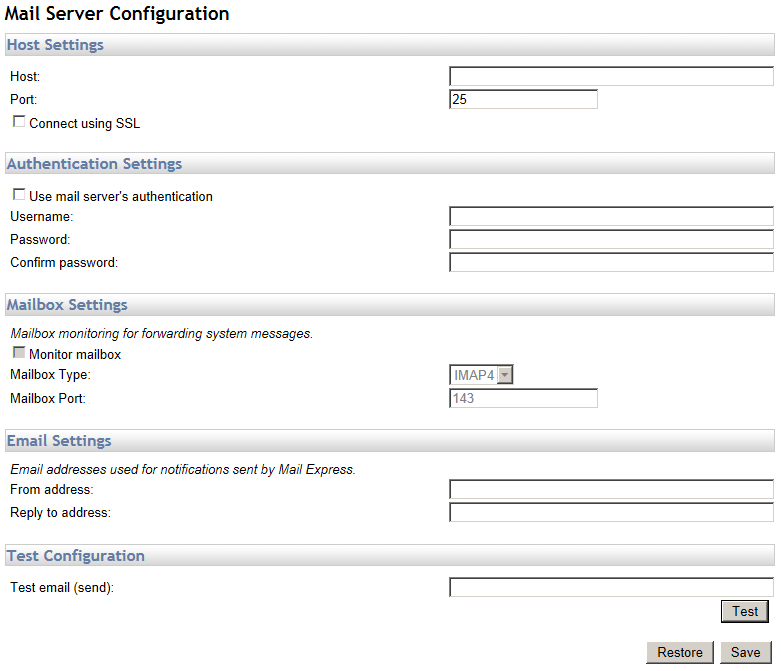
In the Host box, specify the mail server's host name (e.g., mail.company.edu).
In the Port box, specify the port used by the mail server (usually port 25).
If you are using SSL on the mail server, select the Connect using SSL check box. The Trusted Certificate Authority (CA) Certificate box appears.
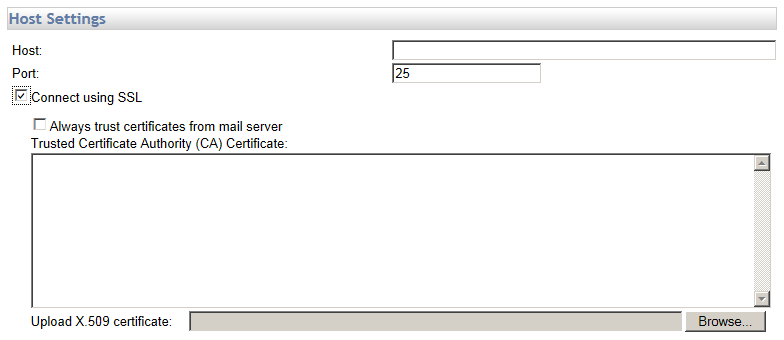
Select the Always trust certificates from mail server check box if Mail Express should implicitly trust the certificate provided by the mail server. Clear the check box if you want to provide a separate certificate. (If you select the Always trust certificates from mail server check box, you do NOT need to specify the certificate.)
-
If you want to provide a separate certificate and did NOT select the Always trust certificates from mail server check box, in the Upload X.509 certificate box, browse to the location of the Base-64 encoded X.509 signed certificate that is to be used to validate the certificate chain. A certificate in this format must begin with "-----BEGIN CERTIFICATE-----" and end with "-----END CERTIFICATE-----". (Upload the Public Certificate of the Certificate Authority that signed the Public Certificate of the mail server. Typically, this will be the Public Certificate of the Active Directory server.)
If the mail server requires authentication, in the Authentication Settings area, select the Use mail server's authentication check box, then specify the username and password to authenticate. (Refer to Configuring Anonymous Access to Exchange and Configuring Authenticated Access to Exchange for more information about Exchange authentication.)
In the Email Settings area, in the From address and the Reply to address boxes, specify the email address used in the email message header when notification emails are sent from Mail Express. If you are using authentication, the From address ought to match the account used to authenticate.
(Optional) In the Mailbox Settings area, select the Monitor mailbox check box to monitor for returned mail messages (i.e., “bounced emails”). Returned mail notifications are sent to the internal sender specified in the From address. In the Mailbox Type list, specify either IMAP4 or POP3, then specify the Mailbox Port (the defaults are IMAP over SSL=933 and POP3 over SSL=995). If Use mail server's Authentication is not enabled, the mailbox monitoring option is not available. If you have configured the mail server to relay, authentication will be disabled (as well as Mailbox Settings), and DSN will be forwarded to the sender by the mail server.
(Optional) Provide an email address to send a test email to, then click Test. A message appears stating that a test email was sent. If an error occurs during the transmission, an error message is displayed instead. If the test is successful, an email is sent to the address specified stating that "the mail server for Mail Express has been configured correctly." The Test email box is unavailable if Monitor Mailbox is selected. In that case, the address specified in the From address box is used for the test. (Refer to Testing Mail Server Configuration for more information.)
Click Save to save your changes, or click Restore to cancel changes. If you navigate away from the page without clicking Save, your changes are discarded.