Comparing with Previous Period
When a dashboard has been enabled with Compare with Previous Period activated, all of the widgets contained within the dashboard (excluding the Title, List and Status widgets) are set to display corresponding data for the previous period.
For example, if the widget is set to display data retrieved from the last 24 hours and has Compare with Previous Period active, the comparison is made with the 24 hours prior to the start time of the information that is currently displayed on screen. So, if a view was taken at 17:00 on a Friday evening, the data shown on screen would represent the time period from 17:00 on the Thursday evening to the current time of 17:00. The comparison period would be for the 24 hour period prior to that, so in this example 17:00 on Wednesday night to 17:00 on the Thursday night.
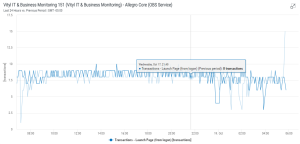
The image above shows the Response Time and Transaction information for the last 24 hours in the Allegro Core (OBS Service). With Compare to Previous Period activated, moving the mouse pointer over the chart, shows a pop-up window containing information for both metrics over the previous period are visible.
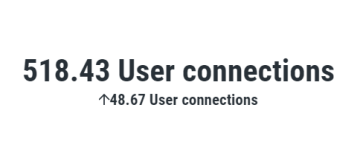
For Key Indicator widgets, the comparison is shown as a figure next to an arrow representing the direction in which the comparison has moved. In the example below, 48.67 more user connections were made in comparison with the previous period.

For Line Chart widgets, the previous period is displayed on screen as a lighter line on the same graph.
Overriding the Compare with Previous Period Setting for an Individual Widget
It is possible to override the default dashboard setting of comparing the current with the previous period by editing the individual widget.
- Ensure that Edit mode is active.
- On widget that you want to remove the Compare with Previous Period setting, click the Edit icon.
- In the Edit Panel, scroll down to the Settings Tabs and reveal the options in this section.
- For Compare with Previous Period, set the Inherit/Custom toggle to Custom and the On/Off toggle to Off.
- Click Save.
- Exit Edit mode.
The widget is now shown without the data for the previous period displayed.
Adding the Compare with Previous Period Setting for an Individual Widget
It is possible to add the compare current with the previous period option within a dashboard that is not set to display this information by default by editing the individual widget.
- Ensure that Edit mode is active.
- On widget that you want to add the Compare with Previous Period setting, click the Edit icon.
- In the Edit Panel, scroll down to the Settings Tabs and reveal the options in this section.
- For Compare with Previous Period, set the Inherit/Custom toggle to Custom and the On/Off toggle to On.
- Click Save.
- Exit Edit mode.
The widget is now shown with the data for the previous period displayed.

