Once you are confident you have spent enough time and study looking at the historical data, and have the allowed SERVER user rules in place, it is time to block the potential for all other unauthorized access. This process is known as public lockdown. In addition to rejecting public access, during this process, you will instruct Exit Point Manager to trigger an immediate alert for all rejected transactions so they can be promptly addressed.
If you are using Central Administration to manage multiple systems, note that the default *PUBLIC rules cannot be copied to Endpoints. Each default *PUBLIC Rule will need to be changed to *REJECT manually for all Endpoints individually.
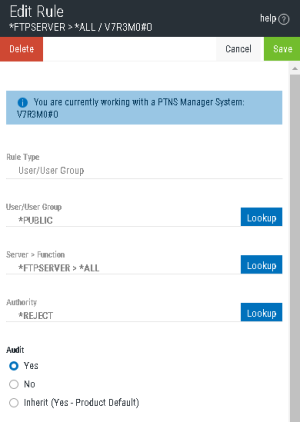
- On the Rules screen, click one of the *PUBLIC user rules.
- Choose Lookup to the right of the Authority field and choose *REJECT.
- Under Audit, select Yes.
- Click Save.
- Repeat these steps for the next server, until all servers have been locked down.
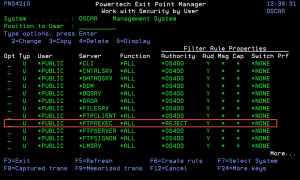
- From the Main Menu, choose option 2, Work with Security by User.
- Choose 2 to change one of the *PUBLIC rules.
- Change Audit to Y. Repeat for all the *PUBLIC rules so they will all be audited.
- Choose 2 on the *PUBLIC rule for a server you want to lock down.
- Set Authority to *REJECT and set Audit=Y.
- Repeat these steps for the next server, until all servers have been locked down.
|
|
Recommendation – Use a message management process such as Powertech Interact to be notified of reject messages (with Msg set to Y) in real time. |


