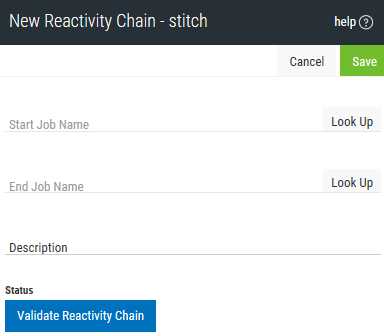
Adding or Editing a Reactivity Chain
A reactivity chain allows you to focus on a specific segment of a reactive job flow.
To add or edit a reactivity chain:
-
In the Navigation Pane, clicktap Reactivity Chains under the Robot Schedule menu. If the menu is hidden, hover over the Navigation Pane to expand it.
-
To add a new chain, clicktap Add.
To edit an existing chain, find it and clicktap its row.

-
Enter a Start Job Name, or clicktap Look Up to select it from the job list. This is the first job in the reactivity chain.
-
Enter an End Job Name, or clicktap Look Up to select it from the job list. This is the final job in the reactivity chain.
-
Type a Description for the chain.
-
You must validate the chain before you can successfully diagram it. ClickTap Validate Reactivity Chain to do so.
There are three Statuses you might see.
-
 Reactivity chain has not been tested. — You'll see this status before you attempt to validate the reactivity chain for the first time.
 -
 No path was found between the two jobs. — This status means that the validation failed. You should change the starting or ending job and try the validation again.
 -
 Valid — This status means that your reactivity chain is valid and can be diagrammed.
-
-
ClickTap Save.
If you have a valid reactivity chain, you can now diagram its job flow.