Creating Sub-maps
Another way to hide detail is to create a top-level map that gives an overview of many individual maps. Each icon on the top-level map shows the status of another map (a "sub-map"). The color of the icon indicates the most serious condition (the "worst thing") on its sub-map. These sub-maps can be on the local computer, or could even be on another InterMapper server.
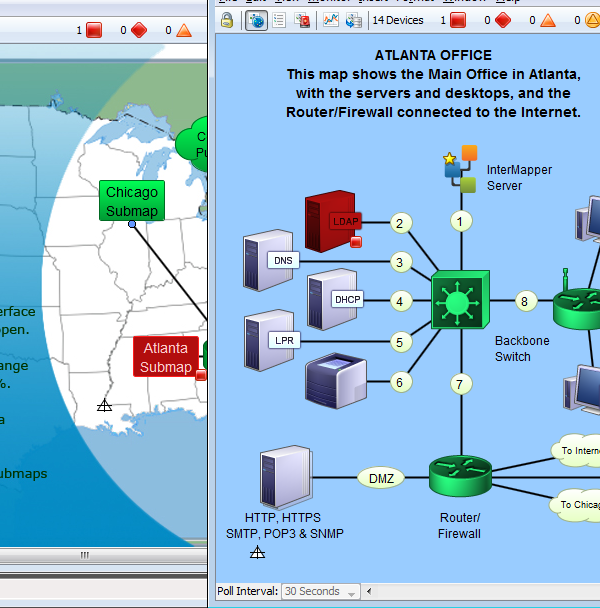
The example below shows the Atlanta map that opens when you double-click the Atlanta icon on the National map. Notice that on the National map, the Atlanta icon is "down". The Atlanta map shows that the LDAP server is the reason.
Creating a Sub-Map
Use the Map Status probe to create an icon that represents a sub-map. To do this, you add a device with the address of the InterMapper server on which the map is running, (127.0.0.1 if it's on the local computer) with a Probe Type of Map Status.
The color of the icon for a map item using a Map Status probe indicates the most serious condition (the "worst thing") on sub-map.
To add a sub-map item to a map:
- The easiest way to add a submap is to drag the desired map from the Map List window to the map. In certain special cases, the Set Probe window appears, with the Map Status Probe selected.
- Click OK to accept the default settings. A new device is added, using the current map and user account information.
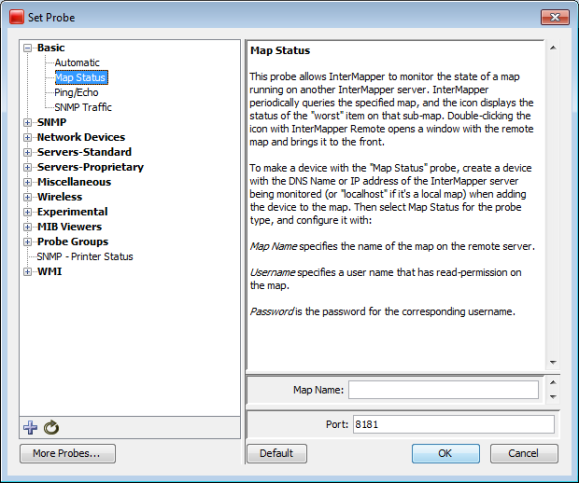
The Map Status probe configuration window.
To add a sub-map manually:
- From the Insert menu, choose Device...
- Enter the IP address, DNS name, or WINS name (preceded by "\\") of the InterMapper server that contains the sub-map. Sub-maps may be running on the local InterMapper server (use the address 127.0.0.1), or enter the address of InterMapper running at a customer site, at a branch office, or at an international office.
- Specify the Port to connect to (default is 8181).
- Select Map Status from the Basic category.
- Enter the Map Name to be monitored.
Note: if your map is nested in a sub-folder, you must enter the full path to the map. For example, "/MySubFolder/MyMap.map". If you add the submap by dragging it into the map from the Map List window, the path is entered automatically. - Enter the User Name and Password of an account on that server. This account must have read-access to the map.
- Click OK. The new icon appears on the map, and its color reflects the state of everything on the sub-map.
To view the sub-map (to "drill down" into it)
- Double-click the sub-map's icon. The map opens, and you can see and modify (if you have been granted permission) the settings on the sub-map.
Best Practices When Using Sub-maps
Try to follow these best practices when setting up a map status probe:
- Use a username with minimum amount of privilege (read-only). Never set up a map status probe using a username that has administrative privileges.
- Use only one username per server for map status probes. InterMapper has a limit of 2
user logins per connection. If map status probes monitoring maps on a server are
configured using more than one username, you may need to explicitly logout
from the map status probe login before you can access a map status probe
that uses a different username.
For example, let's assume you have access to map status probes on server S, and that we have MapB and MapC on server S that you don't have access to. When you double click a map status probe for MapB, the InterMapper client will log you in as user B (you are logged in twice on server S). You will not be able to open MapC before you log off the connection to MapB. This restriction is only for one server, if you are using map status probes to monitor maps on multiple InterMapper servers, you can use a different username for each server.