The JAMS API can be used to create custom Execution Methods with .NET code. Developers can also design the source editor used by the Execution Method. This topic describes the steps involved in this process as well as some best practices for designing a custom Execution Method.
When creating a new execution method there are four key components:
- Host: is a class that implements IJAMSHostV2 and contains the code that runs during the Job's execution and cleanup. This is the only required class when creating a method that doesn't need a source editor.
- Source Editor is a User Control that implements IEditJobSource. This control is displayed on the Job's Source tab and provides controls for editing the source.
- Viewer is a User Control that implements IViewExecutingJob. This control is displayed in the details dialog of a JAMS entry in the Monitor. The purpose of this control is to present live data to end users about the Job's execution at run time.
- Source is a class that serves as the model between the Source Editor and Host classes. It contains the editable properties on the Job’s Source tab. These property values are then made available inside the Host class when the Job is executing.
Configuration
To get started:
1. Open Visual Studio.
2. Create an empty Class Library Project.
For this example, name the project JAMSIntegratedDll as shown below:

3. Once the project has been created, add a Reference to JAMSHostBase.dll and JAMSShr.dll.
The two assemblies can be found within the Scheduler directory where JAMS is installed.
Add the Source Class
Within the Solution Explorer:
1. Add a new Class named WriteFileSource.cs to the JAMSIntegratedDll project.
This class contains the properties that can be edited on the Job’s Source tab.
2. Add the following code to the class:
 |
NOTE: in this example the JavaScriptSerializer class is used to handle JSON serialization, however you may find it necessary to use a different serialization class if your Execution Method requires properties with more complex Types. In this case you must add a reference to System.Web.Extensions in order to access the JavaScriptSerializer class. |
| WriteFile Source |
Copy Code
|
|---|---|
using System;
using System.Web.Script.Serialization;
namespace JAMSIntegratedDll
{
    /// <summary>
    /// WriteFileSource defines the properties that the execution method requires. These
    ///  properties are edited through the WriteFileControl on the Job's Source tab.
    /// </summary>
    public class WriteFileSource
    {
        /// <summary>
        /// The name of the file to write the Message to.
        /// </summary>
        public string FileName
        {
            get;
            set;
        }
        /// <summary>
        /// The content to write to the file.
        /// </summary>
        public string Message
        {
            get;
            set;
        }
        /// <summary>
        /// Returns the JSON Job source
        /// </summary>
        /// <returns></returns>
        public string GetSource()
        {
            string serializedObject;
            try
            {
                var serializer = new JavaScriptSerializer();
                //
                //  Serialize the Job source
                //
                serializedObject = serializer.Serialize(this);
            }
            catch (Exception ex)
            {
                throw new ApplicationException("Error while exporting WriteFileSource", ex);
            }
            return serializedObject;
        }
        /// <summary>
        /// Returns a WriteFileSource object from the JSON Job Source
        /// </summary>
        /// <param name="source"></param>
        /// <returns></returns>
        public static WriteFileSource Create(string source)
        {
            WriteFileSource jobSource;
            source = source.Trim();
            try
            {
                if (string.IsNullOrWhiteSpace(source))
                {
                    //
                    //  Empty string, create an empty WriteFileSource
                    //
                    jobSource = new WriteFileSource();
                }
                else
                {
                    var serializer = new JavaScriptSerializer();
                    //
                    //  Deserialize the Job Source from JSON
                    //
                    jobSource = serializer.Deserialize<WriteFileSource>(source);
                }
            }
            catch (Exception ex)
            {
                throw new ApplicationException("Error while importing WriteFileSource", ex);
            }
            return jobSource;
        }
    }
}
|
|
3. In addition to defining the Job’s properties this class also contains the methods Create and GetSource.
These methods are used by the Source Editor to convert the Job source to and from the JSON format for storage in the JAMS database.
Adding the Source Editor
In the Solution Explorer:
1. Add a new UserControl to the project named WriteFileControl.
2. Insert the code below to the UserControl’s code-behind. You can ignore any errors pertaining to missing controls.
The controls to the designer will be added in the next step.
| WriteFileControl.cs |
Copy Code
|
|---|---|
using System; using System.Windows.Forms; using MVPSI.JAMS; using MVPSI.JAMSExtension; namespace JAMSIntegratedDll { /// <summary> /// The WriteFileControl is displayed as the Job's source editor and is used to /// specify the data required by the Job. /// </summary> public partial class WriteFileControl : UserControl, IEditJobSource { public event EventHandler SourceCodeChanged; private WriteFileSource _writeFileSource; public WriteFileControl() { InitializeComponent(); } /// <summary> /// Returns the control used to edit the Job source. /// </summary> public Control EditorControl => this; /// <summary> /// The JAMS Job being edited. /// </summary> public Job Job { get; set; } private void fileNameTextBox_TextChanged(object sender, EventArgs e) { OnSourceCodeChanged(e); } private void messageTextBox_TextChanged(object sender, EventArgs e) { OnSourceCodeChanged(e); } public void SaveState() { } /// <summary> /// Marks the Job source as modified so it will be saved. /// </summary> /// <param name="e"></param> private void OnSourceCodeChanged(EventArgs e) { SourceCodeChanged?.Invoke(this, e); } /// <summary> /// Gets or Sets the Job source. This property is called by JAMS when loading and saving the Job source. /// </summary> public string SourceCode { get { if (_writeFileSource == null) { return string.Empty; } _writeFileSource.FileName = fileNameTextBox.Text; _writeFileSource.Message = messageTextBox.Text; return _writeFileSource.GetSource(); } set { try { // // Get the WriteFileSource object from the JSON source // _writeFileSource = WriteFileSource.Create(value); } catch (Exception ex) { MessageBox.Show(ex.ToString(), @"Unable to load source", MessageBoxButtons.OK, MessageBoxIcon.Error); _writeFileSource = WriteFileSource.Create(string.Empty); } // // Set the control values from the WriteFileSource // fileNameTextBox.Text = _writeFileSource.FileName; messageTextBox.Text = _writeFileSource.Message; } } } } |
|
3. On the Designer, drag out two Labels and Text Boxes as shown below.
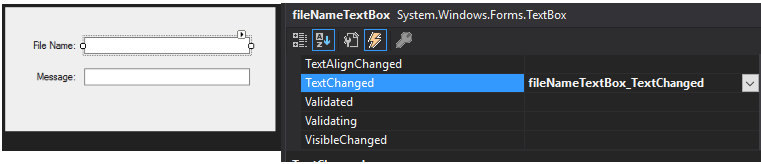
4. The text boxes should be named as follows:
a. fileNameTextBox
b. messageTextBox
5. Be sure to map the TextChanged event on both TextBox controls to the corresponding event in the code-behind.
This mapping must be done or else JAMS won’t save your source.
Adding the Viewer
In the Solution Explorer:
1. Add a new UserControl to the project named EntryViewUserControl.
2. Insert the code below to the UserControl's code-behind. You can ignore errors pertaining to missing controls.
The controls to the designer will be added in the next step.
| EntryViewUserControl |
Copy Code
|
|---|---|
using System; using System.Windows.Forms; using MVPSI.JAMSExtension; namespace JAMSIntegratedDll { public partial class EntryViewUserControl : UserControl, IViewExecutingJob { private WriteFileSource _writeFileSource; /// <summary> /// With TabName, we can set the tab name on the entry. /// </summary> public string TabName => "Write File Details"; public Control ViewJobControl => this; public EntryViewUserControl() { InitializeComponent(); } /// <summary> /// Here, we load the control with the details from the job source. /// </summary> /// <param name="executingJob"></param> public void LoadControl(IExecutingJob executingJob) { try { // // Get the WriteFileSource object from the JSON source // _writeFileSource = WriteFileSource.Create(executingJob.Job.Source); } catch (Exception ex) { MessageBox.Show(ex.ToString(), @"Unable to load source", MessageBoxButtons.OK, MessageBoxIcon.Error); _writeFileSource = WriteFileSource.Create(string.Empty); } // // Set the control values from the WriteFileSource // fileNameTextBox.Text = _writeFileSource.FileName; messageTextBox.Text = _writeFileSource.Message; } } } |
|
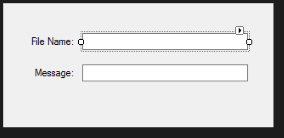
3. On the Designer, drag out two Labels and Texts Boxes as shown below:
Adding the Host
In the Solution Explorer:
1. Add a class named WriteFileHost.cs.
This class contains the code that occurs when the JAMS Job is running.
The Execute method is where your Job does the actual work.
2. Insert the following code:
| WriteFileHost |
Copy Code
|
|---|---|
using System; using System.IO; using MVPSI.JAMS.Host; namespace JAMSIntegratedDll { public class WriteFileHost : IJAMSHostV2 { private FinalResults _finalResults; private WriteFileSource _writeFileSource; /// <summary> /// Prepare for execution /// </summary> /// <param name="serviceProvider"></param> /// <param name="entry"></param> public void Initialize(IServiceProvider serviceProvider, Entry entry) { _finalResults = new FinalResults(); try { // // Validate that the Job contains a parameter named WriteCount to indicate how many times to write the source to the file // if (!entry.Parameters.ContainsKey("WriteCount")) { WriteErrorInfo("A Parameter named \"WriteCount\" must be specified with the number of times to write the Message to the File!", "Initialize"); } } catch (Exception ex) { WriteErrorInfo(ex.Message, "Initialize"); } } /// <summary> /// Write a Message to the specified file /// </summary> /// <param name="serviceProvider"></param> /// <param name="entry"></param> /// <returns></returns> public FinalResults Execute(IServiceProvider serviceProvider, Entry entry) { var writeCount = 0; if (_finalResults.FinalSeverity == 3) { return _finalResults; } // // If there were no errors during Initialize write content to the file // try { // // Read the WriteCount parameter on the Job // var writeCountRaw = entry.Parameters["WriteCount"].ToString(); if (!string.IsNullOrWhiteSpace(writeCountRaw) && !int.TryParse(writeCountRaw, out writeCount)) { WriteErrorInfo($"The value of WriteCount could not be converted to an integer: {writeCountRaw}", "Execute"); } if (_finalResults.FinalSeverity != 3) { // // Get the Job source file // var jobSourceFile = entry.CommandFilename; // // Get the deserialized Job source // _writeFileSource = WriteFileSource.Create(File.ReadAllText(jobSourceFile)); // // Write to the Job Log // Console.WriteLine(@"Writing to File: {0}", _writeFileSource.FileName); Console.WriteLine(@"Writing Message: {0}", _writeFileSource.Message); Console.WriteLine(@"Write Count: {0}", writeCount); // // Write the Message to the specified FileName // using (var writer = new StreamWriter(_writeFileSource.FileName)) { for (var i = 0; i < writeCount; i++) { writer.WriteLine(_writeFileSource.Message); } } // // Set the Final Results object to Success // _finalResults.FinalSeverity = 0; _finalResults.FinalStatus = "The operation completed successfully"; _finalResults.FinalStatusCode = 0; } } catch (Exception ex) { WriteErrorInfo(ex.Message, "Execute"); } return _finalResults; } /// <summary> /// Write the error message to the Job log and set the Final Results to error /// </summary> /// <param name="errorMessage"></param> /// <param name="methodName"></param> private void WriteErrorInfo(string errorMessage, string methodName) { Console.WriteLine(errorMessage); _finalResults.FinalSeverity = 3; _finalResults.FinalStatus = "Exception occurred during " + methodName; _finalResults.FinalStatusCode = 1; } public void Cancel(IServiceProvider serviceProvider) { // // Handle the Job being canceled // } public void Cleanup(IServiceProvider serviceProvider, Entry entry) { // // Cleanup any resources // } } } |
|
Now that all the classes have been created, you will build your solution and verify that there are no errors.
1. Navigate to your project’s bin folder.
2. Copy the JAMSIntegratedDll.pdb and .dll files from release/debug.
3. Paste both files into the Client and Scheduler directories where JAMS is installed.
By default, this will be: C:\Program Files\MVPSI\JAMS\
a. Client
b. Scheduler
Distributed Approach
For this example all the classes were created within a single Project. However, you could also define the following into separate projects:
1. Source Editor
2. Host
3. Source
When using this approach, the Source project is referenced by the other two projects. The assemblies would then be deployed as follows:
| JAMS Directory | Assembly |
| Client | Source Editor, Source |
| Scheduler | Source, Host |
| Agent | Source, Host |
Adding the Method to JAMS
1. Open the JAMS Client.
2. Navigate to the Execution Method view.
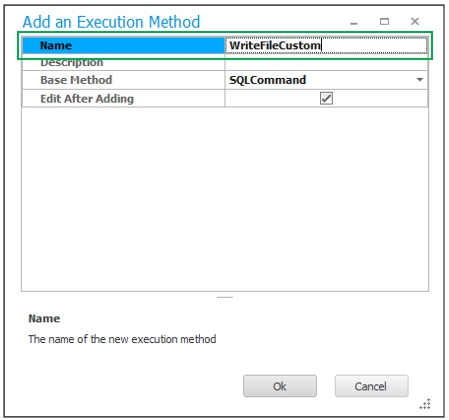
3. Click Add.
4. Name the new Method WriteFileCustom.
5. When prompted for a Base Execution Method select the SQLCommand.
6. Click Ok.
7. From the next method window, select the Properties tab.
8. Under the Assemblies section, update the values as shown below:
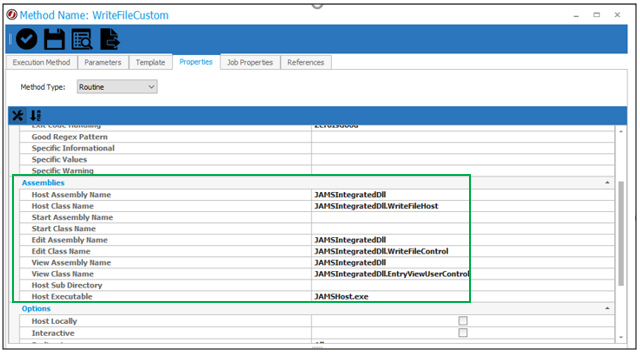
9. Save changes to the Method.
Next, you will create a new JAMS Job.
1. In the Execution Method field, select WriteFileCustom.
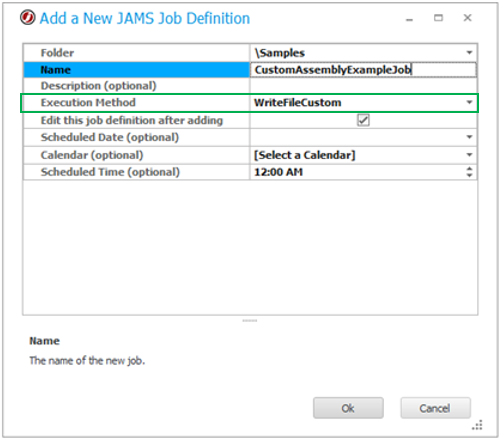
2. Click Ok.
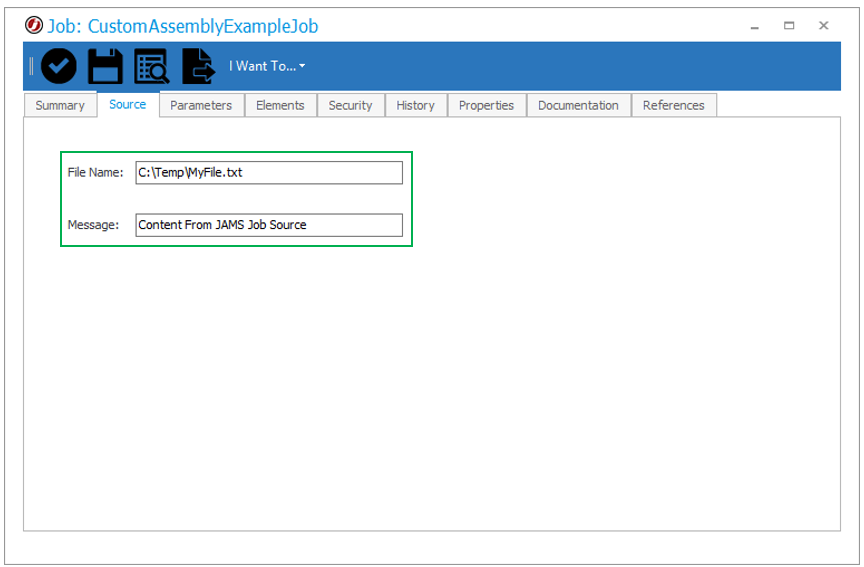
3. From the Job Edit window, go to the Source tab.
You should see the custom form controls to specify the source and will enter the following values:
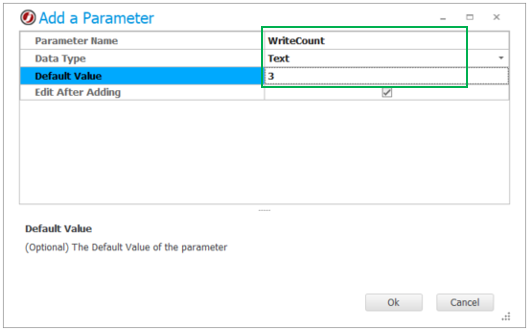
4. Go to the Parameters tab to add the Job named WriteCount with a default value of 3 and save changes to the Job.
5. Run the Job.
You should see the file getting created and the specified content being written three times.