Dynamics AX Integration Pack
Configuring the .NET Business Connector
To ensure JAMS will run Dynamics AX Jobs, a Local Client (Where JAMS will retrieve the Job List) and a Business Connector (Where JAMS will run Jobs) must be properly configured.
Begin by opening Microsoft Dynamics
- Open the Start Menu
- Navigate to Administrative Tools
- Open Microsoft Dynamics AX Configuration
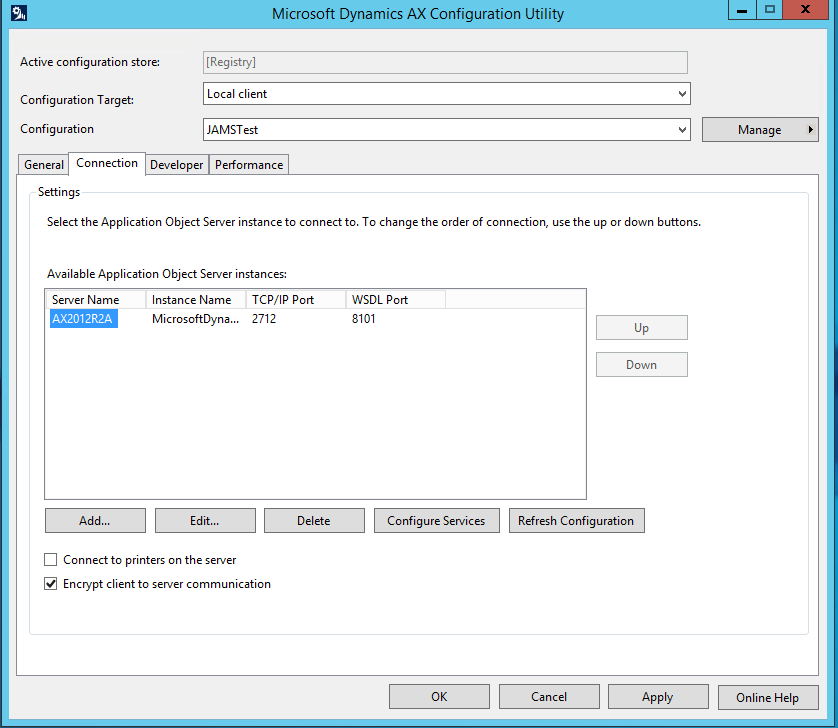
Configure the Local Client
- Set the Configuration Target to "Local Client" using the drop-down menu.
- In the Connection tab, verify the Application Object Server and Instance Name are correct.
If the server name cannot be changed, a new configuration must be created.
- Click the Manage button, then select Create Configuration.
- In the dialog box, give the configuration a name, select Active Configuration, then click OK.
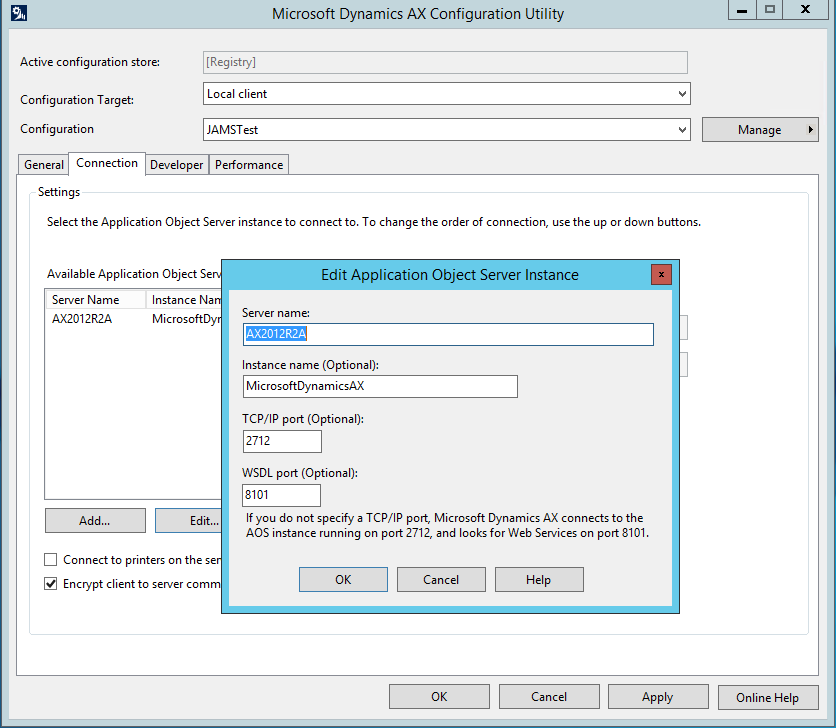
- Highlight the Server Name in the list of available servers and click Edit.
- In the dialog box that appears, fill in the Server Name, Instance Name, TCP Port and WSDL Port, then click OK.
- Click Apply.
- Click Refresh Configuration.
- Click OK to save the Configuration.
Configure the Business Connector
The Business Connector Configuration Target is the AOS where the JAMS job will connect to when the job actually runs.
- Set the Configuration target to " Business Connector" using the drop down menu.
- In the Connection tab, verify the Application Object Server is correct and that the Instance Name is correct.
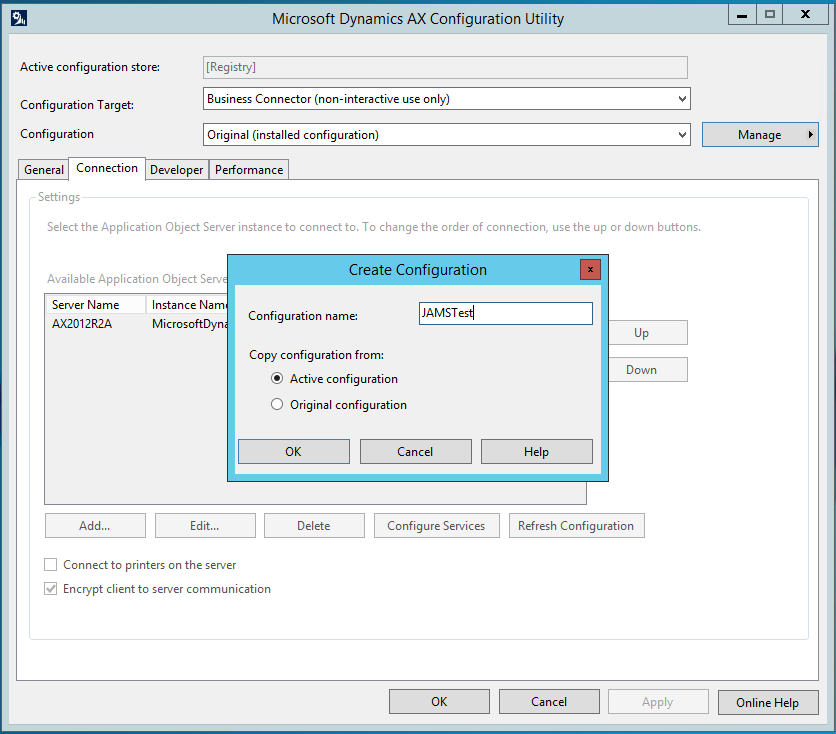
If the server name cannot be changed, a new configuration must be created.
- Click the Manage button, then select Create configuration
- Give the configuration a name, select Active Configuration, then click OK
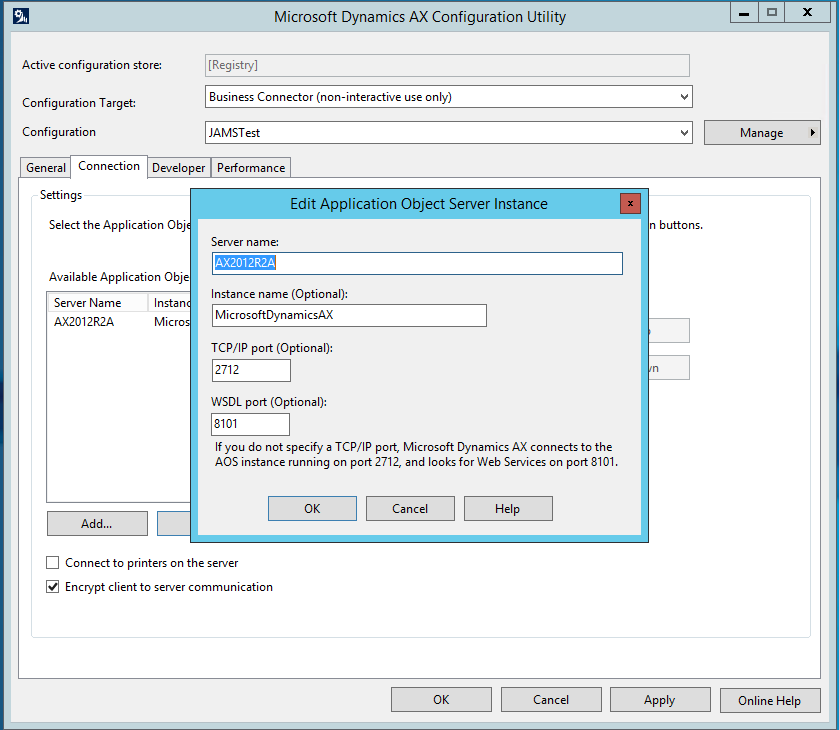
- Highlight the Server Name in the list of available servers and click Edit.
- In the dialog box that appears, fill in the Server Name, Instance Name, TCP Port and WSDL Port, then click OK.
- Click Apply.
- Click Refresh Configuration.
- Click OK to save the configuration.
Creating a User Credential for Dynamics AX Job Execution
JAMS natively supports automation using many leading business applications, including Microsoft Dynamics AX solutions. Integration Packs for these and other preferred applications are selected during the JAMS installation process. Once the integration is enabled, users can create, manage, deploy and monitor almost any kind of Dynamics AX job.
The JAMS Integration Pack for Microsoft Dynamics AX allows users to initiate Dynamics AX processes and take advantage of monitoring and report distribution capabilities using JAMS scheduling software.
When the integration runs, it initiates communication with and instructs Dynamics AX to schedule, execute AX jobs, batch jobs and reports as configured in JAMS. The process can then be monitored, canceled and restarted in either Dynamics AX or JAMS.
Follow the steps below to quickly add new JAMS user credentials.
- Open the Credential Definitions view from the JAMS Menu.
- Click the Add button on the Control Bar.
- The JAMS Credential definition dialog opens.
- Set the Credential Name, Logon As, Password, and Password Confirmation values.NOTE: The user defined here must have the authority to use the .NET Business Connector.
A Microsoft Dynamics AX User is only allowed to use the .NET Business Connector if they satisfy one of the following Criteria:
- User is assigned to System Administrator Role
- User is assigned to the Business Connector Role
- User is assigned to a role with the privileges to execute .NET Business Connector Operations
- Click OK. By default, JAMS will open the full Credential Definition dialog after the Credential definition is initially saved.
- On the Security tab of the Credential dialog, Add the ACE for any user that is already set up in AX.
This user must have login rights as well as rights to execute items that will be added in later JAMS jobs. This may require setting up additional users based on their access rights in the AX product. - Save and Close the Credential definition.
Setting up the AX Job
Users must define and enter specific attributes in order to successfully run a job in JAMS.
Once a job has been properly defined it can either:
- Be submitted to run on demand or . . .
- Set up to run automatically using a schedule.
Creating a New Folder
The first step is to create a new folder or alternatively use an existing folder directory to locate similar JAMS jobs.
To create a new JAMS definitions folder follow the steps below:
- Open the Definitions view from the JAMS Menu.
- Right-click the desired Parent Folder in the Folder Navigator, then select Add Folder from the drop-down list.
- The Add a new Folder dialog will appear.
- Give the new folder a Name, then click OK to save the Folder definition.
- Once the folder is defined, right-click on the folder and select Properties from the drop-down list to access the full Folder Definition dialog.
- Define additional Elements, Parameters, Security, and Properties on the folder as desired, then click Save and Close.
Adding a new Dynamics AX Job using the JAMS Definition Wizard
After creating a folder, you can quickly set up a Dynamics AX job using the Add a New JAMS Job Definition dialog.
Follow the steps below to create and define a JAMS/AX job:
- Select the desired folder for the Dynamics AX Job, then ensure the Job Definitions tab is selected.
- Click the Add button from the Control Bar to open the Add a New JAMS Job Definition dialog.
- In the dialog, give the new Job a Name, Description (optional), and Execution Method.
In this case, select MSDAX2012Job to create a Microsoft Dynamics AX Job. - By default, the full Job Definition dialog will open when the Job is initially saved. Click OK.
- The Job Definition dialog will open.
- Define Elements, Parameters, Security, Properties, and Documentation as desired. Ensure "Execute As" has been set to the Dynamics AX user Credential.
- On the Source tab, enter the appropriate values for the given Dynamics Job.
Company: Select the AX company ID for this job.
Job Type: Choose the appropriate radio button.
Job: Choose from a list of defined jobs in the AX AOT
Report: Select from a list of reports that are on an AX menu. This type of job can have many defined parameters.
Batch Job: Choose from the list of batch Jobs (by name) that have been created in AX. A batch job contains all the pertinent information to execute on its own. - Save and Close the job definition.
Available AX Job Parameters
Generic to all Job Types
Include MS Dynamics Log
Debug
Language: Specify the language setting to be used when logging into AX Job.
ObjectServer: Specify the object server setting to be used when logging into AX Job.
Configuration: Specify the object server setting to be used when logging into AX Job.
Report Job Type Specific Parameters
Query: Specify the name of a query to be applied to the report before rendering it. This Query is set up in AX.
Destination: Specify where the report should be sent once rendered.
Possible Values
| Value | Meaning |
|---|---|
| 1 | Printer |
| 3 | |
| 4 | File |
| Printer | Printer |
| File | File |
Default value:
1. Printer
FileFormat: Specify the format of the file being exported by processing a report.
Possible Values
| Value | Meaning |
|---|---|
| ASCII | Ascii |
| RTF | Rich Text Format |
| HTML | HTML |
| PDFEMBEDFONTS | PDF with embedded fonts |
| TEXTUTF8 | Text in UTF8 encoding |
| 1 | Ascii |
| 2 | Rich Text Format |
| 3 | HTML |
| 4 | |
| 5 | PDF with embedded fonts |
| 6 | Text in UTF8 encoding |
Default value:
1. Ascii
FileName: Specify the name of the file the report will be exported to when the destination is set to File.
PrinterName: Specify the printer name report will be printed when the destination is set to Printer.
FirstPage:
Specify
Default
0
LastPage:
Specify
Default
0
Copies:
Specify
Default
0
Subject: Specify the subject of an Email. Used when the destination is set to Email.
To: Enter an email address to send the report,
Job Specific Parameters
Parm: Specify a single parameter to be sent to a Job. Note the job in AX must be designed in such a way to accept a ‘parm’