The Powertech Secure Screen Main Menu allows you to start and end the Secure Screen monitor, set the notification message queue, and work with Secure Screen filters.
Select option 1 on the Utilities Menu to display the Secure Screen main menu. You also can enter the WRKSECSCR command to display the main menu.
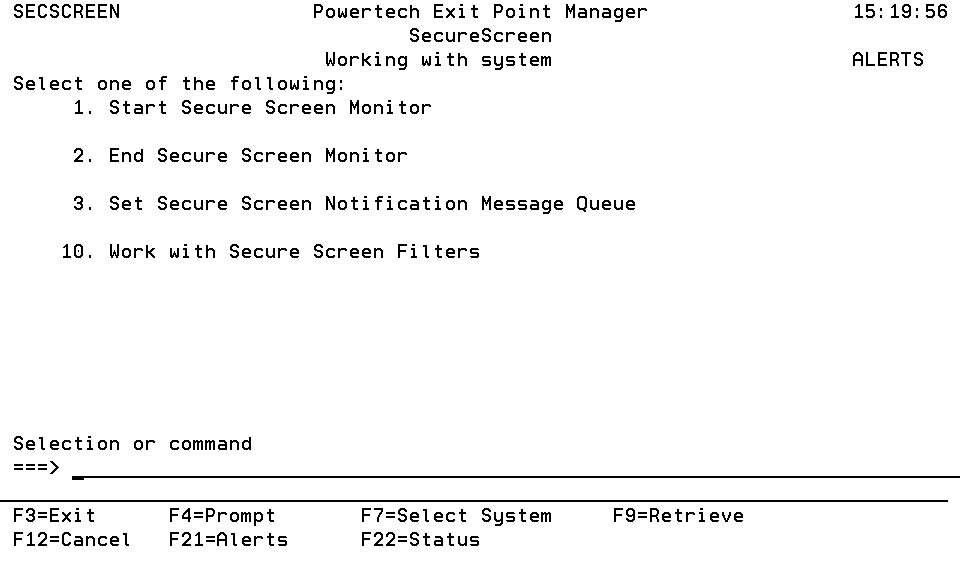
1. Start Secure Screen Monitor
Starts the session inactivity monitor job. The job runs in the PWRWRKMGT subsystem; the subsystem starts if it is not currently active.
The monitor receives messages from the message queue specified in the QINACTMSGQ system value. The messages describe jobs that have been inactive the interval specified in the QINACTITV system value. Information from the message is used to retrieve attributes of the inactive job, and compare them against the Secure Screen filters to determine the action to take.
Notes:
- You must configure the QINACTMSGQ and QINACTITV system values before starting the Secure Screen monitor. Use the WRKSYSVAL QINA* command to locate the system values.
- You should not define QSYSOPR as the message queue in QINACTMSGQ. Secure Screen monitors for inactivity messages and sees other messages as garbage. The QSYSOPR message queue will be locked any time QSYSOPR signs on.
You also can use the STRPLSSMON command to start the Secure Screen monitor job.
2. End Secure Screen Monitor
Ends the session inactivity monitor job. When the monitor ends, inactive sessions are no longer processed against the Secure Screen filters, and sessions are not disconnected or ended.
You also can use the ENDPLSSMON command to end the monitor job.
3. Set Secure Screen Notification Message Queue
Allows the administrator to set the name of the message queue to receive Secure Screen notifications when selected sessions time out. The monitor sends notification messages when a session times out and matches a filter that has the Notify Administrator value set to *MSG. You also can use the LSETPSSNFQ command to set a notification message queue.
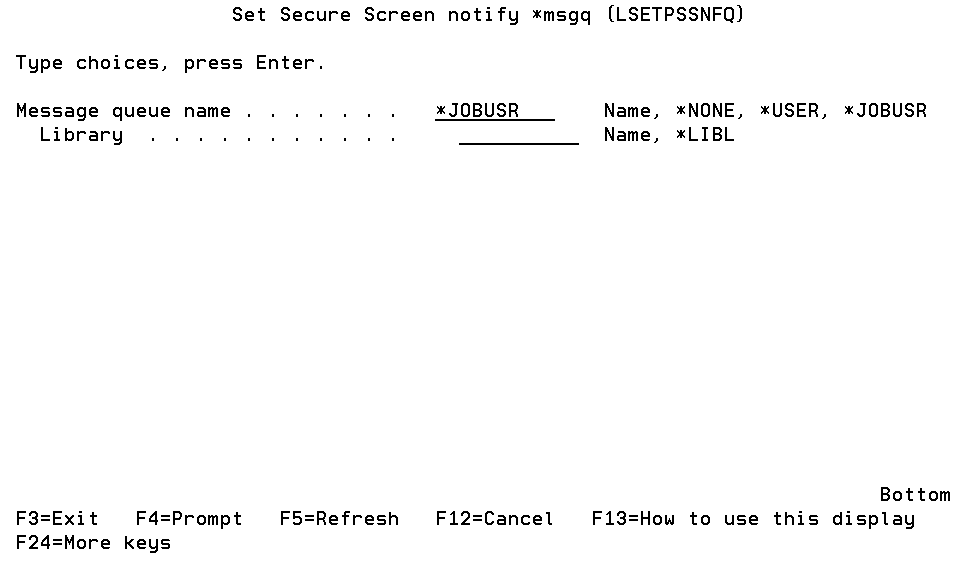
Enter the following message queue information:
Message queue name
Enter the name of the message queue to use.
The possible values are:
10. Work with Secure Screen Filters
You can set up rules for using Secure Screen by defining filters. Select option 10, Work with Secure Screen Filters, on the Secure Screen Main Menu to display the Rules Maintenance screen. You also can enter the command, LEDTPSSFTR, to display the Rules Maintenance screen. See options below for working with Secure Screen Filters.
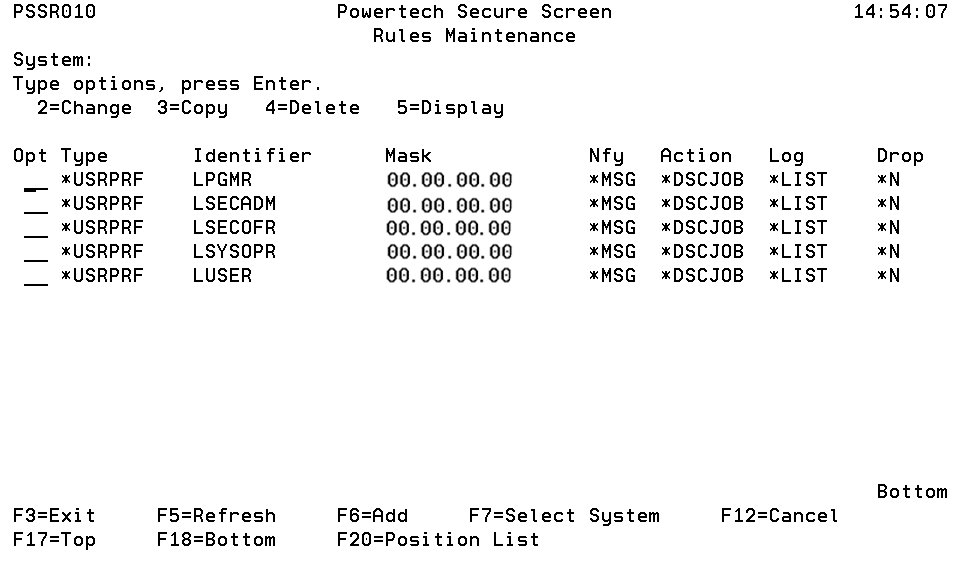
The Rules Maintenance screen lists all filters you currently have in place, and their values. From the screen you can add, change, copy, delete, and display filters.
Options
Below are the options for option 10, Work with Secure Screen Filters panel.
Adding A Filter
To add a new filter, press F6. The Add a filter screen displays, allowing you to specify the filter rules.

Enter the following information for the filter:
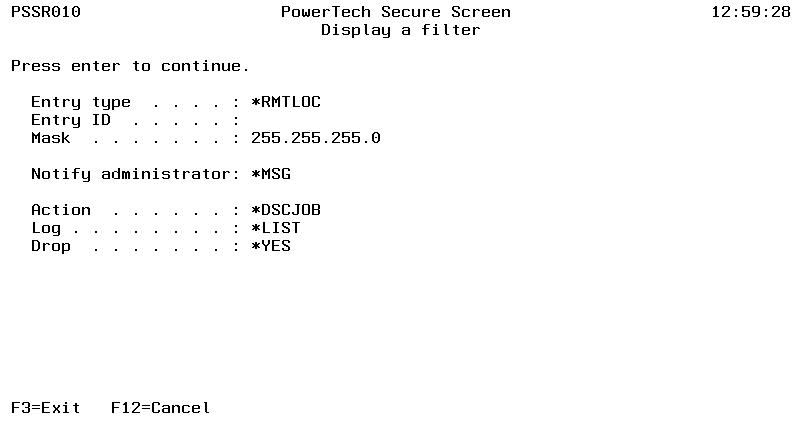
Entry Type
The type of filter. There are six types of filters.
The possible values are:
Entry ID
Enter the name of the device, subsystem, user profile, remote location, group profile, or accounting code. Press F4 to select from a list of values. For a remote location, enter the IP address of the location.
Mask
The subnet mask to be combined with an IP address. The value in this field is used only when you entered an IP address for *RMTLOC. An IP address from a Telnet device is masked to compare with the IP address entered for a filter. This allows the filtering of a range of IP addresses.
Notify Administrator
Tells Secure Screen whether to send a message to the administrator's message queue. Enter *MSG to send a message when a timeout occurs; leave this field blank if you do not want a notification message sent.
Action
Specify what will happen when a timeout occurs for a session.
The possible values are:
Log
When the Action is *DSCJOB, this specifies whether or not to print the job log.
The possible values are:
Drop
When the Action is *DSCJOB, this specifies whether the connection should be dropped if the session time out.
The possible values are:
Changing A Filter
To change an existing filter, enter option 2 next to the filter on the Rules Maintenance screen. This displays the Change a filter screen.
Use the Change a filter screen to change the filter settings. You cannot change the filter Type or Entry ID.

Copying A Filter
You can copy an existing filter to copy the filter's settings and modify them to define a new filter. To copy a filter, enter option 3 next to the filter you want to copy.

Deleting a Filter
To delete a filter, enter option 4 next to the filter you want to delete.
Displaying a Filter
You can display the settings for a filter. Enter option 5 next to a filter to display the Display a filter screen.
Command Keys
F3 (Exit): Exit the menu.
F4 (Prompt): Provides assistance in entering or selecting a command.
F7 (Select System): Use this command key to work with data from a different System.
F9 (Retrieve): Displays the last command you entered on the command line and any parameters you included. Pressing this key once shows the last command you ran. Pressing this key twice shows the command you ran before that, and so on.
F13 (Information Assistant): Displays the Information Assistant menu with several types of assistance available. Press this key to access more information about the IMB i system.
F16 (System Main Menu): Displays the IBM i Main Menu (MAIN).
F22 (Status): Displays the Operational Resources pop-up window containing the status of several operation aspects of Powertech products.