Using Logs |
Overview
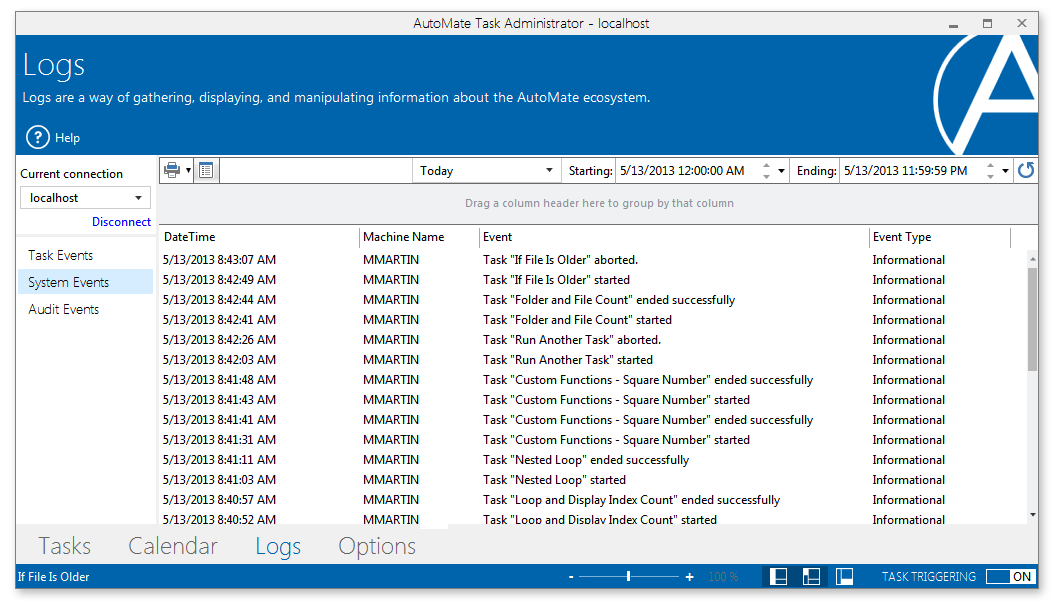
Automate maintains text logs that record various events which can be viewed from the Logs section of Task Administrator. These logs contain a complete set of table formatted reports that display the status and condition of tasks, triggers, system related events and various other operations. You can view statistics, such as whether a task ran successfully or failed, the date/time a task started and ended, which computer ran the task (helpful when deploying tasks to remote agents), when a task was created, deleted or updated, and much more.
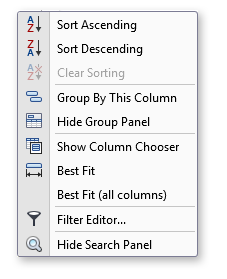
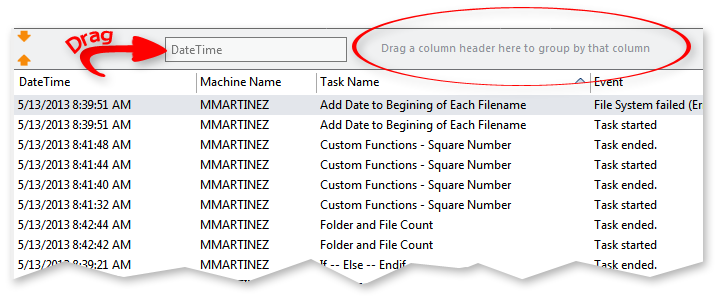
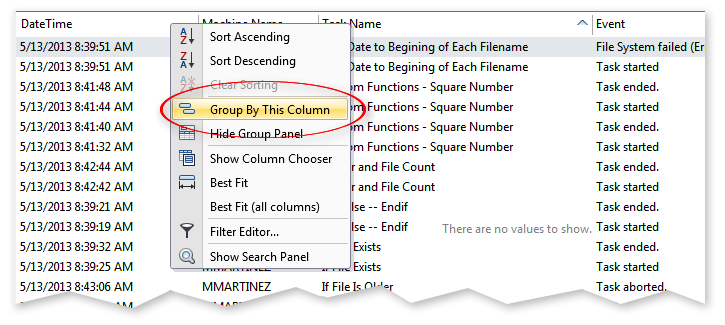
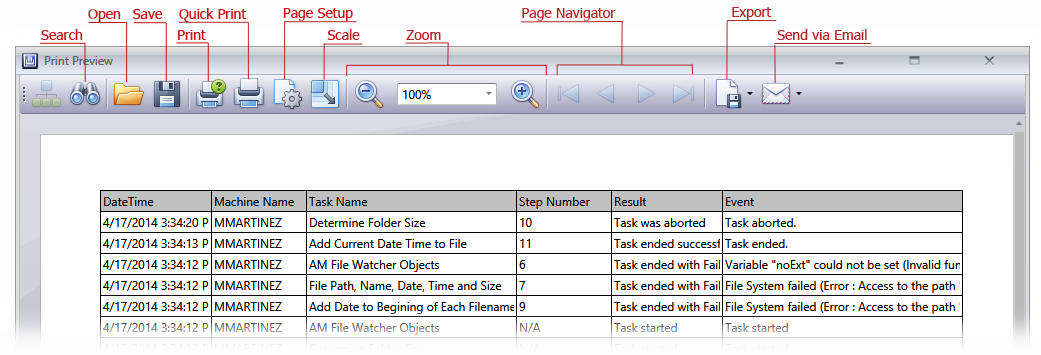
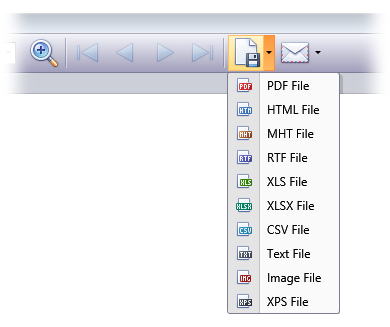
Automate's enhanced sorting and filtering capabilities lets you display the list of records in a particular order and view only those records that meet a specific criteria. For precise filtering, an intuitive Filter Editor can be used to define filter criteria using an unlimited number of conditions combined with logical operators. Records can be grouped by one or more columns. When data grouping is applied by multiple columns, data rows are organized into a tree hierarchy. Logged events can be exported to various file types, including TXT, XLSX, CSV, PDF, HTML as well as a variety of image formats. In addition, enhanced print features enable you to generate numerous reports with ease. The System Events log is displayed below.
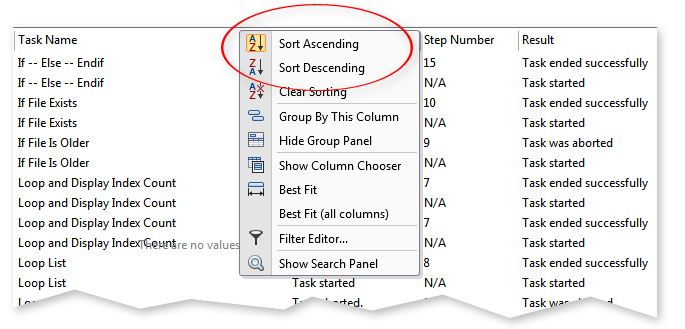
 Sorting
Events
Sorting
Events

Grouping Events
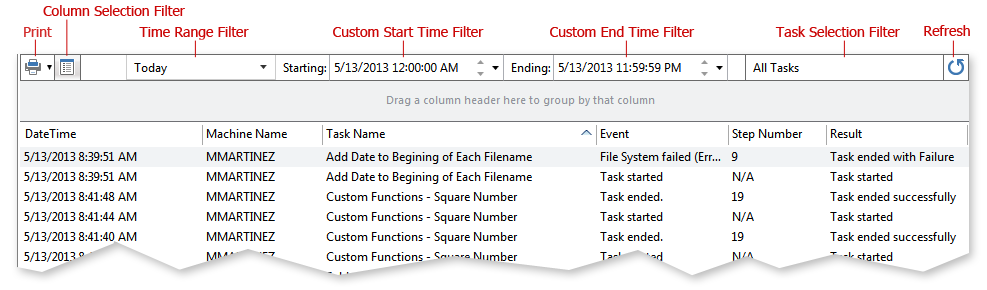
Filtering Events

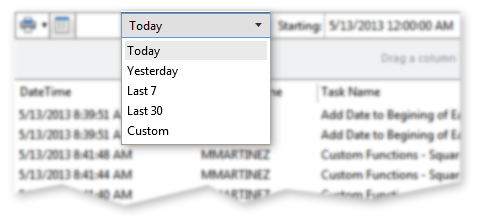
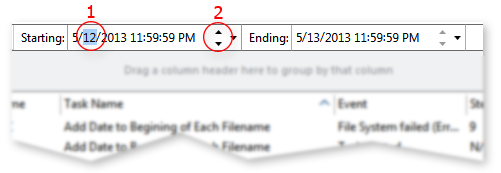
Filter by Pre-defined Date Range
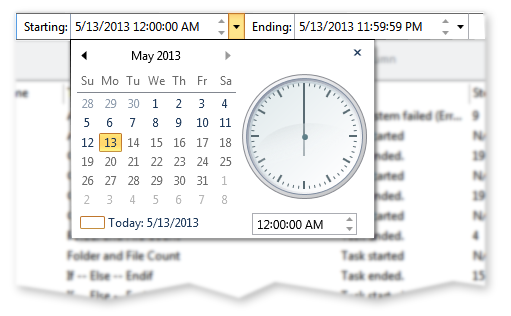
Filter by Custom Date Range
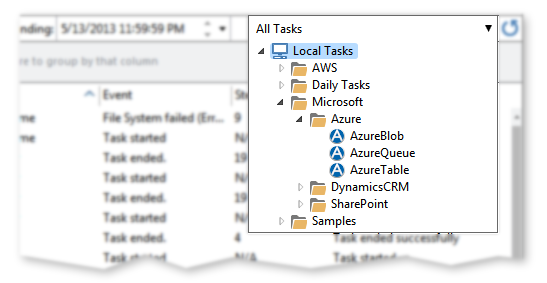
Filter by Tasks
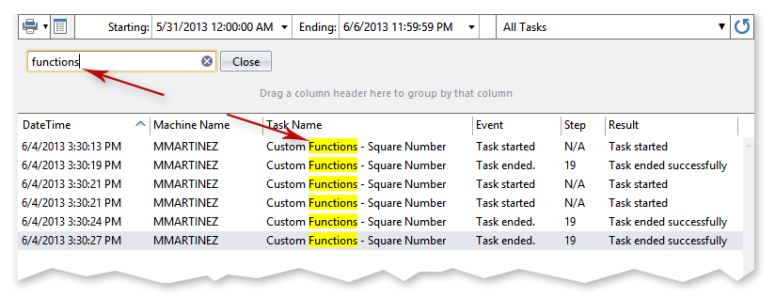
Filter by Keyword
Using the Filter Button

Using the Filter Editor

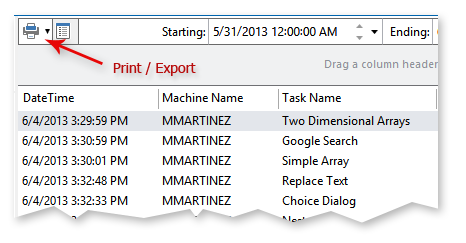
Printing & Exporting

Commands & Operations