Debug Panel - Attachments
Overview
Attachments are files of any type that are wrapped and accessible from an Automate Desktop task. These files can be easily exported or deployed along with their associated task allowing them to be more transportable and manageable. At runtime, attachments are automatically "unwrapped" to a local directory where they can be accessed by the task. The Attachments debug panel displays any files that are currently attached to the task. It also allows you to add a new attachment to the task as well as modify or remove existing attachments. More on Attachments
Parameters
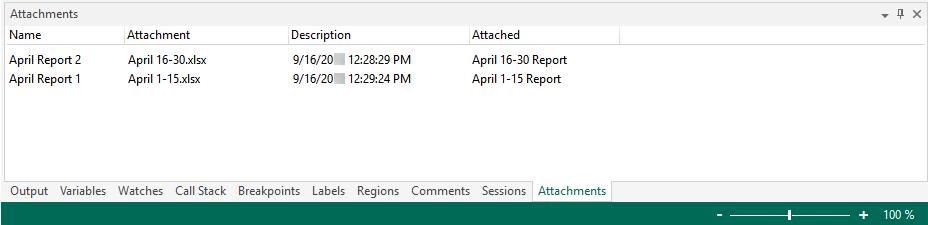
The Attachments debug screen contains the following column headers:
| Column header | Description |
|---|---|
| Name | The name of the attachment. |
| Attachment | The file name (including extension) of the attachment. |
| Description | A user defined description of the attachment (this property is optional, therefore, may appear blank). |
| Attached | The date and time when the file was initially attached to the task. |
Shortcut menu
Right-clicking anywhere inside the Attachments screen displays a shortcut menu with the following items:
| Menu item | Description |
|---|---|
| Add | Adds a new attachment to the task. |
| Properties | Opens the Attachment dialog to display the properties associated to the selected attachment. |
| Refresh | Refreshes the Attachments list |
| Remove | Removes the selected attachments. To select
more than one attachment, hold down CTRL during selection. NOTE:
When you remove an attachment, be sure to remove all references
to the attachment from the task, otherwise the task may fail to
execute properly. |
| Remove All | Removes all attachments that exist in a task. NOTE:
When you remove an attachment, be sure to remove all references
to the attachment from the task, otherwise the task may fail to
execute properly. |
| Help | Opens the help topic regarding this debug tool. |
To attach a file to a task
- In the Attachments debug panel, right-click anywhere and then select Add. The Attachment dialog opens.
- Select the file you want to attach.
- Select Open. Another Attachment dialog opens.
- Enter the following information:
- Name - The name of the attachment (this value is what you will use as a placeholder for the file).
- Attachment file - The full path and file name of the attachment file. Use the folder icon to select the file you want to attach.
- Description - An optional description of the attachment.
-
Select OK. The new attachment and its properties are displayed in the Attachments Debug panel.
NOTE: Multiple files of any type and size can be attached to a task, however, be aware that the size of the task file expands with the size and number of attachments, which may affect performance. Multiple or large sized attachments used in a single task may slow down task execution.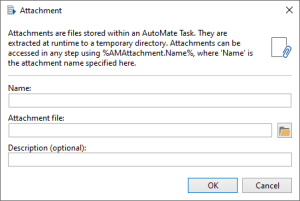
To remove one or more existing attachments
-
In the Attachments debug panel, select which attachments you want to remove. To select multiple attachments, hold down CTRL during selection.
-
Right-click the attachments, and then select Remove. To remove all existing attachments, select Remove All.
NOTE: After removing an attachment, make sure to remove all references to it in any step parameter to ensure that no attachment related error occurs during runtime.
To modify an existing attachment
-
In the Attachments debug panel, right-click the attachment, and then select Properties. The Attachment dialog opens.
-
Make the desired adjustments.
-
Select OK.
NOTE: If modifications to the original attachment name is made, make sure to update any step parameters referencing the original name to reflect the new name to ensure that no attachment related error occurs during runtime.