Fuzz Testing with the OSPFv2 with adjacency Protocol
Overview
The Open Shortest Path First version 2 (OSPFv2) routing protocol is used for determining the best path for data to travel within an IP network. It is an Interior Gateway Protocol (IGP), meaning it operates within a single autonomous system. Its purpose is to facilitate the exchange of routing information between routers, dynamically update the routing tables based on network topology changes and calculate the shortest path to each node. This specific module establishes an adjacency with the router to test before fuzzing begins. Adjacency is a relationship formed between selected neighboring routers for the purpose of exchanging routing information.
Testing environment requirements
-
beSTORM 13.4.0 or later (licensed)
-
Windows 10 or later
-
A router that supports the OSPFv2 protocol (this will be the device under test [DUT])
Fuzzing with beSTORM
To fuzz with the OSPFv2 with adjacency protocol in beSTORM, do the following:
-
Using a network cable, connect the OSPFv2-supported router (DUT) to the beSTORM computer's Ethernet adapter.
-
Open beSTORM Client.
-
Select New Project. The beSTORM New Project Wizard opens.
-
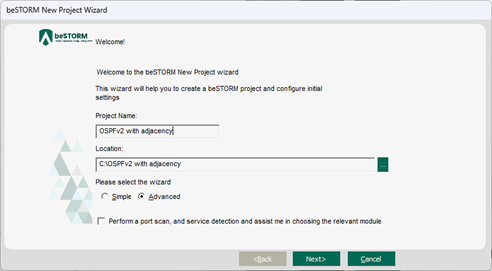
On the Welcome page, do the following:
-
In the Project Name box, enter a name.
-
Optionally, select a different file location for your project in the Location Name box.
-
For Please select the wizard, select Advanced.
-
Leave Perform a port scan, and service detection and assist me in choosing the relevant module unchecked.
-
-
Select Next.
-
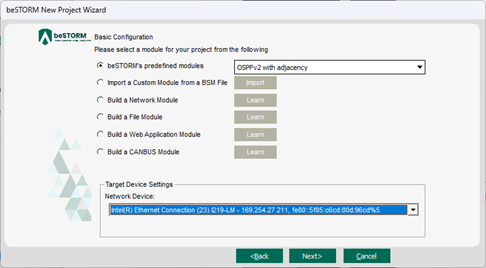
On the Basic Configuration page, do the following:
-
In the beSTORM's predefined modules list, select OSPFv2 with adjacency from Low-level Network group.
-
In the Network Device list, select the beSTORM computer's Ethernet adapter where you connected your network cable.
-
-
Select Next.
-
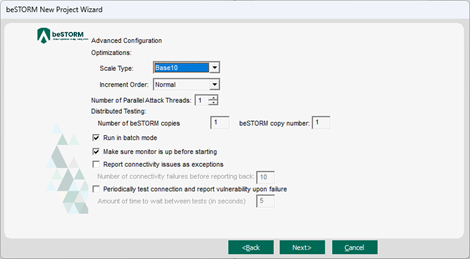
On the Advanced Configuration page, adjust Scale Type to reduce the number of combinations and overall testing duration. For the least number of combinations and shortest testing duration, select Base10.
-
Select Next.
-
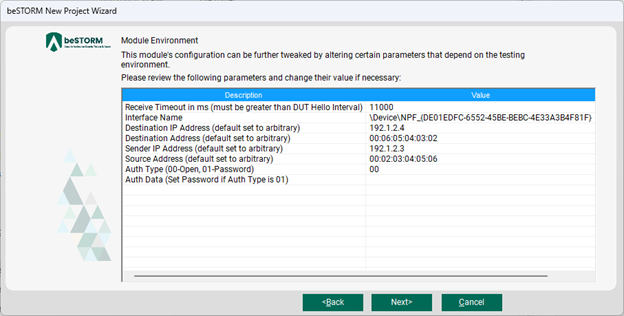
On the Module Environment page, do the following for the first six parameters:
-
Receive Timeout in ms – This value represents the maximum time to wait to receive a Hello message from the DUT router.
IMPORTANT: It is critical that you set this value to be greater than the Hello interval configured on the DUT router to successfully establish full adjacency at the beginning of the test. The default 11.000 milliseconds – 11 seconds value should work most of the times. -
Interface Name - In the Value box, confirm it is set to the Ethernet adapter you selected in step 6b.
-
Destination IP Address - In the Value box, enter the IP address of the DUT router (for the interface connected to in the router).
IMPORTANT: Ensure this IP address is correct as it is necessary to establish full adjacency at the beginning of the test. -
Destination Address - Double-click the Value box. In the MAC Address Finder dialog, enter the IP Address of the DUT router, and then select Find. The MAC Address box will refresh and display the MAC address of the DUT router. Select OK.
-
Sender IP Address - In the Value box, enter the IP address of the beSTORM computer.
-
Source Address - Double-click the Value box. In the MAC Address Finder dialog, enter the IP Address of the beSTORM computer and then select Find. The MAC Address box will refresh and display the MAC address of the beSTORM computer. Select OK.
-
Optionally, you can adjust the remaining parameters to further refine OSPFv2 with adjacency fuzzing with beSTORM.
-
-
Select Next.
-
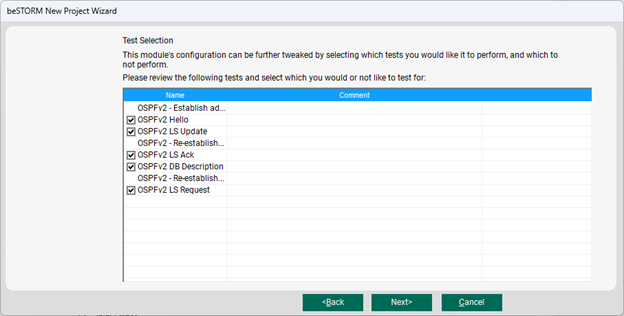
On the Test Selection page, select which OSPFv2 request types you want to fuzz. There are three types that are mandatory for OSPFv2 fuzz testing:
-
Establish adjacency - The initial establishment of adjacency.
-
Re-establish adjacency after LS Update - Re-establishes adjacency and helps prevent the LS Update type from causing the test to fail.
-
Re-establish adjacency after DB Description - Re-establishes adjacency and helps prevent the DB Description type from causing the test to fail.
-
-
Select Next.
-
On the Extra Configuration page, do the following:
-
Select the ARP Echo and ICMP Echo checkboxes.
-
Set the Monitored IP Address to the router's IP Address. Leave all other parameters to their default setting.

-
-
Select Next.
-
On the Complete beSTORM wizard page, select Finish to begin fuzzing, or clear the Auto-start beSTORM scan now checkbox to run the test later.
-
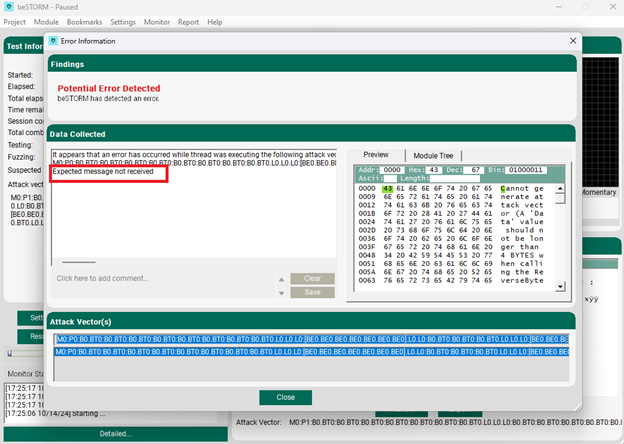
Once your test begins, it will try to establish an adjacency between the DUT router and beSTORM. This step usually lasts between 30 seconds to 2 minutes. . If beSTORM reports an Expected Message not received ERROR, review your configuration, specifically your Destination IP Address (DUT router IP) and Receive Timeout in ms settings. Ensure your DUT router is active and that OSPFv2 is active on it. When OSPFv2 is active, an OSPFv2 Hello request must be sent to the multicast address 224.0.0.5 periodically. The beSTORM computer must receive these Hello request to start establishing the adjacency.
When adjacency is established and the fuzz testing is running, you should see the Session combinations value increase.
-
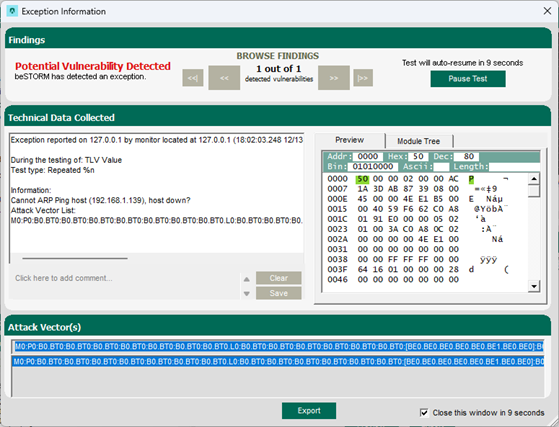
Once your test begins, if an exception occurs (that is, an attack was successful), a message will appear in an Exception Information dialog informing you that the router is not responding. This indicates a possible vulnerability. Testing will resume after five seconds unless you select Pause Test.
-
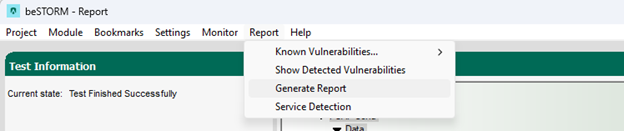
When fuzzing is complete, select Report > Generate Report from the beSTORM Client to generate a more comprehensive report of your Configuration page.